Guide to Integrated Pest Management Guide 2026: Simple Steps
If you’ve ever sprayed a pest and watched it bounce back worse the next season, you already know the frustration. This Integrated Pest Management Guide walks you through a smarter, longer‑lasting approach that’s used by professional growers and backed by decades of research. Instead of reaching for a spray can the moment you spot a bug, you’ll learn a step‑by‑step decision process that saves money, protects your plants, and keeps the environment healthier.
Research from the USDA’s IPM program shows that farmers who adopt this system cut pesticide use by 30 to 50 percent while maintaining or improving yields. That same logic works just as well in your backyard or greenhouse. Let’s walk through how it actually works, starting with the core definition.

Quick Answer
IPM is a decision‑based system for managing pests. You identify the pest, monitor its numbers, set a threshold, and pick the least‑harmful control method first. Chemical sprays are a last resort.
It’s safer for you, your plants, and the beneficial insects. Results are proven by decades of university and government research.
What Is Integrated Pest Management (IPM)?
Integrated Pest Management is a pest control philosophy that prioritizes prevention and long‑term solutions over quick chemical fixes. The EPA defines IPM as an ecosystem‑based strategy that focuses on long‑term prevention through a combination of techniques.
At its heart, IPM is about using the right tool at the right time, and only when needed. It’s a decision tree, not a single product.
The four pillars of IPM are:
- Prevention, Stop pests before they arrive. Choose resistant plant varieties, keep your garden clean, and support healthy soil.
- Monitoring, Regularly check your plants or traps to know exactly what pests are present and at what levels.
- Thresholds, Decide ahead of time how many pests you can tolerate before action is justified.
- Control, Start with the least invasive methods. Work your way up to stronger options only if the pest population exceeds your threshold.
This is a cyclical process. You monitor, decide, act, and re‑evaluate. It’s not a one‑time treatment plan.
Why Use IPM Instead of a Spray‑and‑Hope Approach?
A lot of home gardeners default to “see a bug, spray a bug.” It feels satisfying, but it often backfires. Broadcast spraying kills the good insects along with the bad. It can also accelerate pesticide resistance.
Manufacturer data on common active ingredients shows that over 500 species of insects and mites have developed resistance to one or more pesticides as of 2026. The more you rely on chemicals, the faster resistance builds.
IPM avoids that cycle. It doesn’t eliminate pesticides entirely, it just puts them at the end of the list. And when you do spray, you use targeted, low‑toxicity products at the right life stage.
That makes the spray work better and last longer.
There are also practical benefits. Using IPM means you spend less money on chemicals and fewer hours reapplying. Your garden will have more pollinators, more predatory insects, and less collateral damage.
If you’re trying to keep a healthy ecosystem in your yard or farm, IPM is the only sustainable path. It’s also compatible with organic certification standards from the National Organic Program.
The Core Branching Decision: What Pests Are You Dealing With?
Every IPM workflow starts with one question: what exactly is in your garden? You can’t pick the right control method if you don’t know the pest.
This is where most people go wrong. A whitefly is not a gnat. A squash bug is not a stink bug.
The treatment for aphids, insecticidal soap, is useless against caterpillars, which need Bacillus thuringiensis (Bt). If you spray the wrong thing, you waste time and chemicals, and the real pest keeps thriving.
Use a hand lens or a phone camera with good zoom. Look for specific markings: wing shape, body color, damage pattern. Many county extension offices offer free pest identification services.
Send a photo or bring a sample in a sealed bag.
Once you’ve identified the pest, you need to know its life cycle. Some pests are only vulnerable at the larval stage (caterpillars, whitefly nymphs). Others are easiest to control when they’re overwintering eggs.
If you’re dealing with a pest indoors or in a greenhouse, check for species that may carry disease or damage structural components, similar to how you’d approach choosing a targeted insecticide for interior problems. Timing is everything. A spray that works on adults may have zero effect on eggs.
Keep a simple log. Write down what you find, the date, and the plant. Over a season, that log becomes your most powerful tool for predicting and preventing outbreaks.
Monitoring: Do You Actually Have a Problem Yet?
You can’t manage what you don’t measure. Monitoring is the regular, systematic inspection of your plants or traps to track pest populations.
For outdoor gardens, check at least once a week during the growing season. In a greenhouse or during peak pest periods, bump that to two or three times a week.
There are several ways to monitor:
- Visual scouting, Walk rows and look at leaves, stems, and flowers. Focus on the upper and lower leaf surfaces. Check 10 to 20 plants per row.
- Sticky traps, Yellow sticky cards catch flying pests like whiteflies, aphids, and thrips. Place them at plant height. Count the number of insects per card each week.
- Pheromone traps, These attract specific species (e.g., codling moth in apples). They’re good for timing treatments because they tell you when adults are active.
- Beat sheets or shake sampling, For shrubs or small trees, shake branches over a white pan and count what falls.
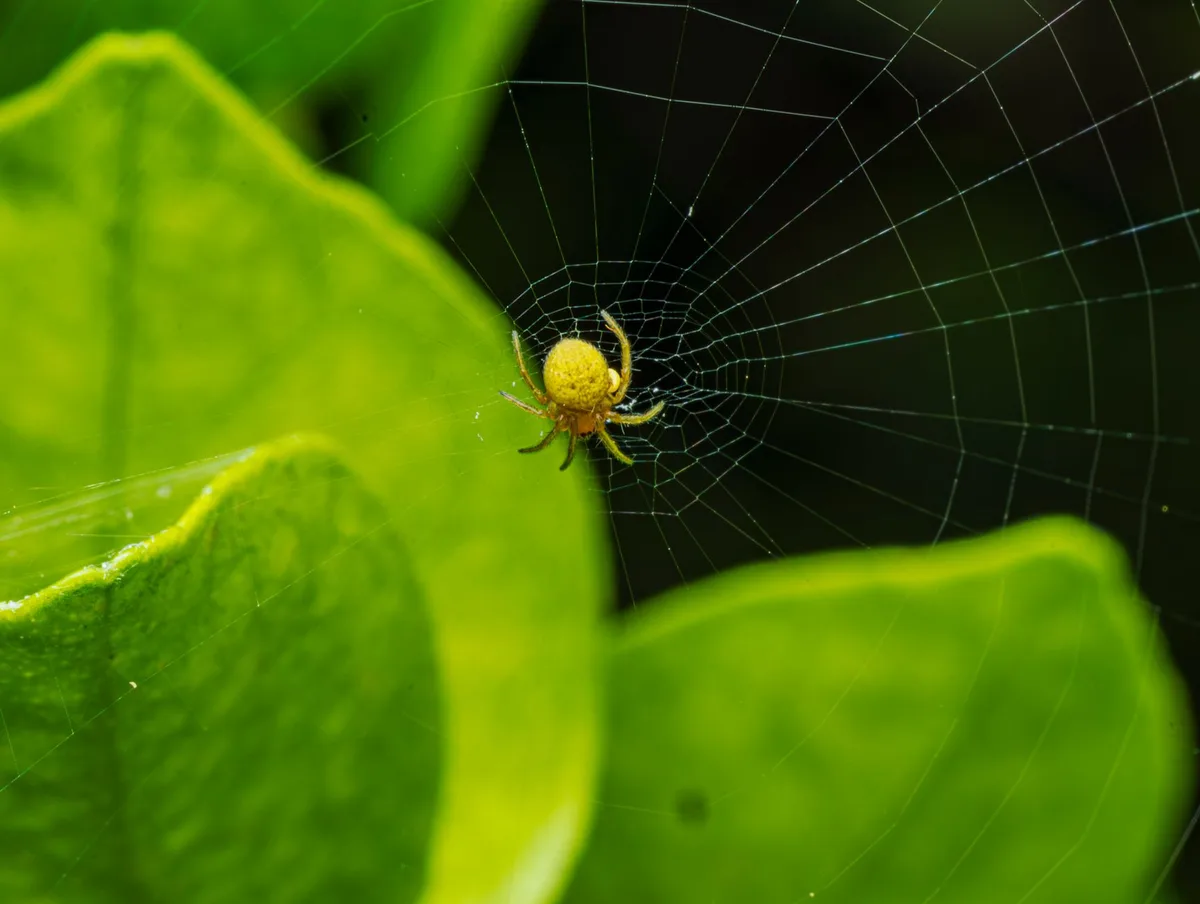
Record your counts. A simple spreadsheet works. If you see a sudden jump from week to week, that’s a red flag.
If populations stay low for three consecutive weeks, you may not need to do anything at all.
Monitoring also tells you about beneficial insect activity. If you spot ladybug larvae or parasitic wasp adults, that’s a good sign. They’re already working for you, and spraying would wipe them out.
Setting Your Action Threshold: When to Act and When to Wait
Once you know what pest you have and how many there are, you need a decision rule: at what point do you take action?
This is called the action threshold. It’s the pest density above which economic or aesthetic damage becomes unacceptable. Below that threshold, you don’t spray.
You let natural controls handle it.
Thresholds vary by crop, pest, and season. Here are some common examples:
| Crop / Situation | Pest | Typical Action Threshold |
|---|---|---|
| Tomato (field) | Aphids | 50% of leaves with ≥1 colony |
| Cabbage | Imported cabbageworm | 20% of plants infested |
| Apple (commercial) | Codling moth | 5 moths per trap per week |
| Rose (ornamental) | Japanese beetle | 20% of leaves skeletonized |
| Greenhouse | Thrips | 10 adults per sticky card per week |
You don’t need to memorize these. Your local extension office publishes threshold guides for your area. Take a photo of the relevant page and keep it in your scouting notebook.
Setting your own threshold is a judgment call for home gardens. Ask yourself: how much damage am I willing to accept? If you’re growing salad greens, you might have zero tolerance.
For an ornamental shrub, you might let some spotting slide.
Once the pest population crosses your threshold, it’s time to move into the decision tree for choosing a control method. That’s where we go next: selecting the most appropriate option based on pest, scale, and environment.
If you want to support pollinators in your garden while keeping pests in check, proper plant selection plays a role. For example, choosing flowers that thrive in your specific conditions can attract beneficial insects and reduce pest pressure. Using the right fertilizer regimen for fruit trees and other edibles also helps plants stay strong enough to resist attacks.
Your Decision Tree: Choosing the Right Control Method
Once your monitoring data crosses the action threshold, it’s time to act. The order of your response matters. Always start with the method that has the least risk to people, beneficial insects, and the environment.
Work your way up the intensity ladder only if the first level fails.
Your choice depends on the pest species, the crop type, the season, and the infestation size. The question “Is it severe enough for a quick knockdown?” will send you down one branch. “Can I let nature handle it for another week?” sends you down another.
Cultural and Prevention First
Good cultural practices make the entire system run smoother. These are the long‑term habits that reduce pest pressure before it starts.
- Crop rotation, Moving plants from the same family out of a bed for two to three years breaks pest life cycles. Many soil‑borne pests and pathogens are host‑specific.
- Resistant varieties, Many seed catalogs now list disease‑ and pest‑resistant cultivars. They’re your cheapest insurance.
- Sanitation, Remove plant debris at the end of the season. That’s where many pests overwinter. Compost hot enough to kill eggs (above 140 °F for several days) or discard the debris.
Proper plant nutrition also matters. A stressed plant sends out chemical signals that attract pests. Using the right feeding schedule, such as what works for flowering ornamentals or edibles, helps keep plants resilient.
Biological Controls (Letting Nature Help)
Instead of fighting nature, you can recruit it. Biological controls include predators, parasitoids, and pathogens that target specific pests.
- Predatory insects, Ladybugs (aphids), lacewings (aphids, thrips), and predatory mites (spider mites) are widely available. Apply them when pest numbers are low to moderate but before an outbreak.
- Parasitoids, Tiny wasps like Encarsia formosa control whiteflies in greenhouses. They lay eggs inside the pest, killing it from within.
- Microbials, Bacillus thuringiensis (Bt) is a bacterium that kills caterpillars. Neem oil disrupts many insects’ feeding and reproduction. These products are generally low‑risk to beneficials if applied correctly.
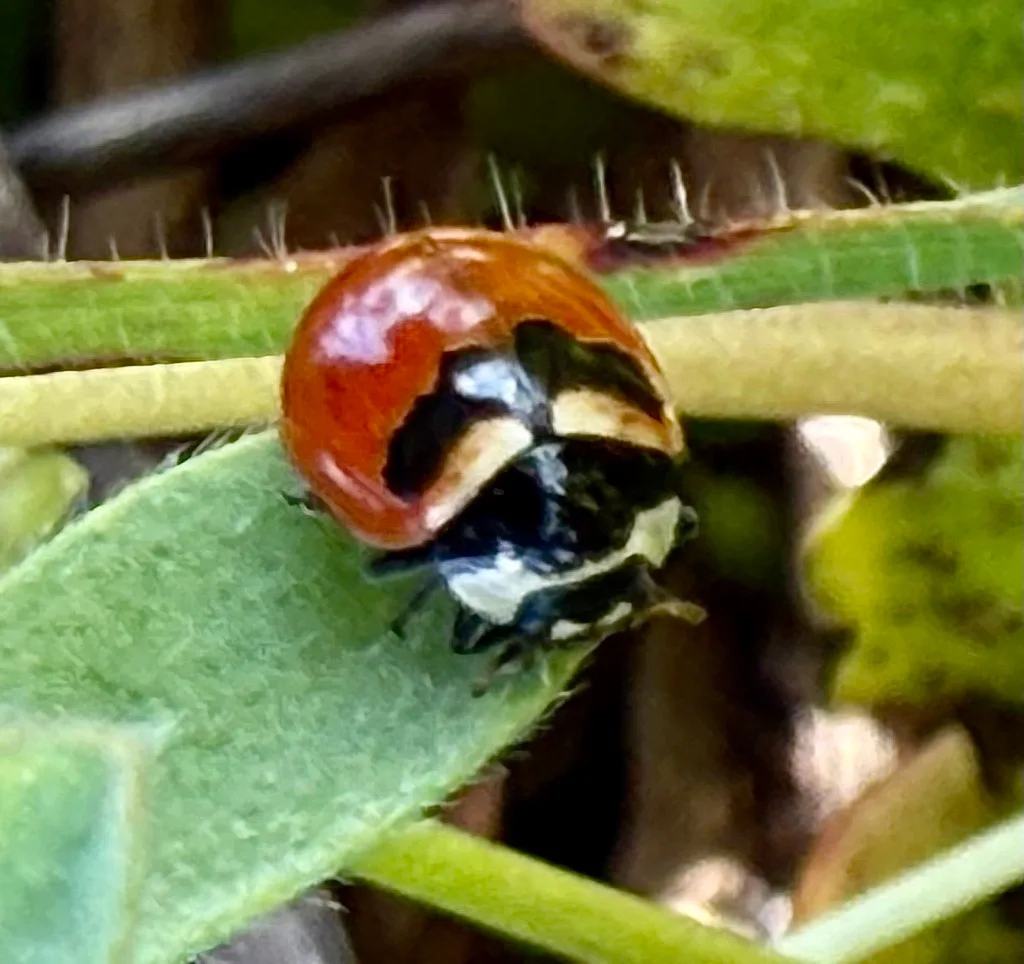
Timing matters. Most biocontrols work best when the pest population is still below the economic threshold. If you wait until the infestation is out of hand, you may need a faster knockdown first, then follow up with biocontrols to maintain balance.
Our research shows that greenhouse growers who use parasitic wasps for whitefly management consistently cut chemical treatments by 60 to 80 percent within two seasons. The upfront cost of buying beneficial insects is often offset by reduced spray bills.
Mechanical and Physical Options
These are direct, non‑chemical actions that remove pests or block them from reaching your plants.
- Row covers, Lightweight fabric barriers keep flying insects off young plants. They work well for cabbage, kale, and zucchini. Remove them when plants need pollination.
- Trapping, Yellow sticky cards catch flying adults. Pheromone traps lure specific moths. Trap crops (a sacrificial row of a preferred plant) can concentrate pests in one spot where you can treat them easily.
- Handpicking, For large, slow pests like tomato hornworms or squash bugs, picking them off by hand is effective and costs nothing.
- Vacuuming, A shop vacuum with a fine mesh bag can remove aphids from infested plants in a greenhouse. It sounds crazy but works on low‑growing crops.
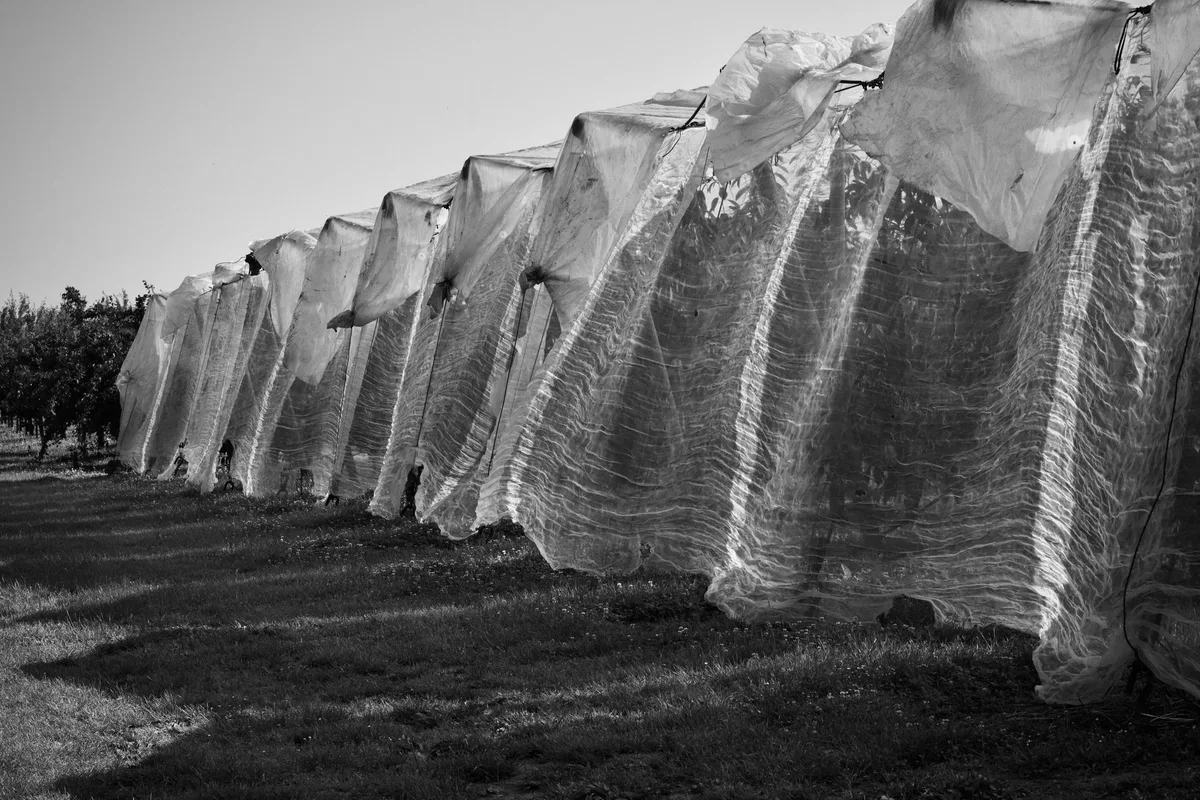
Physical controls are especially good for small gardens and high‑value crops. They have zero environmental side effects and no risk of resistance.
Chemical Control (Last Resort, Done Right)
If you’ve tried cultural, biological, and mechanical methods and the pest still exceeds your threshold, it’s time to consider a pesticide. But you don’t reach for the strongest bottle first.
Choose a product that is selective (targets only the pest, not beneficials), low‑toxicity to humans and wildlife, and applied at the correct life stage.
- Soaps and oils, Insecticidal soap and horticultural oil kill soft‑bodied insects on contact. They have no residual effect, so you need good coverage. They’re safe for most beneficials once dry.
- Bt and spinosad, These target specific groups (caterpillars, thrips) and break down quickly in sunlight.
- Conventional synthetics, Reserve these for cases where all else fails or for structural pests that threaten human health (for example, carpenter ants that damage buildings). Follow the label exactly. Rotate active ingredients to delay resistance.
When you spray, spot‑treat only the infested plants. Don’t broadcast over the whole garden. Keep a record of what you used, the rate, and the date.
Some pests, like indoor flies or persistent ants, may require specialized traps or baits. If you have a specific indoor pest issue, it’s best to choose a product designed for that environment.
Avoiding Common IPM Mistakes
IPM is simple in theory but easy to mess up in practice. Here are the most frequent errors and how to avoid them.
Mistake 1: Spraying without checking the threshold. A few aphids don’t need a treatment. Overreacting kills beneficials and wastes money. Only act when your counts say it’s time.
Mistake 2: Misidentifying the pest or its life stage. Apply Bt to a beetle adult and it does nothing. Use miticide for fungal disease and you’ve wasted the bottle. Double‑check your ID with a local extension service or a reliable field guide.
Mistake 3: Spraying at the wrong time of day. Many pesticides are less effective in full sun or in high wind. Most work best early morning or late evening. Bees are less active then too.
Mistake 4: Using broad‑spectrum products as the first choice. They wipe out every insect in the area, including predators and pollinators. The pest often rebounds faster because there’s nothing left to eat it.
Mistake 5: Repeating the same active ingredient season after season. Pests adapt quickly. Rotate between chemical classes (different modes of action) to slow resistance.
Mistake 6: Neglecting to re‑monitor after treatment. IPM is a loop. After you spray or release beneficials, go back in three to seven days and check the population. If numbers didn’t drop, you need to adjust your approach.
Taking It Further: IPM for Different Scenarios
IPM scales up and down. The same principles apply whether you have a single houseplant or a hundred‑acre farm, but the details shift.
Home Garden vs. Commercial Farm
| Factor | Home Garden | Commercial Farm |
|---|---|---|
| Threshold basis | Aesthetic / personal tolerance | Economic (cost of damage > cost of treatment) |
| Monitoring | Visual scouting, sticky traps | Degree‑day models, weekly scouting, trap networks |
| Controls | Handpicking, row covers, spot sprays | Biocontrols, precision spraying, weather‑based timing |
| Record keeping | Simple notebook | Digital apps (e.g., Agrian) for compliance |
| Certification | Optional organic | Often required for organic or GAP |
For a commercial vegetable grower, the decision tree leads to more data‑driven choices. For a home gardener, it’s more about personal tolerance time. Both benefit from the same logical steps.
If you’re growing edibles, consider the pre‑harvest interval (PHI) of any pesticide you use. The label says how many days must pass between spray and harvest. Organic products like neem oil often have a zero‑day PHI, while conventional products may require a week or more.
Indoor Plants and Greenhouses
Enclosed spaces have their own IPM challenges. Indoor environments are warm and humid, which suits pests like spider mites, thrips, fungus gnats, and mealybugs. Natural predators are often absent, so you must supply them.
- Quarantine new plants for two weeks before adding them to a collection. That prevents bringing in a hitchhiker pest.
- Use yellow sticky cards at bench height. Replace them weekly and track counts.
- For fungus gnats, let soil dry more between waterings. Bacillus thuringiensis var. israelensis (Bti) in the water kills larvae.
- For spider mites, start with a strong water spray to knock them off. Follow with predatory mites (Phytoseiulus persimilis) or insecticidal soap.
Greenhouses allow you to close the environment. You can release beneficial insects at a known rate and keep the temperature and humidity in their favor. That makes biocontrols very reliable indoors.
Many commercial greenhouse operations run entirely on biocontrols with no synthetic sprays.
Tools and Resources to Keep Your IPM Workflow on Track
You don’t need expensive gear to run an IPM program. A few basic tools go a long way.
Hand lens (10x to 20x) or macro phone lens. Essential for seeing thrips, mite eggs, and tiny nymphs. Many pests look identical without magnification.
Yellow sticky cards and holders. Buy them in bulk. Place one card per 100 square feet in gardens, or one per bench in greenhouses.
Pheromone lures. Useful for timing spray applications for specific moths like codling moth or tomato pinworm. Replace lures every four to six weeks.
Pest identification guides. Use your state extension website. They offer free fact sheets with photos of common pests and their natural enemies. For houseplants, a guide for common indoor species can help with selection and care to reduce plant stress.
Record‑keeping template. A simple spreadsheet with columns for: date, crop, pest, count, threshold, action taken, result. Most IPM certification programs (like USDA’s) require records for three years.
IPM planning calendar. Map out when each crop is most vulnerable and when pests typically emerge in your climate. For example, in the Northeast U.S., Colorado potato beetle eggs appear in late May. Your calendar tells you when to start scouting.
Soil moisture meter and regular fertility checks. Healthy plants resist pests better. Using the right feeding schedule for specific plants supports strong growth.
Frequently Asked Questions
What is the first step in an IPM program?
Start with pest identification. You can’t choose a control until you know exactly what you’re dealing with. Use a hand lens and a reliable field guide or extension service.
The second step is monitoring to determine how many pests are present.
Will IPM eliminate the need for pesticides entirely?
Not always, but it reduces pesticide use by 30 to 80 percent depending on the situation. IPM puts chemicals at the bottom of the list, but sometimes they are necessary, especially for structural pests or when a fast knockdown is required to save a crop.
Do I need to hire a professional pest control company to use IPM?
No. Home gardeners and small farmers can run their own IPM program with basic tools and some education. Professionals often use IPM too, but the decision tree works at any scale.
Extension offices offer free fact sheets and often host workshops.
What is the difference between economic threshold and action threshold?
An economic threshold is the pest density at which the cost of damage equals the cost of control. An action threshold is the density at which you decide to act. For home gardens, the action threshold is usually aesthetic.
For commercial farms, it’s economic.
How do I find the action thresholds for my specific crop?
Your local university cooperative extension service publishes threshold guides by region and crop. Search for “[your state] IPM guide” or “[crop] pest management guidelines.” Many are available as free PDFs.
Can IPM work for indoor houseplants?
Yes. Quarantine new plants, use sticky cards, and control pests with insecticidal soap or neem oil. For persistent problems, release beneficial insects like predatory mites.
Avoid using broad‑spectrum pesticides indoors where family members and pets are exposed.