How to Use Pre Emergent Herbicide 2026: Everything You Need
You bought the bag, spread it on the lawn, and the weeds still showed up. That is the most frustrating outcome in lawn care, and nine times out of ten, the problem is timing or product choice. Knowing how to use pre emergent herbicide correctly means understanding the science behind it, not just following a calendar date.
Manufacturer specifications and cooperative extension research confirm that pre-emergents fail most often because the soil temperature was wrong or the wrong active ingredient was chosen for the target weed. We are going to walk through the decision points so you can stop guessing and start getting that weed-free lawn you are after.
Quick Answer
Apply pre emergent herbicide before weed seeds germinate. Check soil temperature first. It must be 50 to 55 degrees Fahrenheit at two inches deep.
Water in the product within 48 hours. Do not apply if you plan to seed the lawn. Timing varies by your region and grass type.
What a Pre-Emergent Actually Does (and Doesn’t Do)
Let us clear up the biggest misunderstanding first. A pre-emergent herbicide is not a weed killer in the traditional sense. It does not kill existing weeds.
It creates a chemical barrier in the top layer of soil that stops weed seeds from sprouting.
Think of it like a thin, invisible plastic sheet just under the surface. When a crabgrass seed tries to germinate, that barrier disrupts the cell division process. The seed dies before it ever breaks through the soil.
The key phrase is “before it emerges.” Once you see green shoots, a pre-emergent is useless. You have moved into post-emergent territory, which is a different product and a different application strategy.

What It Does Control
- Crabgrass (the number-one target)
- Annual bluegrass (Poa annua)
- Foxtail
- Barnyardgrass
- Some broadleaf weeds like chickweed and henbit (check the label)
What It Does NOT Control
- Perennial weeds like dandelions, clover, and nutsedge
- Existing weeds that are already growing
- Weed seeds deeper than one inch in the soil
This distinction matters because many homeowners apply a pre-emergent expecting it to fix a visible weed problem. It will not. If you have dandelions in April, you need a post-emergent spot treatment or a good dose of the right fungicide for general lawn health first.
That is a separate conversation, but one worth having.
The Three Big Decisions You Need to Make Before Buying
Here is where the decision tree kicks in. Before you buy anything, answer three questions. Your answers will determine which product works and when to apply it.
Decision 1: What Weed Are You Targeting?
Different active ingredients target different weed families. Prodiamine and dithiopyr excel against crabgrass and annual grasses. Isoxaben is your choice for broadleaf weed prevention like dandelion and plantain.
If your primary enemy is crabgrass, go with prodiamine or dithiopyr. If you are fighting annual bluegrass (Poa annua), you need a different timing window and often a product containing prodiamine or pendimethalin. Check the label for the specific weed list.
Decision 2: What Grass Type Is Your Lawn?
Cool-season grasses like tall fescue, Kentucky bluegrass, and perennial ryegrass have different growth cycles than warm-season grasses like Bermuda, Zoysia, and St. Augustine.
For cool-season lawns, you have two windows: early spring (before soil hits 50°F) and early fall (mid-August through September). Warm-season lawns get their primary application in late winter to early spring, as soon as the grass greens up.
Applying a pre-emergent at the wrong time for your grass type can weaken the turf or open the door for weeds to sneak through.
Decision 3: Are You Planning to Seed or Sod This Season?
This is the single most common mistake in lawn care. Pre-emergents kill germinating seeds. That includes grass seed.
If you plan to overseed your lawn in the same season, you must leave a six-to-eight-week gap between the herbicide application and the seeding date. Some products carry longer restrictions. Read the label before you buy.
If you are establishing a new lawn from seed, skip pre-emergent entirely until the grass has been through two full mowings. The same applies if you are using a good grow light for seedlings indoors and transplanting them outside later. The roots need time to establish without chemical interference.
How to Pick the Right Product: Granular vs. Liquid
You will find pre-emergents in two main forms. Each has a clear best-use case.
| Feature | Granular | Liquid |
|---|---|---|
| Application | Spreader | Sprayer (backpack or hose-end) |
| Coverage consistency | Good for large, open lawns | Better for tight areas and edges |
| Mixing required | No (ready to use) | Yes (must measure and mix) |
| Cost per treatment | Moderate | Lower (concentrate goes further) |
| Weed seed barrier quality | Good | Excellent (even coverage) |
| Best for | Homeowners with standard lawns | Professionals or precise application |

When to Choose Granular
Granular products are the easier choice for most homeowners. You fill the spreader, walk the lawn, and you are done. No mixing, no spraying, no drift concerns.
The downside is that granules can miss spots if the spreader is not calibrated or if you walk unevenly. You also need to water the lawn immediately to activate the barrier.
Best for: Large, flat lawns, first-time users, and anyone who wants a simple weekend project.
When to Choose Liquid
Liquid products provide a more uniform chemical barrier because the spray covers every square inch evenly. They are better for small or irregularly shaped lawns, sloped areas where granules roll off, and for mixing with other treatments like liquid fertilizer.
The trade-off is accuracy. You need to measure the concentrate, mix it in the right amount of water, and spray evenly without overlapping or missing stripes. Drift onto flower beds or vegetable gardens can damage desirable plants.
Best for: Smaller lawns, detailed applications, and anyone comfortable using a sprayer.
What About “Weed and Feed” Products?
Combination products that include pre-emergent herbicide plus fertilizer are popular because they simplify the calendar. You fertilize and prevent weeds in one pass.
The problem is the timing rarely lines up. Crabgrass needs prevention when soil hits 50°F, but cool-season grass fertilizer is best applied in early fall. If you put down a weed-and-feed in spring, you are feeding the grass at the wrong time and locking yourself out of overseeding later.
Our research suggests keeping fertilizer and pre-emergent separate. Use a dedicated product for each so you can time them independently. If you need a slow-release option, check out the best slow release fertilizer for flowers and lawns guide for a more targeted approach.
Step-by-Step Workflow: Timing, Application, and Activation
Now we get to the actual how-to. Follow this workflow exactly, and you will hit the window every time.
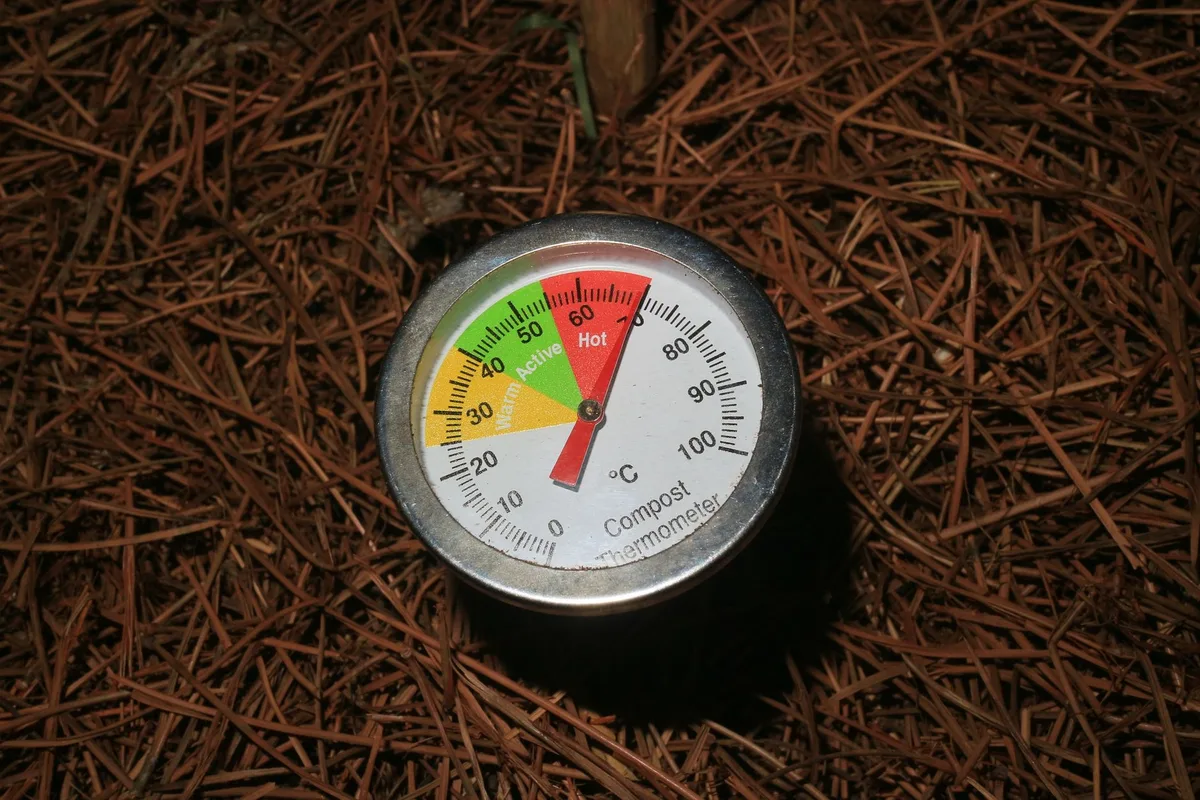
Step 1: Check Soil Temperature
Throw away the calendar. The calendar is a rough guide, but soil temperature is the real trigger. Crabgrass seeds begin germinating when the soil temperature hits 50 to 55 degrees Fahrenheit at two inches deep.
Buy a simple soil thermometer. Stick it two inches into the ground in a bare spot or between grass clumps. Check it at the same time each morning for three days in a row.
When the average reads 50°F and the forecast shows warming trends, you are in the window.
For annual bluegrass (Poa annua), the trigger is a bit different. It germinates when soil temperatures cool to 55 to 60°F in late summer or early fall. That is why a second application in late August or early September is common.
Step 2: Measure Your Lawn
You cannot apply the right amount if you do not know your square footage. Use a measuring wheel or a simple online mapping tool. Walk the perimeter of your lawn and multiply length by width.
| Lawn Size | Typical Product Needed (Granular) |
|---|---|
| 1,000 sq ft | 1 to 2 lbs |
| 5,000 sq ft | 5 to 10 lbs |
| 10,000 sq ft | 10 to 20 lbs |
Always check the product label for the exact application rate. The numbers above are general guidance. Rates vary significantly between active ingredients.
Step 3: Calibrate Your Spreader
This is the step everyone skips, and it is the reason half the lawns in the neighborhood have weed stripes. A spreader set too low leaves gaps. A spreader set too high wastes product and can damage the grass.
Check the product label for the recommended spreader setting (usually a number like 3 or 4 on a rotary spreader). If you want to be precise, do a quick calibration test: weigh a small amount of product, spread it over a measured 100-square-foot area, and weigh what is left. Adjust the setting until the output matches the label rate.
Step 4: Apply Evenly
Load the spreader on a hard surface like a driveway or sidewalk, not on the lawn. Start at one edge and walk at a steady pace. Overlap each pass by about six inches to avoid stripes.
If you are using liquid, spray in a crosshatch pattern. Go north to south first, then east to west over the same area. This ensures you cover every inch without gaps or overlaps.
Step 5: Water In Correctly
The chemical barrier does not form until water activates it. Most pre-emergents need about half an inch of water within 48 hours of application. That can come from rainfall or irrigation.
If no rain is in the forecast, run the sprinklers. Use a tuna can or rain gauge to measure the output. When the can has half an inch of water, you are done.
Do not overwater. Excessive water pushes the chemical deeper than the weed seed germination zone, where it becomes useless.
Step 6: Wait and Watch
The barrier stays active for 60 to 90 days depending on the product and temperature. During that time, do not aerate, dethatch, or do anything that would break the chemical layer. Wait until the barrier has degraded before doing any soil work.
If you are dealing with a heavy weed pressure or a long growing season, a split application may be necessary. More on that in the next section.
Common Mistakes That Wreck Your Pre-Emergent
The step-by-step is straightforward, but small errors cause big failures. Here are the most common ones and how to avoid them.
Applying after weeds have germinated. This is the number-one waste of money. Once you see crabgrass sprouts, a pre-emergent does nothing. At that point, switch to a post-emergent product or try managing the weeds manually until the next application window.
Applying before a heavy rain. Heavy downpours wash the chemical into low spots or off the lawn entirely. Check the 10-day forecast. If a big storm is coming, wait.
Applying on a windy day. Granules blow off target. Liquid spray drifts into flower beds. Wind is your enemy.
Apply on a calm day.
Skipping the soil thermometer. Trusting the date on a calendar instead of the actual ground temperature is the most common mistake across the country. A warm February does not mean the soil is ready. Measure it.
Applying the day after mowing and then mowing again too soon. Freshly cut grass takes up chemical differently. Wait at least 48 hours after mowing to apply, and do not mow again for another 48 hours after application.
For more serious pest or weed pressure, consider pairing pre-emergent with a broader lawn health plan. A strong, dense lawn fights weeds naturally. That often means applying the right fertilizer at the right time.
If you are growing flowers or ornamentals in the same yard, the best organic fertilizer for fruit trees and flowers can keep those beds healthy without chemical interference.
I should note that if you are dealing with persistent weed issues in areas like flower borders, you might want to check out tips for the best flowers for flower beds so you can build a dense, weed-suppressing display that outcompetes unwanted plants naturally.
When to Use a Split-Application (Two Apps per Season)
One application is enough for many lawns in the northern half of the US. But if you live in the transition zone or the South, your growing season is long. Crabgrass germinates in waves from early spring through late summer.
A single barrier degrades after 60 to 90 days, leaving the second wave uncovered.
That is when a split-application makes sense.
How the Split Works
Apply the first dose when soil temperature hits 50°F (the standard spring window). Then apply a second dose eight to ten weeks later. The second application catches late-season germinators and extends protection into early fall.
| Region | First Application | Second Application |
|---|---|---|
| Cool-season (North) | Early spring (soil 50°F) | Not needed or mid-summer for heavy pressure |
| Transition zone (Mid-Atlantic, Midwest) | Early spring | Early June |
| Warm-season (South, Gulf) | Late winter / early spring | Mid-May to early June |
When to Skip the Second App
If you plan to overseed in the fall, skip the second application. The residual barrier from a late spring dose can still be active when you drop grass seed in September. Check the product label for the maximum safe interval between application and seeding.
Most recommend at least six weeks, but some require longer.
Also skip the second app if your lawn is thin or recovering from disease. A stressed lawn needs airflow and root growth more than chemical protection. Focus on feeding and watering instead.
Safety, Runoff, and Label-Reading Basics
Pre-emergent herbicides are regulated pesticides. The label is not a suggestion. It is the law.
Every application rate, timing restriction, and safety instruction on that label is tested and approved by the EPA.
Personal Safety
Wear gloves, long sleeves, and closed-toe shoes when handling any granular or liquid product. Avoid inhaling dust or spray mist. If you use a liquid, wear eye protection.
Wash your hands thoroughly after application and before eating or smoking.
Keep children and pets off the treated area until the product has been watered in and the surface is dry. For granules, that usually means a few hours. For liquids, wait until the spray has dried completely.
Environmental Safety
Do not apply before heavy rain. Runoff carries the chemical into storm drains, streams, and ponds. Many pre-emergents are toxic to aquatic life.
Check the forecast and aim for a 24-hour window with no heavy precipitation.
Avoid treating slopes or compacted areas where water pools and runs off. If your lawn has bare spots, fix the drainage or add soil before applying herbicide.
Storage and Disposal
Store the product in its original container, out of reach of children and pets, in a cool dry place. Do not transfer it to food containers. When the container is empty, rinse it three times and dispose of it according to local hazardous waste guidelines.
Never pour leftover mix down a drain or into the street.
Frequently Asked Questions
Can I apply pre-emergent and fertilizer at the same time?
Yes, but timing matters. Many combination products exist, but they often lock you into a single schedule. Our research shows separate applications give you more control.
Apply pre-emergent when soil temperature is right and fertilizer when the grass needs it (usually fall for cool-season lawns).
How long after applying pre-emergent can I mow?
Wait at least 48 hours after application to mow. Mowing too soon disturbs the chemical barrier and can pick up granules that have not yet worked into the soil. After that, mow at your normal height.
Do not bag the clippings for the first mow.
Will rain wash away my pre-emergent?
Light rain helps activate the barrier. Heavy rain causes runoff and moves the chemical off-target. If a downpour of more than one inch occurs within 24 hours of application, you may need to reapply.
Check the label for specific rainfast recommendations.
Is pre-emergent safe for pets?
Once the product is watered in and the lawn is dry, it is generally safe for pets. The risk comes from direct contact with wet granules or spray. Keep pets off the lawn during application and until the product is fully activated (usually 24 hours after watering in).
Can I use pre-emergent in a vegetable garden?
Some pre-emergents are labeled for vegetable gardens, but most are not. The active ingredients can persist in the soil and affect edible plants. Use a product specifically labeled for vegetable gardens, or rely on mulch and hand weeding instead.
Decision Guide: Your Lawn Type + Weed Target + Timing
This is the cheat sheet you can bookmark. Match your situation to the row, then follow the timing and product recommendation.
| Your Lawn Type | Target Weed | Best Timing | Product Form | Notes |
|---|---|---|---|---|
| Cool-season (fescue, bluegrass, ryegrass) | Crabgrass | Early spring (soil 50°F) | Granular or liquid | Second app only if heavy pressure |
| Cool-season (fescue, bluegrass, ryegrass) | Annual bluegrass (Poa) | Early fall (soil 60°F) | Liquid | Apply before seeds germinate |
| Warm-season (Bermuda, Zoysia) | Crabgrass | Late winter / early spring (soil 65°F) | Granular | Can split in warm climates |
| Warm-season (St. Augustine) | Crabgrass | Early spring after green-up | Liquid only on St. Augustine | Use caution; some products damage St. Augustine |
| Warm-season (Bermuda, Zoysia) | Annual bluegrass (Poa) | Late summer (soil 70°F) | Liquid | Retreat in early fall if needed |
When to Hire a Pro
If you have a large lawn (over 10,000 square feet), complex topography, or persistent weed issues that return every year despite proper timing, consider a professional application. Lawn care companies have commercial-grade equipment and access to active ingredients that perform better and last longer. The cost is usually $50 to $100 per treatment, which is competitive with buying retail products yourself.
Final Note
Pre-emergent is a tool, not a magic wand. It works best as part of a complete lawn care program that includes proper mowing height, adequate watering, and the right fertilizer schedule. A thick, healthy lawn is the best weed prevention there is.
The pre-emergent just gives it a head start.