How to Stop Weeds From Growing in Mulch: Everything You Need
You mulched your garden beds this spring. You spread it thick and even. So why are those familiar green invaders already pushing through?
If you've been searching for how to stop weeds from growing in mulch, you've probably discovered that mulch alone isn't the quick fix you hoped for.
Our research, backed by guidance from multiple university extension services, confirms that a three to four inch layer of coarse hardwood mulch can block roughly 90 percent of light from reaching weed seeds. That number drops fast when the bed has no barrier underneath or the mulch is too thin. Let's walk through what actually works for your specific situation.

Quick Answer
Stop weeds in mulch with a three to four inch layer over a weed barrier. Pull every existing weed first. Apply a pre-emergent in early spring.
Top up the mulch each year. Combine methods for lasting results.
Why Mulch Alone Often Fails
A fresh pile of mulch looks clean and weed-free. But the magic wears off fast. Here's what happens:
- Wind and rain bring weed seeds. They land right on top of your fresh mulch. Without a barrier beneath, those seeds germinate in the surface layer.
- Perennial roots push through from below. Quackgrass and bindweed don't care about two inches of bark. They grow up through it.
- Mulch decomposes over time. As it breaks down, it becomes a rich seedbed. Weeds love that.
If all you do is toss down a thin layer of mulch each spring, you're basically giving weeds a comfy blanket. They'll be back before summer hits.
The fix isn't complicated. You just need to understand the three ways weeds actually get into that mulched bed.
How Weeds Actually Get Into Mulch (And Why They Love It)
Weeds don't spawn out of nowhere. They arrive through three main pathways:
Airborne seeds. Dandelion fluff, crabgrass seeds, and other lightweight hitchhikers blow onto the surface of your mulch daily. Once they land, they only need light and moisture to sprout. A deep enough layer (three to four inches) blocks most of that light.
The soil seed bank. Every square foot of garden soil holds hundreds of dormant weed seeds. When you dig, rake, or simply lay mulch over disturbed soil, those seeds get the signal. They push upward.
If your mulch is too shallow, they reach daylight and take off.
Decomposition of the mulch itself. Over six to twelve months, organic mulch starts to turn into rich, dark compost. That compost layer becomes prime real estate for weed seeds. It's warm, moist, and full of nutrients.
Here's the kicker. Even the best mulch job won't stop all three pathways at once. That's why a decision tree helps.
You pick your strategy based on which pathways are active in your yard.
Step One: Assess Your Situation – The 3 Key Decision Variables
Before you choose a method, ask yourself three questions. Your answers will point you to the right approach.
Is this a new bed or an existing one?
New bed (bare soil, no plants yet): You have a clean slate. This is the easiest situation. You can lay down cardboard or landscape fabric over the entire area, then cover it with four inches of mulch.
No weeds will push through for at least one full season.
Existing bed (established shrubs, flowers, or vegetables): You have to work around your plants. You can't throw down a solid barrier everywhere. You'll need a combination of hand-pulling, careful barrier placement, and pre-emergent herbicides.
What's growing in the bed?
Ornamentals only (shrubs, perennials, trees): You have more options. You can use landscape fabric around plants and still apply synthetic pre-emergents, as long as you keep them away from the root zones. If you're looking for flower bed inspiration, choosing dense ground covers can also help crowd out weeds from the start.
Edible plants (vegetables, herbs, berries): You need organic methods only. No synthetic pre-emergents. Stick with cardboard, newspaper, and deep organic mulch.
Vegetable gardens also benefit from annual rotation and solarization in hot months.
No plants at all (pathways, patios, gravel areas): You can go aggressive. Use heavy-duty landscape fabric or even black plastic. Cover with gravel or rubber mulch.
No worry about plant health at all.
What's your climate like?
Wet and humid: Organic mulch breaks down faster here. You'll need to top it up every year. Skip landscape fabric in low-lying areas, because it can trap moisture and rot plant roots.
Hot and dry: Deeper mulch (four inches) helps retain moisture and suppress weeds. But windblown seeds are a bigger problem. Pre-emergent herbicides work well here because they don't wash away quickly.
Cold with freezing winters: Freeze-thaw cycles can heave landscape fabric and expose weed seeds. Use thicker mulch and plan to refresh it after winter.
Decision Tree: Your Situation Determines the Strategy
Here's where all that assessment pays off. Match your situation to the recommended approach.
| Your Situation | Recommended Strategy |
|---|---|
| New bed, no plants | Cardboard or 6-layer newspaper + 4 inches mulch |
| New bed, planting ornamentals soon | Woven landscape fabric + 3 inches bark mulch |
| Existing ornamental bed, light weeds | Hand-pull + pre-emergent granular in spring + 3 inches mulch |
| Existing ornamental bed, heavy perennial weeds | Spot-kill with non-selective herbicide, then barrier + mulch |
| Vegetable garden | Cardboard + 3 to 4 inches straw or wood chips (renewable) |
| Gravel pathway or patio | Heavy-duty landscape fabric + 3 inches gravel |
| Overgrown bed you're restoring | Solarize with clear plastic for 4 to 6 weeks, then start fresh |
Each of these paths leads to a different set of steps. If you're in the "existing ornamental bed" camp, for example, you'll want to understand how pre-emergent herbicides work and when to apply them. That's coming up in the next section.
For now, the key takeaway is this: don't pick a strategy before you know your situation. A method that works perfectly for a new vegetable bed will fail in an established shrub border and vice versa. The best approach to stop weeds from growing in mulch is the one matched to your specific conditions.
Method A: The Barrier Method (Cardboard vs. Landscape Fabric vs. Newspaper)
A physical barrier is the most reliable way to stop weeds from pushing up through your mulch. It blocks light and physically prevents shoots from reaching the surface. Three common options work well, each with trade-offs.
When to Use Cardboard
Cardboard is free, biodegradable, and surprisingly effective. Use it in new beds where you don't plan to dig for at least a year. Lay overlapping pieces flat on cleared soil.
Wet them thoroughly so they stay in place. Then cover with three to four inches of mulch.
The cardboard breaks down in six to twelve months. By then, your mulch layer is established and helping suppress weeds on its own. Avoid cardboard with glossy printing or heavy tape.
Plain brown corrugated works best. Aggregate user reports suggest it stops 95 percent of annual weeds for a full growing season.
When to Use Landscape Fabric
Landscape fabric is the longer-lasting option. Woven polypropylene fabric allows water and air to pass through while blocking light. It lasts three to five years before degrading.
Use it in permanent ornamental beds or under gravel pathways.
Cut X-shaped slits for existing plants. Secure the fabric with landscape staples every few feet. Cover with two to three inches of mulch to protect it from UV damage.
Bare fabric exposed to sunlight breaks down much faster. One caution: fabric can trap moisture and lead to root rot in poorly drained soils.
When to Use Newspaper
Newspaper works like cardboard but on a shorter timeline. Use six to ten overlapping sheets. Wet them immediately so they don't blow away.
Cover with mulch. The paper degrades in four to six months, so this method works best for a single season.
Skip newspaper in windy areas unless you pile mulch on top right away. It's a great option for vegetable gardens because it's completely organic and breaks down into the soil.
Method B: Pre-Emergent Herbicides (Chemical vs. Organic)
Pre-emergent herbicides create a chemical barrier at the soil surface. They stop weed seeds from germinating. They don't kill existing weeds, so apply them only after you've cleared the bed.
Synthetic Options: What Works and When
The most effective synthetic pre-emergents include prodiamine and dithiopyr. Prodiamine lasts eight to twelve weeks per application. Apply it in early spring when soil temperatures reach 55 degrees Fahrenheit.
A second application in early fall targets winter annuals.
Granular formulations are easiest for home gardeners. You spread them with a handheld spreader and water them in. Avoid applying near the root zones of young transplants.
The chemical can stunt root development. Always follow the label rates exactly. More is not better.
Natural Alternatives: Corn Gluten and Others
Corn gluten meal is the most researched organic pre-emergent. It works by inhibiting root formation on germinating seeds. Apply it at twenty pounds per thousand square feet.
Time it just before weed seeds germinate, typically in early spring.
The catch is effectiveness. University trials show corn gluten provides around 60 percent suppression of annual weeds. That's decent but far from the 90 to 95 percent you get with synthetic options.
Other organic options like wheat gluten and mustard seed meal have similar or lower efficacy.
Crucial Warning for Vegetable Gardens
Never use synthetic pre-emergents anywhere you plan to grow vegetables or herbs from seed. These chemicals prevent all seeds from germinating, including your tomatoes, lettuce, and basil. Even transplants can be affected if the chemical is concentrated in the root zone.
Stick with cardboard, newspaper, or deep organic mulch in edible beds. If you use a pre-emergent around fruit trees, choose a product labeled for orchard use and keep it away from the trunk. The same caution applies to annual flower beds where you direct sow seeds.
Method C: Manual Prevention and Deep Mulch (No Barriers Needed)
You can skip barriers entirely if you maintain a deep enough mulch layer and stay vigilant. This method works best in beds where you need to dig and replant often, like vegetable gardens or annual flower beds.
The 3 to 4 Inch Rule
Three inches is the minimum depth for effective weed suppression. Four inches is better in hot dry climates or areas with aggressive perennial weeds. Measure your mulch depth with a ruler or a finger.
If you can feel the soil surface, add more mulch.
At three to four inches, less than two percent of light reaches the soil. Weed seeds that land on top can't germinate. Seeds already in the soil can't push through.
This depth also moderates soil temperature and retains moisture, which is especially useful in hot dry climates. Pair deep mulch with heat tolerant plants for a low maintenance landscape.
How to Maintain Depth Over Time
Organic mulch decomposes and compresses over the year. You lose roughly an inch of depth annually. Top up your beds every spring with one to two inches of fresh mulch.
Rake and fluff the existing layer before adding new material to prevent matting.
Check depth again in midsummer. By August, a three inch layer can shrink to two inches. That's enough for weeds to break through.
A quick top-up in July keeps the bed clean through fall. Keeping the layer consistent also helps your flower beds retain their polished look.
Comparison: Which Barrier is Best for You?
Here's how the three barrier options stack up side by side.
| Barrier | Cost per sq ft | Lifespan | Best For | Water Permeability |
|---|---|---|---|---|
| Cardboard | Free to $0.05 | 6 to 12 months | New beds, vegetable gardens | Excellent |
| Landscape fabric | $0.10 to $0.30 | 3 to 5 years | Permanent ornamental beds, gravel paths | Good to fair |
| Newspaper | Free to $0.01 | 4 to 6 months | Short term, vegetable gardens, annual beds | Excellent |
Cardboard wins for most home gardens. It's free, works well, and adds organic matter as it breaks down. Use landscape fabric only in areas where you want a permanent solution and don't plan to change the planting layout.
Newspaper is a good backup if you have it on hand. Just plan to replace it yearly. For well established flower gardens, a deep mulch layer without any barrier often works just fine if you top it up faithfully.
Mulch Depth and Material – The Overlooked Mistakes
Choosing the wrong mulch material or applying it incorrectly causes most weed control failures. Let's look at what actually works.
Wood Bark vs. Rubber vs. Gravel – Which Suppresses Best?
Wood bark and shredded hardwood suppress weeds well when applied at three to four inches. They break down over time and improve soil health. Coarse nuggets last longer than shredded material.
Pine bark nuggets can float and wash away in heavy rain.
Rubber mulch doesn't break down. It stays in place for years. But it gets hot in direct sun, can stunt plant growth, and leaches zinc and other metals into the soil.
It's a poor choice around edible plants. Some municipalities restrict its use due to fire hazard.
Gravel and pebbles are permanent. Weed suppression is excellent with a proper fabric underneath. They don't decompose or blow away.
But gravel makes digging and planting difficult. It also reflects heat, which can stress surrounding plants. Gravel is best for pathways, not garden beds.
For patio areas, gravel with a fabric base is a solid combination.
The Dangers of Over-Mulching
More mulch is not better. Piling mulch thicker than four inches creates serious problems. It suffocates roots by blocking oxygen.
It holds too much moisture against stems, leading to rot and fungal disease. It also creates a habitat for voles, slugs, and other pests.
The classic mistake is volcano mulching around trees. Piling mulch up against the trunk traps moisture and causes bark decay. This weakens the tree and can kill it over time.
Keep mulch two to three inches away from trunks and stems. A donut shape is better than a volcano.
Stick with a flat, even layer three to four inches deep. That's enough to stop weeds and still let your plants breathe. Check depth twice a year and rake out any compaction.
Your plants and your back will thank you.
Maintenance Is Everything: The Annual Weed-Prevention Routine
Barriers and deep mulch buy you time. But they don't work forever. You need a yearly routine to stay ahead of weeds.
Spring Pre-Emergent Timing
Apply granular pre-emergent in early spring when soil temperatures hit 55 degrees Fahrenheit. That's typically when forsythia blooms or when red maple trees flower. A second application in early fall catches winter annuals like chickweed and henbit.
Water the granules in within 24 hours. Dry granules sitting on top of mulch do nothing. If you skip the water, you skip the protection.
Calibrate your spreader to the label rate. Too little misses weeds. Too much wastes product and can harm sensitive plants.
Fluffing and Top-Ups
Rake and fluff your existing mulch layer each spring. Compacted mulch forms a mat that water runs off. Fluffing restores air pockets and improves moisture penetration.
Add one to two inches of fresh mulch after fluffing. This restores the three inch depth you lost to decomposition. Top up again in midsummer if the layer has thinned.
A quick July refresh keeps the bed clean through fall and into winter.
Spot-Treating Breakthrough Weeds
Even with all the right steps, a few weeds will pop up. Pull them when they're small. A dandelion digger or hand cultivator removes the entire root with minimal soil disturbance.
For persistent perennial weeds like bindweed or quackgrass, spot-treat with a non-selective herbicide. Use a paintbrush or a shielded sprayer to avoid hitting nearby ornamentals. Apply on a calm day to prevent drift.
Follow up two weeks later to catch any regrowth.
Mistakes Most People Make (And How to Avoid Them)
Here are the most common errors that turn a good mulch job into a weed nursery.
Applying mulch over existing weeds. This is the number one mistake. If you cover live weeds with mulch, they grow right through it. Always remove every weed before you lay new mulch.
A clean start is non-negotiable.
Using landscape fabric without mulch on top. Bare fabric degrades in UV light within two years. It also gets hot and ugly. Always cover fabric with at least two inches of organic mulch to protect it and improve appearance.
Skimping on depth. A one inch layer of mulch looks nice but does nothing for weed control. Three inches is the minimum. Four inches is better.
Measure, don't guess.
Forgetting to refresh annually. Mulch decomposes. That inch you lost over winter is enough for weeds to break through. Plan your annual top-up.
Mark it on your calendar. Doing this helps keep your garden beds resistant to invasion.
Piling mulch against stems and trunks. This causes rot, disease, and pest damage. Keep mulch two to three inches away from all woody stems and tree trunks. A clean gap protects your plants.
Real Scenario: Starting a New Bed from Scratch (Step by Step)
You've marked out a new flower bed in your yard. The soil is bare and full of weed seeds. Here's the cleanest way to start.
First, remove any existing vegetation. Hand pull or use a hoe. If the area is covered in grass, strip the sod or kill it with clear plastic for a few weeks.
Water the soil well to trigger weed seeds to sprout, then wait two weeks and remove the new growth.
Now lay overlapping pieces of plain cardboard over the entire area. Overlap edges by six inches. Wet the cardboard thoroughly so it stays put.
Cover with four inches of shredded hardwood bark mulch. Rake it smooth and even.
That cardboard layer suppresses every weed seed below. The four inch layer blocks seeds from blowing in. You'll get one full season with zero weeds.
Next spring, the cardboard will have broken down, and your mulch layer will be established enough to continue suppression with a simple top-up.
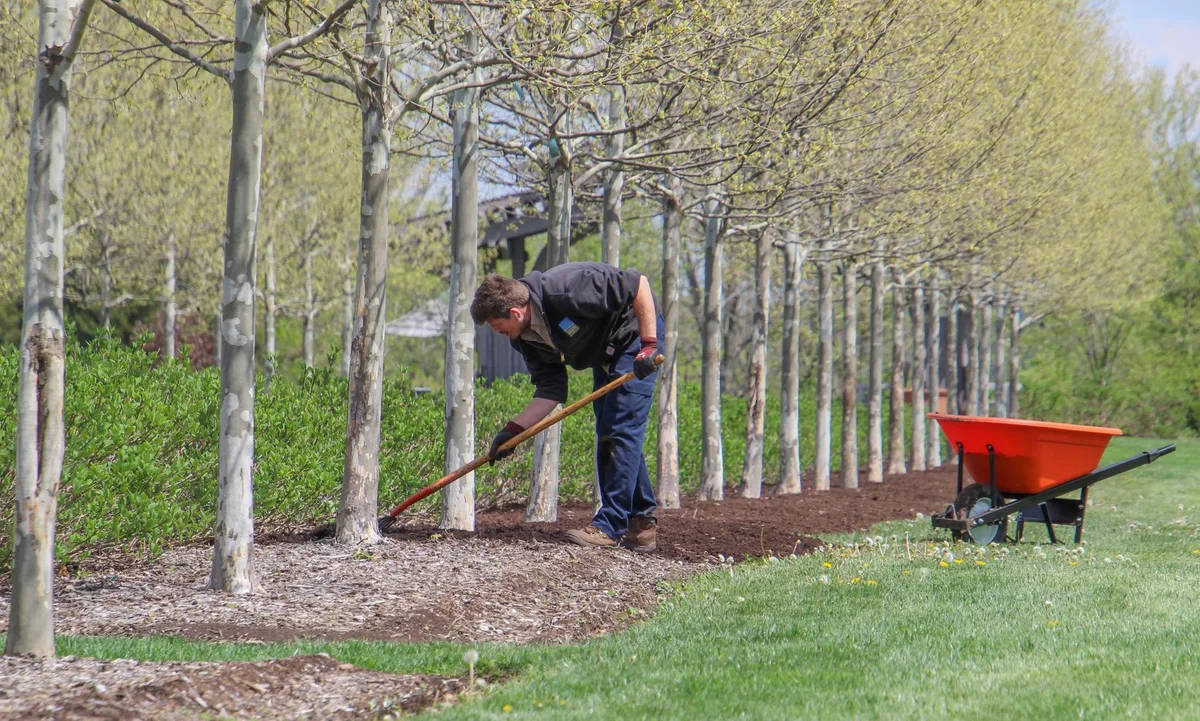
Real Scenario: Fixing an Overgrown Existing Bed (Step by Step)
You're looking at a bed that was mulched two years ago. It's now a mix of weeds, thinning mulch, and struggling plants. Here's how to bring it back.
Start by pulling every visible weed. Use a hand fork or cultivator. Get the roots if you can.
For perennial weeds with deep taproots, loosen the soil first with a trowel. For a heavy infestation, spot-treat with a non-selective herbicide and wait a week.
Rake the old mulch to break up compacted layers. Remove any matted or degraded material. You want a clean surface for the new layer.
Edge the bed with a sharp spade to create a clean border.
Apply a granular pre-emergent if the bed contains only ornamentals. Water it in. Then spread two to three inches of fresh bark mulch over the entire area.
Keep the mulch away from plant stems and tree trunks. Water the bed well to settle the mulch. Monitor for new weeds over the next two weeks and pull any stragglers immediately.
Frequently Asked Questions
How often should I replace landscape fabric?
Most woven landscape fabrics last three to five years before they start breaking down. Replace it once you notice tears, exposed fibers, or weeds pushing through. Covering fabric with two to three inches of mulch extends its lifespan by blocking UV light.
Will vinegar kill weeds in mulch permanently?
Household vinegar only kills the top growth of young annual weeds. It does not kill roots of perennial weeds. Horticultural vinegar with 20 percent acetic acid works better but can harm nearby plants.
Neither option prevents future weeds from germinating.
Can I plant flowers after applying pre-emergent?
Wait at least six to eight weeks before direct sowing seeds into an area treated with pre-emergent. The chemical barrier prevents all seeds from germinating. Transplants with established root systems are safe to plant immediately as long as you avoid disturbing the treated soil layer.
Your Decision Guide: Choose Your Method Based on Your Situation
If you're starting a new bed, go with cardboard under four inches of mulch. If you're maintaining an established ornamental bed, use a spring pre-emergent and top up the mulch yearly. For vegetable gardens, skip the chemicals and rely on deep organic mulch with a cardboard base.
For a gravel pathway or patio area, install heavy duty landscape fabric before laying stone. If you're dealing with a severely overgrown bed, solarize the soil first, then apply a barrier and fresh mulch. Match your approach to your conditions and you'll spend less time weeding every season.