How to Prevent Soil Erosion 2026
If you’ve ever watched a heavy rain wash a bare patch of dirt down your driveway, you already know the problem. Soil erosion isn’t just an eyesore. It damages foundations, steals your best topsoil, and can even create legal headaches if runoff flows onto a neighbor’s property.
Learning how to prevent soil erosion starts with one simple fact: there is no single method that works for every situation.
The USDA Natural Resources Conservation Service (NRCS) estimates that erosion removes roughly 5 tons of topsoil per acre each year on unprotected land. That number jumps dramatically on slopes of 10 percent or more. The method you need depends entirely on your slope, your soil type, and whether you’re managing a farm, a construction site, or a backyard.
Let’s walk through the decision process so you pick the right fix the first time.
Quick Answer
Prevent soil erosion by identifying your slope and soil type first. Gentle slopes (under 5 percent) need cover crops or mulch. Moderate slopes (5 to 15 percent) require a temporary erosion blanket or check dams.
Steep slopes (over 15 percent) often need terracing or a retaining wall. Always divert water before treating the erosion site. Healthy vegetation with deep roots is the long-term solution.
Why Getting This Right Actually Matters
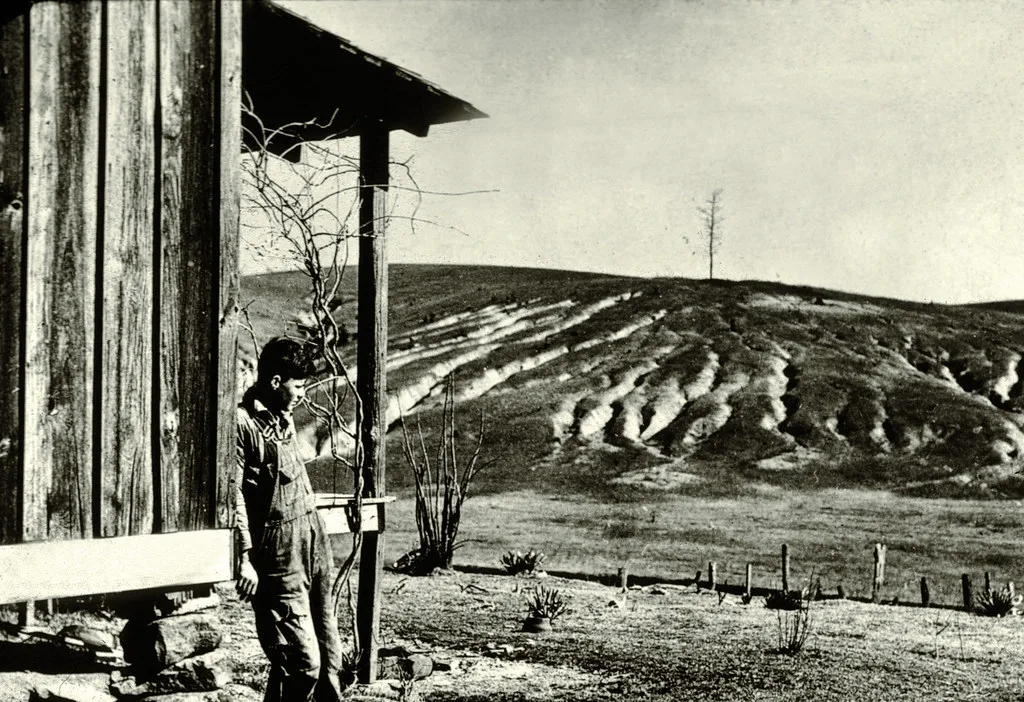
Soil erosion is one of those problems that gets worse fast if you ignore it. A small rill can turn into a gully after one big storm. That gully can undermine a patio, expose utility lines, or cause a slope to fail entirely.
The real cost of soil loss shows up in three places. First, your property. Erosion can wash away several inches of topsoil in a single growing season, leaving you with compacted subsoil that struggles to grow anything.
Second, your liability. If eroded sediment carries fertilizer or pesticides into a neighbor’s yard or a local stream, you might be on the hook for cleanup costs. Under the Clean Water Act, any construction site disturbing more than one acre must have a stormwater pollution prevention plan in place.
Third, your crops. For farmers, losing topsoil means lower yields and more fertilizer needed to compensate.
The good news? Most erosion is preventable with the right approach. The bad news?
The wrong approach can waste your time and money, or make things worse. That is why understanding your specific situation matters more than grabbing the cheapest fix.
How Serious Is Your Erosion? (A Quick Self-Assessment)
Before you buy anything or break ground, you need to grade the problem. Walk your site after a rain and look for these three types of erosion.
Sheet erosion is the sneaky kind. It removes a thin, even layer of soil across a whole area. You might not notice it until you see exposed roots or a lighter soil color at the surface.
Rill erosion shows up as small channels a few inches deep. These are the early warning signs. If you catch them here, you can fix them cheaply.
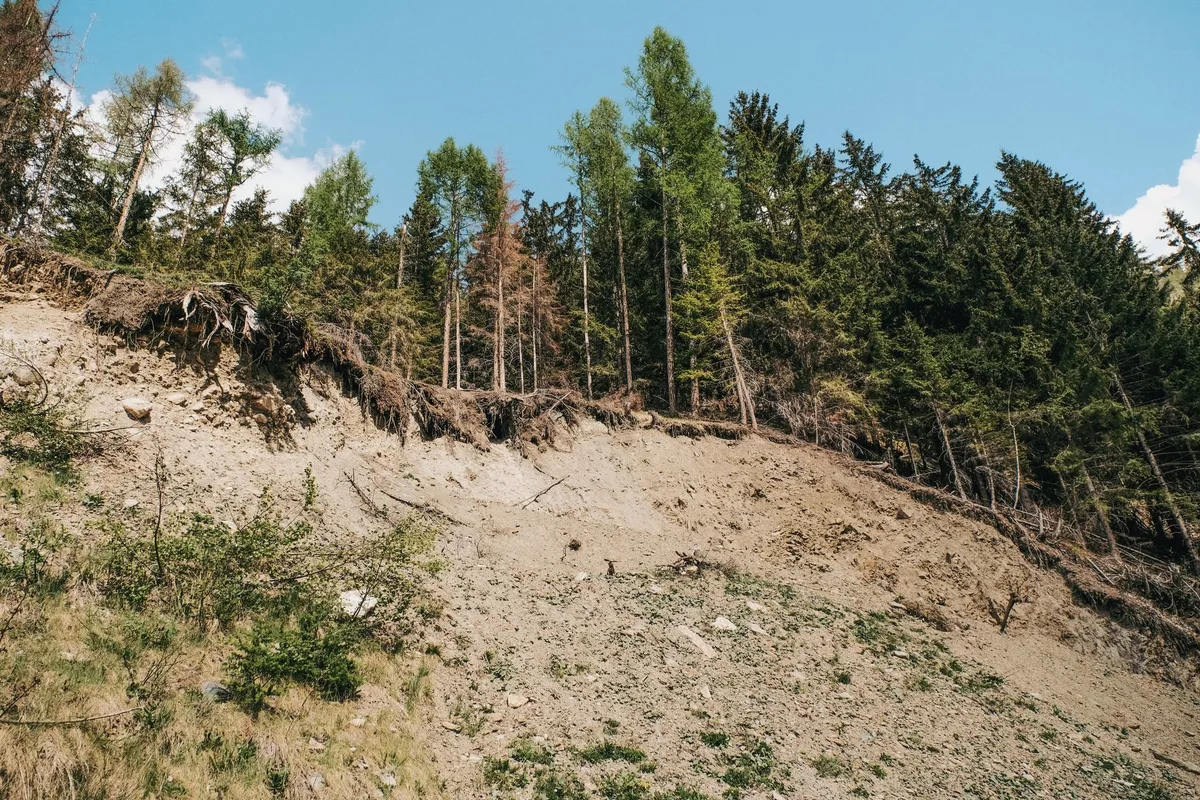
Gully erosion is the emergency. These are deep channels, often a foot or more deep, that carry heavy runoff. Gullies rarely heal on their own.
They require structural fixes like check dams or riprap.
Ask yourself these three questions:
- How steep is your slope? Use a clinometer app on your phone or a simple level and measuring tape. Anything over 10 percent needs structural support.
- What kind of soil do you have? Sandy soil erodes faster than clay. You can check your soil texture with a simple jar test (shake soil with water, let it settle, measure the layers).
- Where does water go when it rains? Walk your property during a storm. Mark where water concentrates and where it leaves your property.
If you see active gullying, or if your slope is steeper than a 2:1 ratio (about 27 percent), skip the DIY site assessment. Call a professional. This is not a place to guess.
Key Factors to Get Right First
Three variables control almost every erosion control decision. Get these right, and the rest falls into place.
Slope Gradient
Slope gradient is the single most important factor. It dictates how fast water runs off and how much energy it carries. A 5 percent slope (roughly 3 degrees) needs different treatment than a 20 percent slope (about 11 degrees).
As a rule of thumb, every 5 percent increase in slope doubles the erosion risk for bare soil.
For slopes under 5 percent, you can rely on vegetation and mulch. For slopes between 5 and 15 percent, you need temporary erosion blankets or fiber wattles to hold seed in place until roots establish. For slopes over 15 percent, plan on terracing, retaining walls, or heavy riprap.
Soil Texture
Sandy soil absorbs water fast but holds together poorly. It erodes easily, even on gentle slopes. Clay soil resists erosion better surface-wise but can create heavy runoff because water doesnt soak in fast.
Loam is the ideal balance for most erosion control.
To figure out your soil type, grab a handful of damp soil and squeeze it. If it crumbles when you open your hand, it is sandy. If it stays in a tight ball that you have to pry apart, it is clay.
If it forms a ball that breaks apart with a gentle poke, you have loam.
Flow Path Identification
Water always follows the path of least resistance. If you treat the erosion spot but ignore where the water comes from, you are wasting your time. You need to divert water around the vulnerable area first.
Use a simple observation method. During a moderate rain, watch where puddles form and where water actually flows. Mark those spots.
On a typical property, the most critical flow paths are along fence lines, at the base of downspouts, and where a driveway meets a slope. For a more detailed approach, especially on larger properties, check the USDA Web Soil Survey for your area. It maps soil types and drainage patterns down to the parcel level.
Erosion Control Methods: The Honest Breakdown
There are four broad categories of erosion control. Each one fits a specific set of conditions. None of them are universally better than the others.
Vegetative Methods
Vegetation is the cheapest permanent solution, but it is not instant. Grass, groundcovers, and deep-rooted plants hold soil in place with their root systems. According to NRCS research, a dense stand of grass can reduce erosion by over 90 percent compared to bare soil.
When it works: Gentle to moderate slopes where you have 60 to 90 days for roots to establish.
When it fails: Steep slopes, sandy soil, or if you seed right before a heavy rain. Fresh seed washes away before it can germinate. You also need the right species for your climate.
Native warm-season grasses like switchgrass have root systems that go six to eight feet deep. Shallow-rooted annual ryegrass only reaches six to twelve inches.
Temporary Structural Methods
These include erosion control blankets, fiber wattles (coir logs), silt fences, and check dams. They hold the soil in place while vegetation establishes or during active construction.
Erosion control blankets come in different materials. Straw blankets are cheap and biodegradable but break down in one season. Coir blankets (made from coconut fiber) last two to three seasons and work better on steeper slopes.
Both need to be stapled securely into the ground, with overlapping seams.
Silt fences are a temporary barrier, not a permanent solution. They trap sediment by letting water filter through the fabric. But they are widely installed wrong.
We will cover the correct method in the step-by-step section below.
Permanent Structural Methods
These are the expensive, long-term solutions. Retaining walls, terraces, riprap, and gabion baskets are all in this category. They are the right choice when you have steep slopes, active gullies, or a high risk of property damage.
Retaining walls can be built from poured concrete, concrete blocks, timber, or natural stone. Each has a different lifespan. Concrete walls can last 50 years or more.
Timber walls typically last 10 to 15 years before rotting.
Riprap (loose rock armor) works well for drainage outlets and streambanks. The rock size matters. A common guideline is D50 of 6 to 12 inches for moderate flows.
Too small, and the rock washes away. Too large, and water flows through the gaps.
Soil Management
Sometimes the best approach is to keep soil from being exposed in the first place. Mulch, compost, and no-till farming all reduce erosion by protecting the soil surface and improving water infiltration.
A good layer of mulch, two to four inches deep, can cut erosion by more than half. Compost improves soil structure, which helps water soak in rather than running off. No-till farming leaves crop residue on the surface, which mimics a natural mulch layer.
Step-by-Step: How to Install the Most Common Solutions
Let me walk you through three installation methods that consistently cause confusion. Do these right, and you will see results. Do them wrong, and you will be redoing them after the next storm.
Installing a Silt Fence Correctly
Most silt fence failures happen because people just drive stakes into the ground and drape the fabric. That lets water flow under the fence. Here is the correct method.
First, dig a trench six inches deep and six inches wide along the fence line. The trench must follow the contour of the slope. Second, place the bottom edge of the silt fence fabric into the trench.
Third, backfill the trench and compact the soil firmly. The key is to bury the fabric, not just stake it. Fourth, drive stakes on the downhill side of the fence, spaced about six feet apart.
The fabric should be taut but not stretched tight.
A properly installed silt fence catches sediment effectively. A poorly installed one is just a decoration.
Building a Rock Check Dam
Check dams slow water flow in a channel and trap sediment. They are not a substitute for a permanent structure, but they work well as a temporary fix.
Space your check dams according to the slope. A standard formula is: spacing equals the height of the dam divided by the slope percentage multiplied by 100. For example, a one-foot-tall dam on a 10 percent slope needs spacing of roughly 10 feet.
Build the dam from rock that is at least six inches in diameter. The center of the dam should be lower than the edges. This forces water to flow over the middle, not around the sides.
Never build a check dam that completely blocks the channel. Water needs to flow over it, not pool behind it.
Laying Erosion Control Blankets
Erosion blankets are simple to install, but the details matter. Start at the top of the slope and roll the blanket downhill. Overlap each roll by at least four to six inches.
Staple the overlaps with U-shaped sod staples every foot.
At the top of the slope, dig a small trench, bury the edge of the blanket, and backfill. This prevents water from getting under the blanket and lifting it. On steep slopes, you might need to add extra staples in the middle of the blanket.
Space staples at two-foot intervals along the edges and in the center.
After the blanket is down, seed through it or hydroseed over it. The blanket holds the seed and soil in place while the roots develop. Leave the blanket to biodegrade naturally.
Do not remove it.
Seeding a Slope for Erosion Control
If you are seeding a slope without a blanket, you need to act fast. The window between seeding and the first heavy rain is critical. Mix the seed with a light layer of straw mulch or wood fiber hydromulch.
This holds the seed in place long enough for germination.
Choose a seed mix that matches your climate and soil. In most cases, a mix of native grasses and a fast-growing annual grass like annual ryegrass works well. During the first year, you need to adjust your fertilizer routine.
A slow-release formula like the one you might use for establishing new lawns, such as a best slow release fertilizer for flowers, can provide consistent nutrients without burning the young roots.
Mow the new growth only after it reaches about six inches tall. Keep mower blades high. Scalping the new grass exposes bare soil and undoes your work.
Matching the Method to Your Situation (Decision Branches)
This is where the decision tree comes into play. You have assessed your site. Now match the method to your situation.
Gentle Slopes (0 to 5 Percent)
For a gentle slope, the approach is straightforward. Plant a cover crop like winter rye or crimson clover in the fall. Add a two to three inch layer of wood chip mulch around existing plants.
If the area is bare, seed a permanent grass mix and water it regularly until it establishes.
Cost level: Low.
Moderate Slopes (5 to 15 Percent)
Moderate slopes need a combined approach. Install temporary check dams in any drainage channels. Lay an erosion control blanket on the slope itself.
Seed through the blanket with a native grass mix. In some cases, adding a small retaining wall at the base of the slope helps catch any sediment that slips.
For the vegetation, choose species with deep root systems. Deep-rooted plants like those in a best plants for a bedroom selection might not apply here, but for outdoor slopes, think of native prairie grasses or shrubs. They anchor the soil much better than shallow-rooted turf grass.
Cost level: Medium.
Steep Slopes (15 Percent and Above)
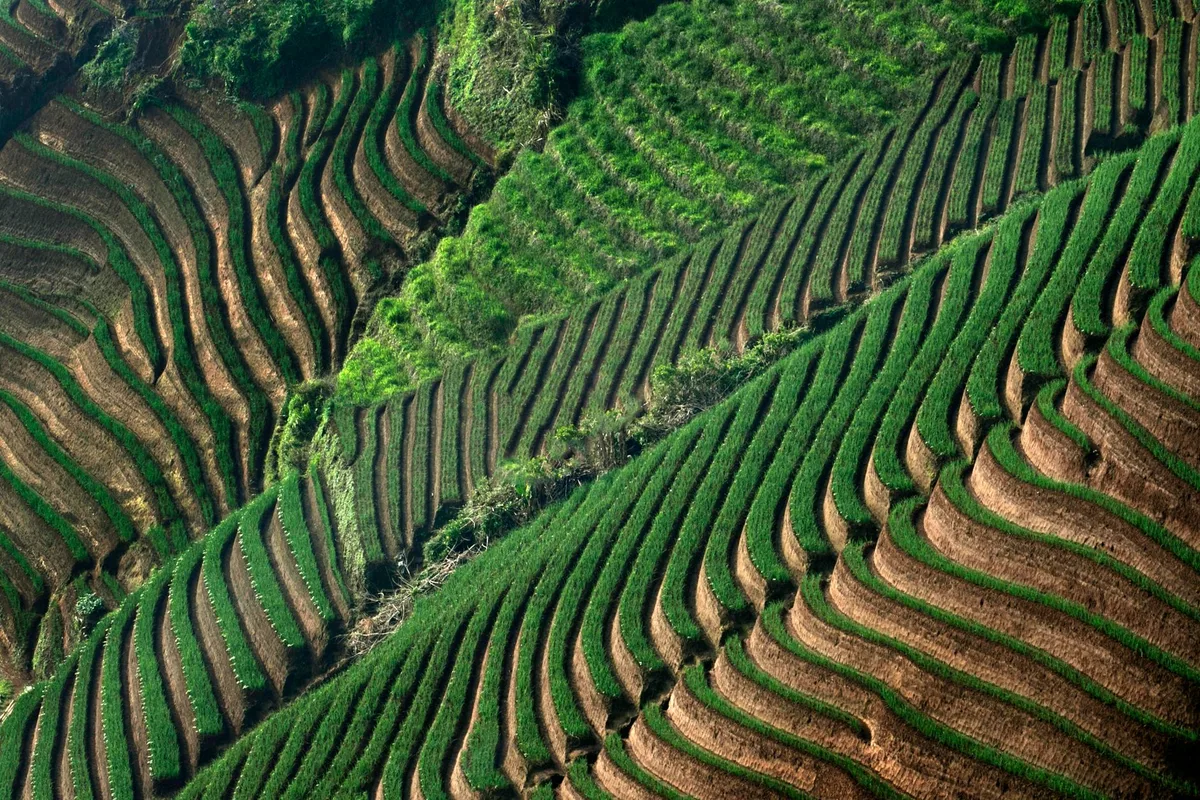
Steep slopes are the most challenging. You need a permanent structural solution. Terracing is often the best option for agricultural or residential slopes.
It breaks the slope into a series of flat steps. Each step is a separate growing area.
If terracing is not possible, a retaining wall is the next best option. A gravity wall made from interlocking concrete blocks or a crib wall built from timber or concrete can hold back large amounts of soil. Both require a solid foundation.
For walls over four feet tall, you likely need an engineer to stamp the design.
Planting deep-rooted vegetation on the terraced areas is essential. The roots add long-term stability. Consider best trees for hot dry climates if you are in an arid region.
The right tree can add stability and shade.
Cost level: High.
Construction Sites
Construction sites have a different set of rules. The EPA requires an approved Stormwater Pollution Prevention Plan (SWPPP) for any disturbance over one acre. Even smaller sites may need local permits.
The priority here is temporary controls. Install silt fences around the entire perimeter of the disturbed area. Place sediment basins at low points to catch runoff.
Use erosion control blankets on any stockpiles of soil. Divert clean water away from the construction zone with diversion ditches or berms.
Do not skip the inspection routine. After every storm that produces half an inch of rain or more, walk the site. Repair any broken silt fence or washed-out ditch immediately.
A clean water discharge is not just a good practice. It keeps you in compliance.
Agricultural Land
Farmers face erosion on a massive scale. The most effective method for row crops is no-till farming combined with a winter cover crop. No-till leaves crop residue on the surface.
The residue slows raindrop impact and holds soil in place. Studies from the USDA show that no-till can reduce erosion by 60 to 90 percent compared to conventional tillage.
Contour farming is another essential technique. Plowing along the contour of the hill instead of up and down it reduces runoff speed. On long slopes, strip cropping (alternating strips of row crop with strips of grass or small grain) adds extra protection.
To keep the soil healthy and productive, incorporate organic material. Using a best organic fertilizer for fruit trees or a general purpose organic amendment can help build soil structure, which improves water infiltration.
Residential Backyards
For a typical home, the most common source of erosion is a downspout that dumps water against the foundation. Extend the downspout at least five feet from the house with a flexible extension.
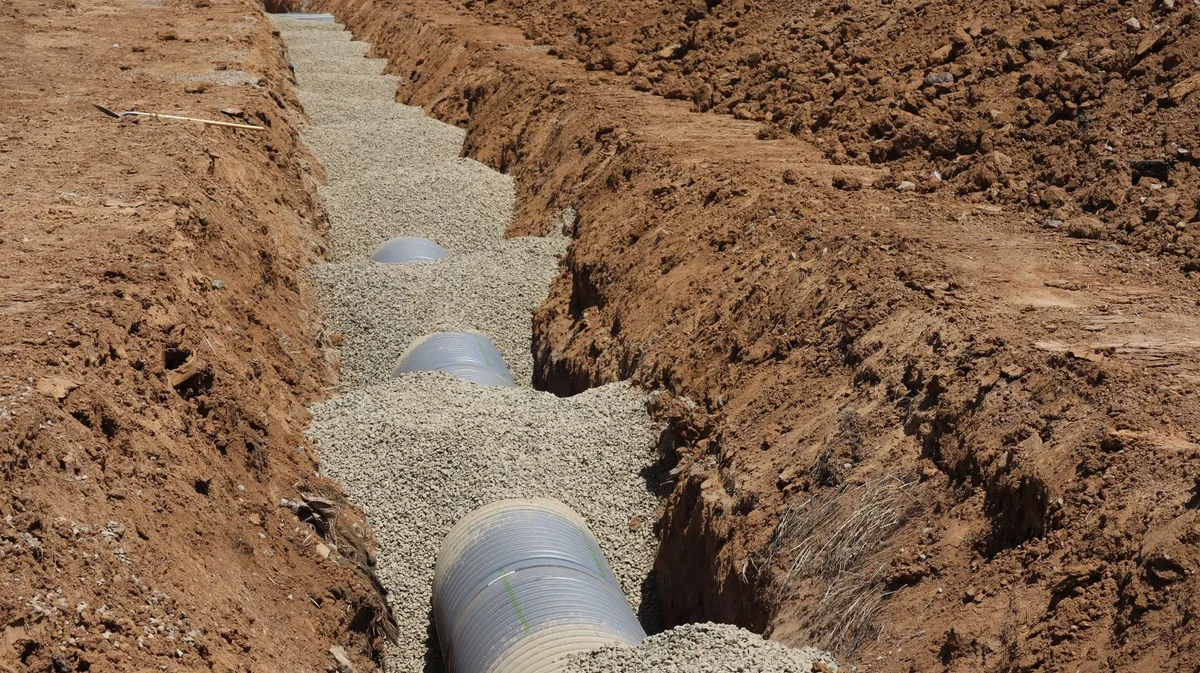
If the backyard slopes toward the house, you need to regrade the soil so it slopes away at a minimum of 2 percent grade. In some cases, a rain garden or a French drain can handle the excess water. A rain garden is a shallow depression planted with native shrubs and perennials that tolerates both wet and dry conditions.
It captures runoff and lets it soak into the ground.
For a finished look, you can incorporate ground covers and mulched beds. Adding small trees or shrubs on the slope, similar to the variety you might find in a best plants for dark bathroom list but suited for outdoor sun, provides root structure and beauty.
Common Mistakes That Wreck Your Erosion Control
I have seen people spend good money on erosion control only to watch it fail in the first storm. These are the mistakes that keep happening.
Installing silt fences parallel to the slope. A silt fence should run along the contour, not straight down the hill. When it runs parallel to the slope, water flows along the fence line and undermines it. Always install fences perpendicular to the flow of water.
Using lightweight mulch on steep slopes. Pine straw and shredded bark float. Stick with heavier wood chips or compost. For slopes over 10 percent, skip the loose mulch and use an erosion control blanket instead.
Forgetting to manage water before it hits the problem area. This is the biggest mistake of all. If you treat a steep slope but ignore the water coming from the property above, the slope will keep eroding. Divert upslope water with a swale or ditch before you start any other treatment.
Seeding without temporary cover. Fresh seed on bare soil is basically bird food. It washes away or gets eaten. Always cover the seed with an erosion blanket, straw mulch, or hydromulch.
The cover holds moisture and protects the seed.
Choosing vegetation with shallow roots. A pretty lawn is not an erosion control solution. Turf grass roots go two to four inches deep. Native warm-season grass roots can go six to eight feet.
If you want the slope to stay put, you need deep roots.
Ignoring subsurface water. Sometimes the erosion is not from rain, but from a spring or a high water table. If the soil stays wet, you need a French drain or curtain drain to capture that water before it reaches the slope.
When to Call in a Pro
You can handle gentle to moderate slopes yourself. But there are clear signs that you need a professional.
- Active gullying that is more than a foot deep. This is beyond a DIY fix. You need an engineer or a licensed contractor.
- A slope that is steeper than 2:1 (about 27 percent). Steep slopes require engineered retaining walls or terraces.
- Erosion near a foundation or a retaining wall. If the soil around your foundation is washing away, the structural integrity is at risk. Call a geotechnical engineer.
- Legal requirements. If your site requires a permit or a SWPPP, you need a qualified professional to design and oversee the plan.
A geotechnical engineer can run soil tests, design a retaining wall or slope stabilization system, and stamp the plans. A licensed erosion control contractor can install the solutions correctly. Expect to pay between $500 and $2,500 for a site assessment and design, depending on the complexity.
The installation cost varies wildly. A small retaining wall can run $3,000 to $10,000. A large slope stabilization project can exceed $20,000.
Compare that to the cost of a failed DIY project. A washed-out driveway or a collapsed retaining wall can cost tens of thousands. An ounce of professional advice is worth a lot here.
Maintenance and Long-Term Care
Erosion control is not a set-it-and-forget-it thing. You need to check your work after every big storm.
After heavy rain, inspect these points:
- Check silt fences for tears or undercutting.
- Look for washouts around check dams. Replace any stone that moved.
- Inspect erosion blankets for lifting. Restaple any loose edges.
- Check the seed bed. If you see bare patches, reseed and cover them.
Seasonal maintenance tasks:
- In spring, reseed any thin areas and add more mulch.
- In fall, plant a winter cover crop on bare soil.
- Clean out sediment basins and diversion ditches at least once a year.
- Inspect retaining walls for cracks or bulging. A small crack can become a big problem.
As the vegetation matures, it becomes more effective. The root network expands each year. After two or three seasons, the plants themselves become the primary erosion control.
At that point, you can reduce your inspection frequency to twice a year, but do not stop entirely.
Quick Reference: Method Selection by Situation
| Situation | Primary Method | Backup / Fallback | Cost Level |
|---|---|---|---|
| Gentle slope, bare soil | Cover crop + mulch | Native grass seed | Low |
| Construction site | Silt fence + sediment basin | Compost filter socks | Medium |
| Steep slope (15%+) | Erosion blanket + hydroseed | Terracing or retaining wall | High |
| Agricultural field | No-till + cover crop rotation | Contour strip cropping | Low-medium |
| Residential backyard | Downspout extension + rain garden | French drain | Low-medium |
This table is a starting point. Run your own numbers before buying materials. The cost of rock alone can vary by a factor of two depending on your location.
Frequently Asked Questions
Can I just use straw from the feed store?
Straw from a feed store works as a temporary mulch, but it often contains weed seeds. It also breaks down quickly. For a gentle slope, it is fine as a short-term fix.
For anything steeper, use an erosion control blanket or certified weed-free straw.
How long do erosion control blankets last?
Straw blankets last one season. Coir blankets last two to three seasons. Jute blankets last about one year.
Check the manufacturer’s specs before buying. Most blankets are designed to biodegrade, leaving the vegetation as the permanent cover.
Will planting trees stop a gully from getting worse?
Trees help, but they are not a quick fix. A tree needs several years to develop a root system that can hold soil. On an active gully, you need immediate structural support like check dams or riprap.
Plant trees after the gully is stabilized.
How much does a retaining wall really cost?
Expect to pay $15 to $40 per square foot of wall face for a DIY concrete block wall. A professional installation can range from $30 to $60 per square foot. Timber walls are cheaper but last only 10 to 15 years.
Engineered walls with geogrid can cost much more.
Do I need a permit for erosion control?
It depends on your location and the scope. Almost every municipality requires a permit for any construction that disturbs more than one acre. Smaller projects may also need approval.
Check with your local building department before starting. Fines for non-compliance can run into the thousands.
How do I know if my soil is sandy enough to need special treatment?
Do the squeeze test mentioned earlier. Sandy soil feels gritty and does not hold shape when squeezed. If you have sandy soil, you need faster-establishing vegetation and heavier mulch.
A slow-release fertilizer, like the kind you might apply to a best slow release fertilizer for flowers bed, can help the plants get established before the soil washes away.
Final Checklist Before You Start
Before you spend a dime on materials, answer these three questions.
- Where is the water coming from? Treat the source first. Divert upslope water away from the erosion site.
- What is your slope gradient? Measure it. Do not guess.
- How much time do you have? If you need immediate protection, you need structural methods. If you can wait 60 to 90 days, vegetation can work.
The one thing you should never skip is the initial water diversion. A simple diversion ditch or a swale can cut your erosion problem in half. Treat that first, then focus on the slope itself.
And if you find yourself staring at a gully that is more than a foot deep, stop the research and call a professional. There is no shame in admitting that a job needs an expert. The shame is in wasting money on a solution that fails because you did not ask for help early enough.