Guide to Common Mulching Mistakes (2026) — Pro Tips & Tricks
Mulch does more than make your garden look tidy. When applied correctly, it conserves moisture, suppresses weeds, regulates soil temperature, and gradually improves soil structure as organic materials break down. Common mulching mistakes, however, can undo all those benefits and damage or even kill your plants.
The most frequent errors include piling mulch too deep, placing it against tree trunks and plant stems, choosing the wrong material for the situation, and neglecting ongoing maintenance.
Most problems stem from the same root cause: too much mulch in the wrong place. Research from university extension horticulture programs consistently recommends a 2- to 4-inch layer for most landscape beds, yet homeowners routinely apply twice that depth or mound mulch into "volcanoes" around tree bases. What follows is a decision-framework guide to help you spot, fix, and avoid the mistakes that cost you time, money, and healthy plants.
Quick Answer
The most common mulching mistakes are applying too much depth (over 4 inches), piling mulch against tree trunks or plant stems, and using fresh wood chips on annual beds. Volcano mulching buries the root flare and invites rot. Always keep mulch 6 inches away from tree trunks.
Maintain a 2- to 4-inch layer across the bed. Water soil thoroughly before you spread mulch. Check and refresh the layer every year to prevent matting.
Why Mulching Mistakes Matter More Than You Think
A badly mulched garden isn't just ugly. It's a slow-motion failure that shows up months or years later as dead trees, stunted perennials, or persistent weed problems you can't explain. Roots need oxygen, and too much mulch starves them.
Mulch piled against bark creates a moist microclimate where fungi and bacteria thrive, leading to stem rot, crown rot, and bark degradation that girdles the plant.
Volcano mulching, the practice of heaping mulch into a cone around tree trunks, is especially destructive. It buries the root flare, the transition zone where trunk becomes roots. Trees respond by growing adventitious roots into the mulch pile, which then circle the trunk and eventually strangle it.
The International Society of Arboriculture calls this one of the top preventable causes of tree decline in urban and suburban landscapes.
Even minor errors compound over time. A slightly matted mulch layer becomes hydrophobic, shedding water instead of letting it reach the soil. Fresh wood chips applied to vegetable beds tie up nitrogen as they decompose, leaving plants yellowing and stunted.
Wrong mulch near foundations attracts termites. The stakes are real, the fixes are simple, and catching mistakes early saves you from expensive replanting or pest remediation down the road.
The Right Mulch Depth: Where Most People Go Wrong

The sweet spot for most landscape situations is 2 to 4 inches of mulch measured from bare soil to the top of the layer. Anything shallower offers minimal weed suppression and moisture retention. Anything deeper risks suffocating roots, creating anaerobic pockets, and holding too much moisture against plant crowns.
Measure depth with a ruler or your hand. Most adults' index finger from tip to first knuckle is roughly 2.5 to 3 inches, a handy field gauge. Check in several spots because mulch settles unevenly and delivery piles are rarely consistent.
If you can't see the soil surface through the mulch, you're probably too deep.
Too Much Mulch (The Volcano Problem)
Excess depth is the single most visible error in home landscapes. Homeowners pile 6, 8, even 12 inches of mulch around trees and shrubs, often shaping it into a cone or mound that touches the trunk. This "volcano" looks intentional and tidy, which is why it persists despite decades of extension warnings.
Deep mulch layers create multiple problems at once. The bottom layer turns anaerobic, smelling sour and hosting harmful bacteria. Roots grow upward into the mulch instead of down into the soil, making the plant unstable and vulnerable to drought.
Bark in constant contact with moist mulch softens and rots. Rodents and insects nest in the thick pile, and diseases spread easily in the damp, low-oxygen environment.
The Morton Arboretum reports that volcano mulching contributes to premature mortality in landscape trees across North America. The damage is cumulative and often invisible until the tree is too far gone. If you've been mulching this way for years, you can still correct it by pulling mulch back to the proper depth and exposing the trunk flare.
Too Little Mulch (Wasted Effort)
A 1-inch layer looks like you tried, but it won't do much. Weed seeds still germinate in the gaps. Soil moisture evaporates almost as quickly as bare ground.
The mulch itself dries out and blows away or gets kicked around by foot traffic and animals.
Thin mulch also breaks down faster because it has more surface area exposed to sun and air. You'll be topping it up every few months instead of once a year. If budget or availability forces you to go thin, focus the mulch in a smaller area rather than spreading it so thin it's ineffective everywhere.
For new plantings, especially trees and shrubs, prioritize a proper 3- to 4-inch depth in a ring extending to the drip line (the outer edge of the canopy). That's where feeder roots grow, and where moisture retention and temperature moderation matter most. A thick ring beats a thin blanket every time.
Mulch Placement Errors That Damage Plants
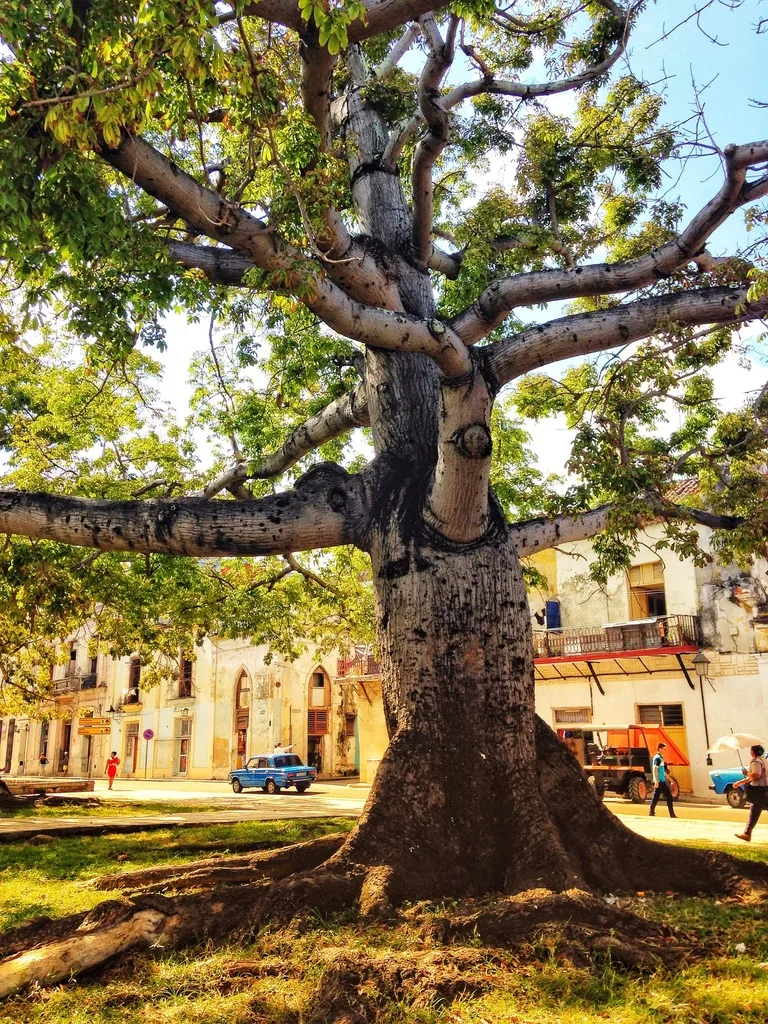
Where you put the mulch matters as much as how much you use. Mulch is a soil cover, not a plant cover. Any time it touches living bark, stems, or crowns, you're creating conditions for rot and pest problems.
Proper placement means leaving clear space around every trunk, stem, and the base of every perennial.
Think of mulch as a doughnut, not a cone. The hole in the middle protects the plant. The ring around it does all the good work: moisture retention, weed suppression, soil improvement, and temperature buffering.
If you're mulching a bed with mixed plantings, you'll need to pull the material back from dozens of individual stems. It takes time, but it's the difference between thriving plants and slow decline.
Piling Mulch Against Tree Trunks and Stems
Direct contact between mulch and bark is an invitation for trouble. Bark is designed to shed water and resist pests when it's dry and exposed to air. Bury it under damp mulch and it softens, cracks, and becomes a highway for fungi, bacteria, and boring insects.
Even a thin layer causes problems over time. Mulch holds moisture against the bark for hours or days after rain, long enough for fungal spores to germinate and penetrate. The damage is invisible at first.
By the time you see cankers, peeling bark, or mushrooms at the base, the infection is often systemic.
Perennials and shrubs are just as vulnerable. Mulch piled against the crown (where stems meet roots) traps moisture and invites crown rot, a common killer of hostas, peonies, daylilies, and young shrubs. Always leave at least 1 to 2 inches of clearance around herbaceous stems and 6 inches around woody trunks.
Burying the Root Flare
The root flare is the flared base of the trunk where it transitions into major roots. On a properly planted tree, the flare is visible at or just above the soil line. Mulch (or soil) piled over it creates the conditions for girdling roots, bark rot, and structural failure.
Many homeowners don't know what a root flare looks like because they've never seen one. If your tree trunk looks like a telephone pole going straight into the ground with no visible widening, the flare is buried. Scrape away soil and mulch until you find it.
You may need to dig down 4 to 6 inches or more if the tree was planted too deep or mulch has accumulated over years.
Once you've exposed the flare, keep it exposed. Mulch should stop at least 6 inches away from the trunk, forming that doughnut shape. The visible flare is a health indicator.
If you can see it, you're doing it right.
Mulching Too Close to Foundations and Siding
Wood mulch against your house creates a moisture bridge and a sheltered habitat for termites, carpenter ants, and other wood-destroying insects. Even if your siding is vinyl or fiber cement, the framing behind it is wood. Mulch piled against the foundation traps water, accelerates rot, and offers pests a direct path inside.
Leave at least 6 inches of clearance between mulch and any structure. In termite-prone regions or wildfire zones, extend that to 12 or even 18 inches and consider using inorganic mulch (gravel, stone) in the immediate foundation zone. Some municipalities now require defensible space standards that prohibit combustible mulch within a certain distance of buildings.
Check your beds after heavy rain. If mulch has washed or been kicked up against the foundation, rake it back. Even a temporary pile creates risk.
Maintain that bare strip as part of your routine filter maintenance throughout the season, especially if your landscape slopes toward the house.
Using the Wrong Mulch Type for Your Situation
Not all mulch works in all situations. The best choice depends on what you're growing, your climate, how long you want the mulch to last, and what you're trying to achieve. A material that's perfect for a perennial bed can be disastrous in a vegetable garden.
A mulch that works in a humid climate can become a fire hazard in an arid one.
Organic mulches (wood chips, bark, straw, leaves, pine needles) break down over time, adding organic matter and nutrients to the soil. That's a benefit in most landscape beds but a problem if you need stable, long-lasting coverage. Inorganic mulches (rubber, stone, landscape fabric) stay put but offer no soil improvement and can create other issues down the line.
Match the mulch to the plant type and bed purpose. Trees and shrubs do well with coarse bark or wood chips that last two to three seasons. Perennials and annuals benefit from finer materials like shredded leaves or compost.
Vegetable gardens need mulch that doesn't tie up nitrogen. Pathways and play areas have different priorities altogether.
Fresh Wood Chips on Annual Beds (Nitrogen Tie-Up)
Fresh wood chips are high in carbon and low in nitrogen, with a C:N ratio often above 500:1. As soil microbes break them down, they consume available nitrogen, temporarily depleting what's left for your plants. This process, called nitrogen immobilization or tie-up, can last several months until the chips age and the nitrogen is released back into the soil.
In a vegetable or annual flower bed, where plants grow fast and need steady nitrogen, fresh chips can cause yellowing, stunted growth, and poor yields. Tomatoes, peppers, and lettuce are especially sensitive. By the time the nitrogen comes back, the growing season is over.
Aged or composted wood chips are a different story. After six months to a year of weathering, the C:N ratio drops, the initial nitrogen demand is satisfied, and the material becomes a slow-release soil amendment. If you have access to free arborist chips, stockpile them for a season before spreading them on beds where you're growing fast-turnover crops.
For vegetable gardens, use straw (not hay, which contains seed heads), shredded leaves, or compost as mulch. These materials have lower C:N ratios and break down quickly without locking up nitrogen. You can also apply a light nitrogen fertilizer at planting time to offset any temporary tie-up if you choose to use fresh chips.
Fine Mulch in Windy or Wet Locations
Finely shredded mulch and small bark nuggets look clean and uniform, but they have drawbacks in certain environments. In windy areas, fine mulch blows away, piling up against fences and structures or disappearing entirely. In wet or poorly drained sites, fine particles pack down into a dense mat that sheds water instead of letting it through.
Once fine mulch mats, it becomes hydrophobic. Water beads up and runs off, leaving the soil underneath bone dry even after a heavy rain. Breaking up the crust with a rake helps temporarily, but the problem returns quickly.
If your site is naturally wet or you have clay soil with slow drainage, choose coarser materials like pine bark nuggets (1 to 2 inches), wood chips, or pine straw that resist compaction.
Wind is predictable. If your beds are on an exposed slope, near open fields, or in a high-wind corridor, go with heavier, chunkier mulch. Pine bark, hardwood chunks, and large stone stay put.
Fine shredded mulch will be halfway across the yard by mid-summer.
Dyed Mulch and Its Hidden Trade-Offs
Dyed mulch (typically red, brown, or black) offers consistent color and hides the fact that it's often made from recycled wood waste, including pallets, construction debris, and old furniture. The dyes themselves are generally safe as of 2026 (carbon-based or iron oxide pigments), but the wood source can be a concern.
Some recycled wood contains chemical treatments, glues, or preservatives that aren't ideal for soil biology. The dye also masks the age and quality of the wood. You can't tell if it's fresh and nitrogen-hungry or aged and ready to use.
Dyed mulch tends to be more expensive, and the color fades within a season or two, leaving you with grayed-out mulch that looks worse than natural bark would.
If appearance is your priority and you're mulching ornamental beds with established woody plants, dyed mulch won't cause harm. Just know you're paying for cosmetics, not performance. For vegetable beds, around sensitive plants, or anywhere soil health is the goal, stick with undyed, locally sourced organic mulch where you can see and smell what you're getting.
Timing and Preparation Mistakes
When you mulch matters almost as much as how you mulch. Spreading material over dry, compacted soil or weed-choked beds wastes time and money. The mulch can't do its job if the ground beneath it is already in poor shape.
Proper prep takes an extra hour, but it makes the difference between mulch that works and mulch that just sits there looking decorative.
Most people buy mulch, dump it, and spread it the same afternoon without checking soil moisture or clearing existing problems. That's backwards. The soil should be moist, loose, and weed-free before the first scoop of mulch goes down.
If you're mulching in spring, do it after the soil warms but before weeds explode. In fall, wait until plants go dormant but before the ground freezes.
Applying Mulch to Dry Soil
Dry soil under mulch stays dry. Mulch is a blanket, and once it's in place, water has to work its way through the layer before it reaches the ground. If the soil is already parched, rain or irrigation may never penetrate deeply enough to rehydrate the root zone.
Water the bed thoroughly a day or two before you mulch. Soak it until water puddles slightly, then let it drain. The soil should feel damp several inches down.
You're essentially locking in that moisture with the mulch layer, giving your plants a head start and ensuring the first rain after mulching actually reaches the roots instead of running off.
This is especially critical for new plantings, drought-stressed trees in hot climates, and beds that have been bare all summer. Mulching dry soil is like putting a lid on an empty pot. It keeps the emptiness locked in.
Mulching Over Weeds Without Clearing First
Mulch suppresses weed seeds by blocking light, but it won't kill established weeds. If you spread mulch over a bed full of dandelions, crabgrass, or bindweed, those plants will push right through. You've just made them harder to pull because now you're digging through 3 inches of wood chips to get at the roots.
Clear the bed first. Pull or hoe annual weeds. Dig out perennial weeds by the root.
For heavy infestations, consider a pre-emergent herbicide or a thick layer of cardboard under the mulch (sheet mulching), but don't skip the clearing step. Mulch is prevention, not cure.
If you're dealing with persistent weeds like nutsedge or quackgrass, mulch alone won't solve it. You'll need to address the root cause, whether that's poor drainage, compacted soil, or an underground rhizome network, before mulch can help.
Wrong Season for Your Climate
In cold climates, mulching too early in spring keeps the soil cold and delays warming, which can slow growth and increase frost damage to early perennials. Wait until the soil temperature reaches 60°F or the date of your last expected frost. Mulching too late in fall, after the ground freezes, offers no winter protection because roots can't benefit from insulation once they're already frozen.
In hot, arid regions, spring mulching conserves the moisture from winter rains and keeps soil cool through the brutal summer months. Fall mulching is less critical unless you're protecting tender plants. Timing depends on your USDA hardiness zone and local rainfall patterns.
Humid climates require careful timing to avoid creating a fungal breeding ground. Mulch when the soil is moist but not waterlogged. Avoid mulching right before a week of heavy rain, which can turn the bed into a swamp and promote disease in plant crowns.
Mulch Maintenance Errors People Ignore
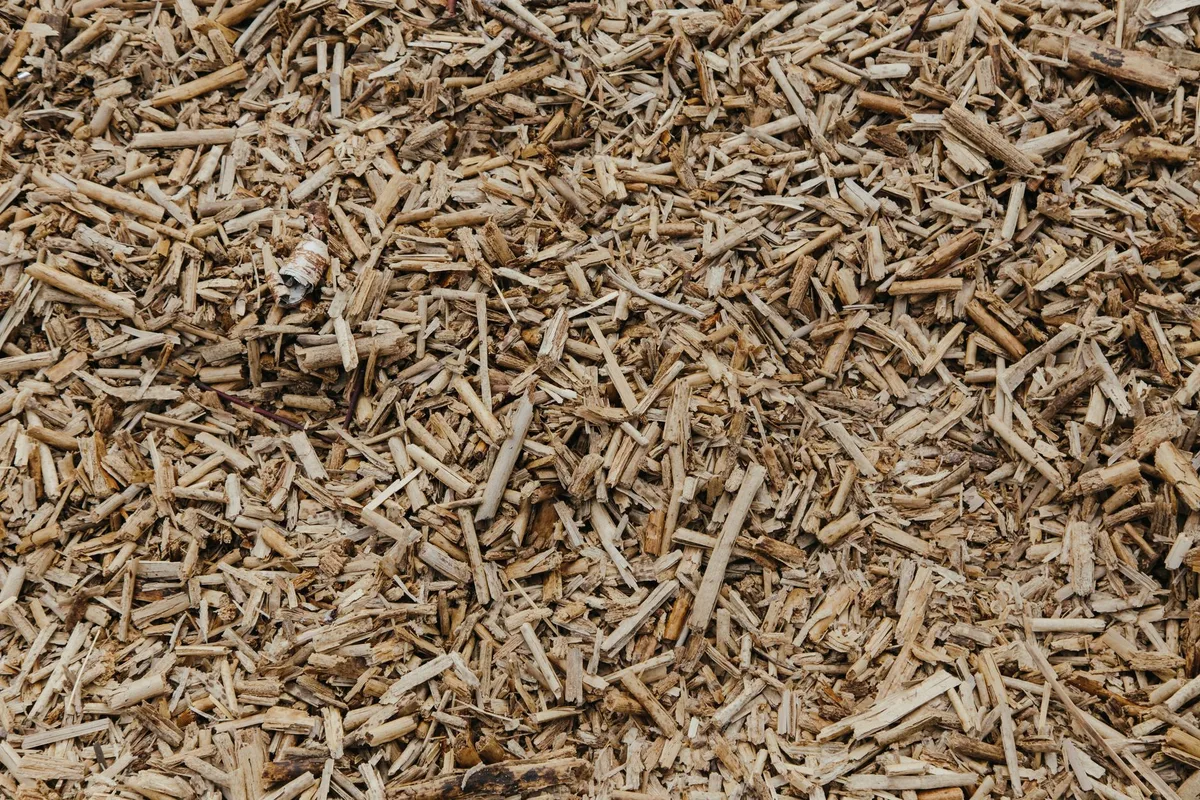
Mulch isn't a one-and-done task. It settles, compacts, blows away, and decomposes. A bed that looked perfect in May can be patchy, matted, or weed-infested by August if you don't check it.
Regular inspection and light maintenance keep mulch functional and your plants healthy.
Walk your beds every few weeks during the growing season. Look for thin spots, areas where mulch has washed away, and places where it's piled up against stems. Rake it level, pull it back from crowns, and top off bare patches.
This takes minutes and prevents the bigger problems that show up when you ignore mulch for months at a time.
Letting Mulch Mat Down and Become Hydrophobic
Fine mulch, especially shredded hardwood, compacts into a dense mat after a few months of rain, foot traffic, and natural settling. The surface forms a crust that water can't penetrate. Rain beads up and runs off.
You can water for an hour and the soil underneath stays dusty.
Break up the crust with a garden rake or cultivator. Fluff the mulch every month or two during the growing season. This restores porosity, lets water through, and prevents the anaerobic conditions that develop in compacted layers.
If the mulch is too far gone, rake it aside, add a fresh inch on top, and mix the old material back in lightly.
Coarse mulches like pine bark nuggets and wood chunks resist matting better than finely shredded products. If you're tired of fighting hydrophobic mulch, switch to a chunkier material next time you refresh the bed.
Never Refreshing the Mulch Layer
Organic mulch decomposes. That's part of its value, but it also means the layer thins over time. A 3-inch application in spring may be 1.5 inches by late summer, especially with fast-decomposing materials like shredded leaves or compost.
Once it drops below 2 inches, weed suppression and moisture retention decline sharply.
Top-dress with a fresh 1- to 2-inch layer annually. Most people do this in spring, but fall works too, especially if you're mulching for winter root protection. You don't need to remove the old mulch unless it's diseased, contaminated, or so decomposed it's turned into soil.
Just add the new layer on top and let the old material finish breaking down underneath.
Check depth with a ruler in several spots before you order or spread new mulch. You may only need a half-inch refresh in some areas and 2 inches in others. Buying too much is wasteful.
Buying too little leaves you with patchy coverage.
Turning Mulch Into Soil Too Early
Some gardeners treat mulch like compost and turn it into the soil every season. That's a mistake unless you're specifically sheet-mulching to build new beds. Mulch belongs on top of the soil, not mixed into it.
Turning woody mulch into the root zone buries partially decomposed material that's still tying up nitrogen, disrupts soil structure, and destroys the beneficial fungal networks that colonize the mulch-soil interface.
Let mulch decompose in place. As it breaks down, it forms a rich humus layer at the soil surface that earthworms and microbes gradually incorporate. This slow, natural process improves soil structure without the nitrogen tie-up and root disturbance that come from mechanical mixing.
If you're converting a mulched bed to a vegetable garden or want to plant annuals, rake the mulch aside, work the soil, plant, then replace the mulch around (not touching) the new plants. Don't till mulch into the planting area unless it's fully composted and looks like soil.
Landscape Fabric Under Organic Mulch: Why It Backfires
Landscape fabric (weed barrier, weed cloth) sounds like a good idea. It's marketed as a long-term weed blocker that lets water through while stopping weeds from growing up. In practice, it creates more problems than it solves, especially under organic mulch.
Fabric prevents organic mulch from breaking down into the soil, which eliminates one of mulch's main benefits. It also traps decomposing mulch on top, creating a slimy, anaerobic layer that smells bad and harbors pests. Weeds still germinate in the mulch layer above the fabric, rooting into the decomposing material, and pulling them means pulling up fabric too.
Within two to three years, the fabric is clogged, torn, and visible, making your beds look worse than if you'd never used it.
Fabric works under inorganic mulch like stone or rubber, where there's no decomposition and the goal is purely decorative or functional (playgrounds, pathways). Under wood chips, bark, or straw, skip it. If you already have fabric in place and want to mulch organically, remove it.
Cut it into strips with a utility knife and roll it up. It's tedious, but your soil and plants will thank you.
For heavy weed suppression without fabric, use thick cardboard or several layers of newspaper as a biodegradable barrier. Top with 3 to 4 inches of mulch. The cardboard smothers existing weeds, decomposes within a season, and doesn't create the long-term problems fabric does.
When Mulch Creates Problems Instead of Solving Them
Mulch is a tool, and like any tool, it can cause harm if misused. Certain combinations of mulch type, placement, and environment create unintended consequences that range from annoying to destructive. Recognizing these scenarios helps you adjust your approach before small issues become expensive repairs or dead plants.
The key is matching the mulch to the context. A material that's perfect for a shady perennial bed can be a fire hazard next to a wooden deck in a dry climate. A depth that works for established trees can smother newly planted seedlings under grow lights.
Think through the risks before you spread.
Attracting Termites Near Structures
Wood mulch near your foundation is an open invitation for subterranean termites. They don't eat the mulch itself, but they tunnel through it to reach the wood framing of your house. The mulch provides cover, moisture, and a stable temperature, everything termites need to establish a colony close to a food source.
Keep a 6- to 12-inch bare zone between mulch and any wooden structure: house, shed, deck, fence. Use inorganic materials like gravel or stone in that buffer zone if you need ground cover for aesthetics or erosion control. In high-risk regions, consider rubber mulch or stone for the entire bed adjacent to structures.
Termite damage is expensive and often not covered by homeowners insurance. The few feet of bare soil you leave around your foundation is cheap insurance. Check the gap seasonally, because mulch migrates, gets kicked around, and washes toward structures during heavy rain.
Creating Disease and Mold Issues
Thick, constantly damp mulch is a breeding ground for fungal pathogens, especially in humid climates or poorly drained sites. Artillery fungus (Sphaerobolus), a common mulch mold, shoots sticky black spores onto siding, cars, and anything nearby. The spores are nearly impossible to remove and look like tar spots.
Crown rot and stem rot thrive when mulch holds moisture against plant tissue. Tomatoes, peppers, hostas, and young shrubs are especially vulnerable. If you're seeing mushrooms, slime molds, or black spore masses in your mulch, the conditions are too wet.
Pull the mulch back, let it dry, and reduce the depth.
Some fungal growth is normal and even beneficial. Mushrooms breaking down wood chips are doing their job. But if the mulch smells sour, looks slimy, or is causing visible plant damage, it's time to replace it or switch to a drier material like pine straw or aged bark.
Encouraging Rodent Nesting
Thick mulch piles, especially around foundations or near garden structures, offer shelter for mice, voles, and other rodents. They burrow into the mulch, nest in the warm, protected layer, and feed on nearby plants, bulbs, and roots. Voles are notorious for girdling young trees and shrubs by chewing bark at or below the mulch line.
Keep mulch depth reasonable, 2 to 4 inches, and avoid piling it into mounds. Clear mulch away from foundations and the base of fruit trees. If rodent damage is ongoing, consider hardware cloth barriers around tree trunks or switching to a less appealing mulch like stone in problem areas.
Rodents also nest in brush piles, wood stacks, and dense ground cover, so mulch isn't the only factor. But reducing thick, undisturbed mulch layers near vulnerable plants cuts down on one more habitat option.
How to Fix Common Mulch Mistakes
Most mulch problems can be corrected without starting over. If you've been volcano mulching for years, your trees aren't doomed. If your beds are hydrophobic or weed-infested, you can turn things around with a few hours of work and some new habits.
Start with a walk-through. Identify which mistakes you're dealing with, then tackle them one bed at a time. Fixing mulch errors is easier than fixing the plant damage they cause.
Correcting Volcano Mulching
Pull the mulch away from the trunk until you can see the root flare. Use a rake or your hands to scrape down to the original soil line. The flare should be visible and the trunk should widen at ground level, not disappear straight into the mulch like a pole.
Spread the excess mulch outward toward the drip line, keeping the depth at 2 to 4 inches in the extended ring. Don't pile it up elsewhere or dump it. Just redistribute it where it can do good instead of harm.
Check the tree again in a few weeks. Mulch migrates, especially after rain or if you have kids or pets. Make flare visibility part of your seasonal inspection routine.
Breaking Up Matted or Hydrophobic Mulch
Rake the surface with a garden rake or bow rake to break up the crust. Work in overlapping passes until the mulch is loose and fluffy again. Water should soak in quickly once you've restored porosity.
If the mulch is too compacted or decomposed to fluff, rake it aside and add a fresh 1-inch layer on top. Mix the old material back in lightly, or compost it and start fresh if it smells sour or looks slimy.
Adjusting Depth and Placement
Measure depth in several spots with a ruler. If you're over 4 inches, rake off the excess and spread it elsewhere or bag it for compost. If you're under 2 inches, top-dress with fresh mulch to bring it back up.
Pull mulch away from all plant stems, tree trunks, and the house foundation. Leave that 1- to 2-inch gap around herbaceous plants and 6 inches around woody trunks. It feels fussy, but it's the difference between plants that thrive and plants that rot.
Decision Guide: Choosing the Right Mulch and Method
Your situation dictates your best mulch choice. Consider what you're growing, your climate, how much maintenance you're willing to do, and what you're trying to achieve. No single mulch works everywhere for everything.
Use this framework to narrow your options. If you're mulching established trees and shrubs, go with coarse hardwood or pine bark for longevity. For vegetable beds, choose aged compost, straw, or shredded leaves to avoid nitrogen tie-up.
For pathways or play areas, consider inorganic options like stone or rubber.
Match Mulch Type to Plant Type
Trees and shrubs handle coarse, slow-decomposing mulches like wood chips and bark nuggets. These materials last two to three seasons and don't need frequent refreshing. Perennials do better with medium-texture mulches like shredded bark or aged leaf mold that break down faster and integrate with soil more easily.
Annuals and vegetables need mulch that won't tie up nitrogen. Use compost, aged manure, straw, or grass clippings (pesticide-free, thin layer). Avoid fresh wood products unless you compensate with extra nitrogen fertilizer at planting time.
Adjust for Your Climate and Soil
Hot, dry climates benefit from thick mulch layers (3 to 4 inches) to conserve every drop of moisture. Light-colored mulches like straw reflect heat. Dark mulches absorb it, which can be good in cool-season gardens but bad in midsummer heat.
Humid climates need coarser mulches that resist matting and allow airflow. Pine straw and bark nuggets work better than fine shredded hardwood, which turns into a wet sponge. In fire-prone areas, keep mulch thin and use stone or gravel within 10 to 15 feet of structures.
Clay soils need mulch that improves structure as it breaks down. Woody materials add organic matter slowly and help aerate compacted clay over time. Sandy soils benefit from compost-based mulches that add nutrients and improve water retention.
Factor in Maintenance and Longevity
If you want low maintenance, choose coarse bark or wood chunks that last multiple seasons and resist compaction. If you're willing to refresh annually, finer mulches like shredded leaves or compost improve soil faster but disappear by fall.
Budget matters too. Free arborist chips are unbeatable for large areas if you can wait six months for them to age. Bagged dyed mulch costs three to four times more per cubic yard and needs replacement every season.
Stone and rubber have high upfront costs but last indefinitely.
Quick Reference: Mulching Best Practices by Situation
| Situation | Best Mulch | Depth | Notes |
|---|---|---|---|
| Established trees | Hardwood or pine bark chunks | 3–4 inches | Keep 6 inches from trunk |
| Vegetable garden | Straw, aged compost, shredded leaves | 2–3 inches | Avoid fresh wood chips |
| Perennial beds | Shredded bark, aged wood chips | 2–3 inches | Pull back from crowns |
| New plantings | Aged compost, fine bark | 2 inches | Water soil first |
| Slopes, erosion control | Pine straw, coarse bark | 3–4 inches | Heavier materials stay put |
| Near foundations | Stone, gravel (inorganic) | 2–3 inches | Leave 6–12 inch bare gap |
| Hot, arid climates | Light straw, aged bark | 3–4 inches | Maximize moisture retention |
| Humid climates | Pine straw, bark nuggets | 2–3 inches | Avoid fine, matting mulches |
Frequently Asked Questions
How often should I replace or refresh mulch?
Refresh organic mulch annually, typically in spring or fall. Add 1 to 2 inches to bring the total depth back to 3 or 4 inches. You don't need to remove old mulch unless it's diseased or severely matted.
Top-dressing lets the bottom layer finish decomposing and feeding the soil.
Can I use grass clippings as mulch?
Yes, but only if the lawn hasn't been treated with herbicides in the past month and you apply clippings in thin layers (half-inch to 1 inch). Thick piles of fresh grass heat up, smell bad, and turn slimy. Let clippings dry for a day before spreading, or mix them with leaves or straw to prevent matting.
Is it OK to mulch in summer?
It's fine to mulch in summer if the soil is already moist. Water deeply first, then apply mulch to lock in that moisture and cool the soil. Avoid mulching during a drought when the ground is bone-dry, because you'll trap the dryness underneath.
Summer mulching works well after a good rain or thorough irrigation.
Why is my mulch growing mushrooms?
Mushrooms are a sign that fungi are breaking down the wood, which is normal and healthy. They won't harm your plants. If you don't like the look, knock them over or rake them out.
Mushrooms appear most often in damp, shaded mulch and usually disappear once the weather dries out.
Should I use mulch or compost?
Compost is a soil amendment, best mixed into the top few inches of soil before planting. Mulch is a protective surface layer that stays on top. You can use finished compost as mulch in vegetable beds and annual plantings, where its nutrients benefit fast-growing crops.
For trees, shrubs, and perennials, use structural mulches like bark or wood chips for longer-lasting coverage.
How do I calculate how much mulch I need?
Measure the bed area in square feet (length times width). Multiply by the desired depth in feet (3 inches equals 0.25 feet). Divide by 27 to convert cubic feet to cubic yards.
For example, a 100-square-foot bed at 3 inches deep needs (100 × 0.25) ÷ 27, roughly 0.9 cubic yards. Round up and order 1 yard.