How to Remove Carbon Buildup From Your Grill 2026
Let's be honest: that black, crusty layer on your grill grates isn't just ugly. It's making your food taste like last week's burnt marinade, and it's causing those annoying flare-ups that torch your burgers. If you've been asking "How do I remove carbon buildup from my grill?" and getting vague advice, you're in the right place.
The good news is that you don't need to replace your grill or spend hours scrubbing with harsh chemicals. The right method depends on your grate material, the severity of the buildup, and the type of grill you own. As of 2026, modern grill materials and cleaning products have made the job easier, but the fundamentals still apply.
Let's walk through exactly what works, what damages your equipment, and how to keep your grill performing like new.
Quick Answer
Heat your grill on high for 15 to 20 minutes with the lid closed. Turn off the gas, then scrub the grates with a grill brush or pumice stone while they're still hot. For heavy carbon, remove the grates and soak them in hot soapy water for 30 to 60 minutes.
Scrub, rinse, dry, then coat with a thin layer of cooking oil. That's the complete process.
First, What Kind of Grill Are You Cleaning?
Before you grab a scraper and go to town, you need to identify what you're working with. The material of your grates determines everything about how you should clean them. Using the wrong method can ruin your grates permanently.
Gas Grills
Gas grills are the most common type in American backyards. They're convenient, heat up fast, and usually have removable grates. That's good news because it means you can take the grates to your sink or driveway for a deep clean.
Most gas grills have either cast iron, stainless steel, or porcelain-coated grates. Each requires different care.
Charcoal Grills
Charcoal grills build up carbon faster than gas because of the direct smoke and ash exposure. The grates are often heavier, and the buildup tends to be thicker and more stubborn. You'll likely need the soak-and-scrub method for these.
The upside is that most charcoal grates are bare metal, so they can handle more aggressive cleaning.
Pellet Grills
Pellet grills operate at lower temperatures, which means the grease doesn't burn off as efficiently. Carbon buildup here tends to be more of a sticky residue mixed with soot. You'll want to be gentler because many pellet grills have porcelain-coated grates or specialty finishes.
Identifying Your Grate Material
This is the single most important step. Here's how to tell what you have:
| Grate Material | Look and Feel | Cleaning Tolerance |
|---|---|---|
| Cast Iron | Heavy, dark, rough texture | Durable but can rust; needs seasoning after cleaning |
| Stainless Steel | Shiny, smooth, lighter | Very durable; handles aggressive scrubbing |
| Porcelain-Coated | Glossy, smooth, usually black or colored | Fragile; chips easily with metal tools |
If you're unsure, check the manufacturer's website or the underside of the grates for a stamp or label. Guessing wrong here can cost you a set of grates.
The Decision Tree: Choosing the Right Method
Not all carbon buildup is the same. A light greasy film needs a different approach than thick, crusty carbon that's been baking on for months. Here's a simple way to decide what to do.
Scenario 1: Light Greasy Film
You can see the metal through the buildup, and it wipes off with your finger. This is just a layer of cooked-on oil. You don't need anything fancy.
Use the high-heat burn-off method. It's quick, takes about 20 minutes, and requires no chemicals. This is your after-every-cook routine.
Scenario 2: Moderate Buildup
The grates have a dark, baked-on layer that's not easily wiped away. You can't see the metal clearly, but there aren't thick chunks or flakes yet.
Use the soak-and-scrub approach. This works best for removable grates. It takes about an hour total, including soak time, but it gets your grates back to near-new condition.
Scenario 3: Thick, Crusty Carbon
This is the "I bought a grill from someone who never cleaned it" situation. The buildup is thick enough to flake off in pieces, and you might see uneven patches where carbon has turned into a hard, black crust.
You need the full deep clean. This might involve a grill stone or pumice block for stubborn spots, plus the soak method. Expect to spend 1 to 2 hours. In extreme cases, replacement might be the smarter move.
Method 1: The High-Heat Burn-Off
This is your first line of defense and honestly the best habit you can build. It works by heating the carbon until it turns to ash, which then wipes off easily. This method is perfect for gas grills because they reach high temperatures quickly.
Step-by-Step Process
Step 1: Turn all burners to high and close the lid.
Step 2: Let the grill heat for 15 to 20 minutes. You're looking for a temperature between 400°F and 600°F. At these temperatures, carbon starts to break down and turn into ash.
Step 3: Turn off the burners and open the lid.
Step 4: Scrub the grates with a grill brush while they're still hot. The carbon should come off easily now. Work in short strokes, focusing on one area at a time.
Step 5: Wipe the grates with a paper towel or cloth to remove the ash residue.
When It Works
The burn-off is perfect for light to moderate buildup that's mostly grease. It's fast, chemical-free, and takes minimal effort. If you use this after every cook, you'll rarely need a deep clean.
When It Won't Work
The burn-off won't penetrate thick carbon chunks. Those need physical scrubbing and soaking. It also won't restore already-damaged grates.
If your grates have rust or chipped porcelain, this method won't fix that.
The Charcoal Grill Version
For charcoal grills, the same principle applies but with a twist. After your coals are glowing and hot, place the grates on the grill and close the lid for 10 to 15 minutes. Then scrub while hot with a brass brush.
Brass is softer than stainless and won't damage cast iron.
Method 2: The Soak-and-Scrub Approach
For grates that need serious attention, this is the most effective method. It works best on removable grates. If your grates are fixed in place, you can still do this with careful work, but it's much easier to pull them out.
Preparing Your Soak
Step 1: Remove the grates from your grill and let them cool completely.
Step 2: Fill a large tub, plastic bin, or your sink with hot water. Enough to fully submerge the grates.
Step 3: Add dish soap. A good squirt of Dawn or similar degreaser works well. For heavy buildup, add a cup of white vinegar to help break down the carbon.
Step 4: Submerge the grates and let them soak for 30 to 60 minutes. Longer is better for tough buildup.
Scrubbing Techniques
After soaking, the carbon should be softened enough to scrub away. Use a nylon brush or a non-abrasive scrub pad. For cast iron grates, a stainless steel brush is fine.
For porcelain-coated grates, stick to nylon or a soft pad.
Here's the critical part: use gentle, circular motions. Don't scrape with brute force. The goal is to lift the softened carbon, not gouge the metal.
If you encounter stubborn spots, re-soak for another 15 minutes.
Rinsing and Drying
Rinse the grates thoroughly with clean water. All soap and carbon residue must go. Then dry them immediately with a clean cloth.
Unprotected cast iron will flash-rust if left wet, so dry it fast and coat it with oil.
The Baking Soda Paste Trick
For really stubborn spots, make a paste of baking soda and water. Use about a 1:1 ratio and stir until it forms a thick paste. Spread it over the carbon spots and let it sit for 15 minutes.
Then scrub gently. The mild abrasiveness lifts carbon without scratching. This works especially well on porcelain-coated grates where metal tools are dangerous.
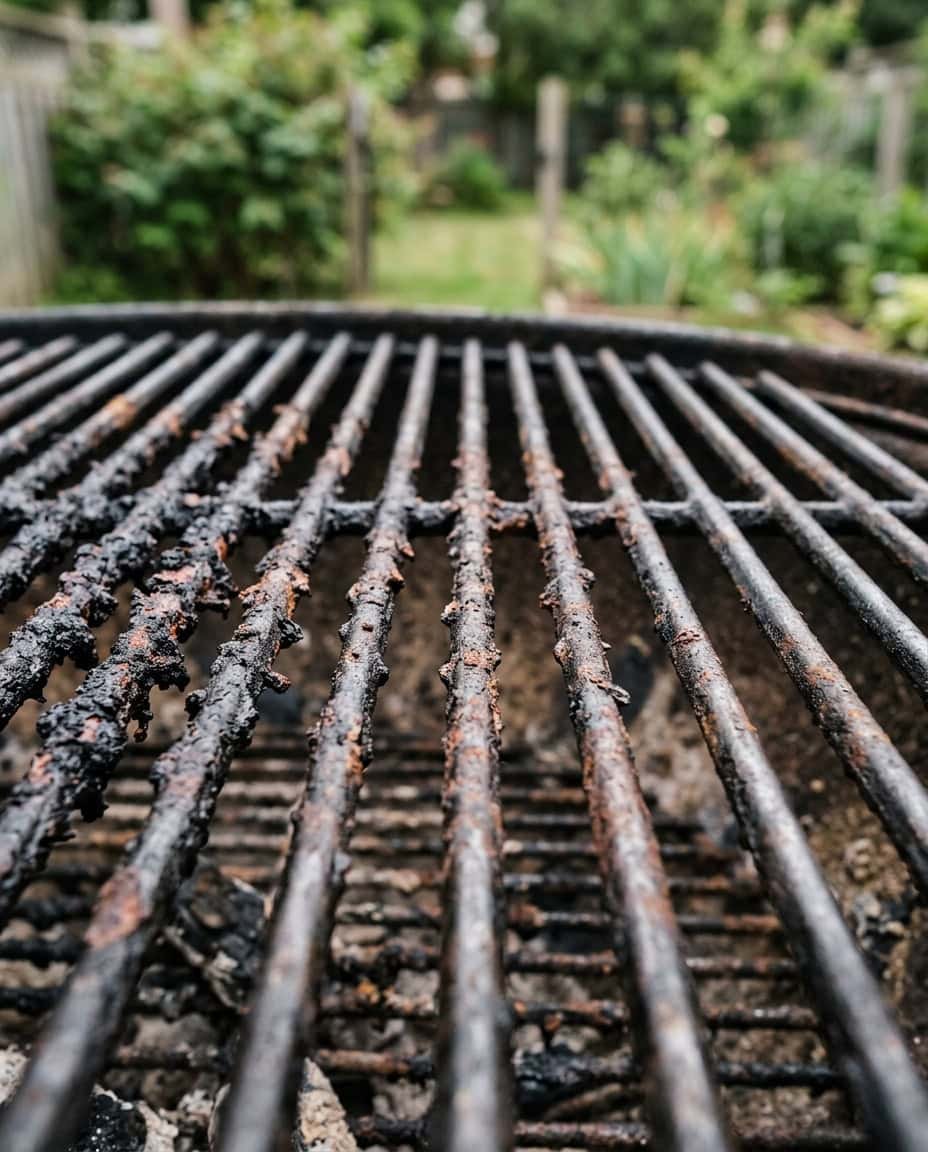
Image source: Bing (Web (fair-use with source credit))
The Wire Brush Question: Should You Still Use One?
This is where the conversation gets interesting. For years, everyone used wire brushes. Then the warnings started making headlines.
Loose wire bristles were ending up in food, causing serious, even life-threatening internal injuries.
What the Research Shows
The Consumer Product Safety Commission has documented cases of wire bristle ingestion from grilled food. The bristles detach from the brush, stick to the grates, and transfer to your burgers. This is a genuine safety concern, not a scare story.
The CDC has also highlighted these cases in food safety reports.
Safer Alternatives
The good news is that you don't need wire brushes to clean your grill. The market has responded with safer options:
| Tool | Material | Best For |
|---|---|---|
| Grill Stone / Pumice | Abrasive stone | Heavy carbon, cast iron, stainless |
| Nylon Brush | Soft nylon bristles | Porcelain-coated grates, light cleaning |
| Bamboo Scraper | Wood | Light residue, safe on all surfaces |
| Steam Cleaner | Water steam | Deep cleaning, all grate types |
The Pumice Stone Advantage
A grill stone is a rectangular block of porous stone that works like an eraser. You rub it on the hot grates and it crumbles slightly as it removes carbon. It's effective, non-toxic, and leaves no bristles behind.
Many grill manufacturers now recommend them over wire brushes. You'll find the best-rated grill stones and top-rated grill cleaning products worth considering for your setup.
Checking Your Current Brush
If you still have a wire brush, check it before every use. Look for loose, bent, or rusted bristles. If you see any, replace it immediately.
When you use the brush, run it under water first to dislodge any weak bristles. Pay attention to the brush over time; a cheap one will shed more.

Image source: Bing (Web (fair-use with source credit))
Mistakes That Ruin Grill Grates
You can be doing everything right and still damage your grates without realizing it. Here are the most common mistakes and how to avoid them.
Scrubbing Porcelain-Coated Grates with Metal
This is the #1 cause of ruined grates. Porcelain is essentially glass baked onto metal. A steel brush or metal scraper will chip and scratch it.
Once chipped, moisture gets between the porcelain and the metal, causing rust and flaking. Use nylon brushes, pumice stones, or baking soda paste only.
Using Oven Cleaner on Cast Iron
Oven cleaner is caustic and strips the seasoning from cast iron. This leaves the metal bare and prone to rust. If you use it, you'll need to re-season the grates completely.
Just avoid it altogether. The soak-and-scrub method works better and is safer.
Ignoring Rust
Rust happens fast on bare cast iron, especially in humid climates. It doesn't just look bad; it destroys the metal over time. After every cleaning, dry your grates thoroughly and oil them.
This is non-negotiable. A thin coat of cooking oil acts as a barrier against moisture.
Waiting Too Long Between Cleanings
The longer carbon sits, the harder it gets. A light cleanup after every cook takes 5 minutes. A deep clean after months of neglect takes hours.
Make the small effort a habit, and you'll never need the big one.
Using the Wrong Chemicals
Bleach is a common mistake. It's corrosive to metal and produces toxic fumes when heated. Stick to dish soap, vinegar, baking soda, or dedicated grill cleaners from a reputable brand.
Read the label to confirm it's safe for your grate material.
Not Oiling After Cleaning
This is the step everyone skips. Cleaning strips some of the protective coating, even on stainless steel. Without a fresh layer of oil, the grates are vulnerable to rust and future carbon bonds more aggressively.
Always oil after cleaning, then heat the grill for a few minutes to set the oil. To keep your grill performing like new, avoid common grill mistakes like this one.