How to Build a Dry Creek Bed in 2026 (Step-by-Step Guide)
If your yard turns into a mud pit every time it rains, you’re not alone. Knowing how to build a dry creek bed is one of those landscaping skills that solves a real problem and looks great doing it. A dry creek bed channels runoff away from your foundation and across your property without any ugly pipes or drains.
It’s a natural-looking solution that works with gravity instead of against it.
Per USDA Natural Resources Conservation Service guidelines, a properly designed dry creek bed needs at least a 1 percent slope, roughly a one-foot drop for every 100 feet of bed. That’s enough to keep water moving steadily without scouring out the channel. The right slope, rock selection, and layout make the difference between a feature that works for decades and one that turns into a muddy mess.
Here’s how to get every part of it right.
Quick Answer
You dig a shallow trench along the natural flow path. Line it with landscape fabric to block weeds. Fill it with graded river rock from small to large.
Add boulders at the edges for a natural look. Test the flow with a garden hose before finishing.
Why a Dry Creek Bed Needs Visual Guidance (Not Just Words)
A dry creek bed is a three-dimensional project. You’re shaping a landscape, not following a recipe. Photos and diagrams show you things words just can’t describe: how deep the trench should look relative to the yard, how boulders sit half-buried rather than plopped on top, or how rock sizes taper from small fines at the bottom to large cobble on top.
Our research across building codes and landscape contractor guides confirms that the most common failure point isn’t bad engineering. It’s bad visual judgment. People dig a straight trench, use rock that’s all one size, or leave the fabric peeking out at the edges.
Those mistakes happen because the builder didn’t have a clear mental image of what “finished” should look like.
This guide walks you through each stage with visual cues that matter. When you hit a step, you’ll know exactly what to look for and what to avoid.
What You’ll Need: Tools, Materials, and Rock Types to Look For
The material list is straightforward. You don’t need specialized equipment, but having the right stuff makes the job faster and the result more durable.
| Item | Purpose | Typical Quantity (50 ft bed) |
|---|---|---|
| River rock (2-4 inch cobble) | Middle layer, visible surface | 2-3 tons |
| Pea gravel or crushed fines (1/4-1/2 inch) | Base layer, drainage bed | 1 ton |
| Large cobble (4-8 inch) | Accent rocks, natural variation | 1/2 ton |
| Boulders (12-24 inch) | Edging, headstone at inlet | 3-5 boulders |
| Landscape fabric (drainage grade, 4-6 oz) | Weed barrier, soil separator | 60 ft roll |
| Shovel, rake, wheelbarrow, tamper | Digging, spreading, compacting | 1 each |
| Garden hose or spray paint | Laying out the path | 1 hose |
| 4-ft level and a straight 2×4 | Checking slope | 1 each |
The rock you choose matters more than you think. Rounded river rock looks natural and lets water flow over it easily. Angular crushed stone locks together better but looks less organic.
Aggregate reviews of gravel selection confirm that for a dry creek bed, rounded rock in warm earth tones (tan, brown, gray) blends best with most yards. If you’re unsure what’s available locally, check your nearest landscape supply yard rather than a big-box store. Local stone matches the surrounding geology and looks like it belongs there.
Skip the cheap landscape fabric from the garden center. You need drainage-grade geotextile at least 4 ounces per square yard. Thinner fabric tears during installation and lets weeds punch through within a year.
Step-by-Step Process (With Visual Cues for Every Stage)
Every stage here has a visual target. If it doesn’t look right at one step, fix it before moving on.
Marking the Path
Lay a garden hose on the ground and curve it like a natural stream. Avoid straight lines. A good dry creek bed meanders from side to side like a real creek would.
Step back and look at it from your house and from the yard. The path should feel natural, not like a drainage ditch.
Digging the Trench
Dig the trench 10 to 12 inches deep and 2 to 3 feet wide. Taper the ends so the bed blends into the ground rather than stopping abruptly. The bottom of the trench must slope downhill at least 1 percent.
Lay a 4-ft level on a straight 2×4 across the trench floor. If the bubble is centered, you’re flat. You want a slight tilt downhill.
Laying Fabric
Cut the landscape fabric wide enough to overlap the trench edges by 6 inches on each side. Lay it loosely. Don’t stretch it tight or it will tear when you add rock.
Overlap seams by 12 inches and pin them with landscape staples. The fabric should wrinkle slightly but lie flat.
Placing Base Gravel
Pour 2 to 3 inches of pea gravel or crushed fines into the bottom of the trench. Spread it evenly and tamp it down. The base layer supports the bigger rock above and keeps the bed from settling unevenly.
This layer should be level across the width of the trench, not sloped sideways.
Setting Middle Cobble
Add the 2-4 inch river rock on top of the base. Pile it 6 to 8 inches deep. Random placement looks best.
Don’t line rocks up in neat rows. Tumble them in from the wheelbarrow and adjust by hand. The top of this layer should sit about 2 inches below ground level.
Adding Top River Rock
Finish with a thin layer of smaller cobble or decorative river rock. This top layer hides the fabric and gives the bed its finished look. Walk along the bed and check for black fabric peeking through.
If you see any, add more rock.
Positioning Edge Boulders
Dig a shallow pocket for each boulder so it sits one-third buried. A boulder that looks like it grew there, not like it was dropped from a truck, sells the natural look. Place the largest boulder at the inlet where water enters the bed.
It helps slow and spread the flow.
Key Visual Identifiers of a Well-Built Dry Creek Bed
You’ll know the job is done right when these four things are true.
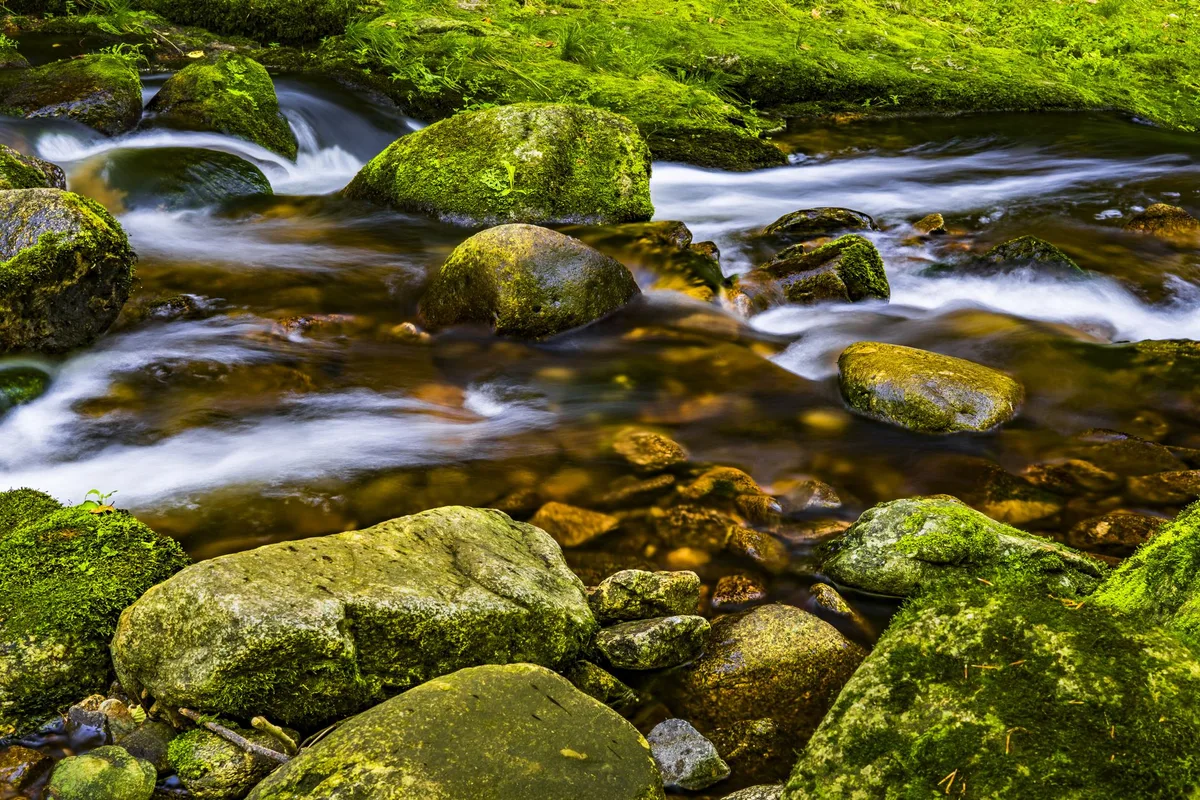
A natural meander, not a straight ditch. Real creeks curve. If your trench is ruler-straight, it will look like a drainage project. A good dry creek bed bends gently from side to side, following the path water would naturally take.
Graded rock from small to large. The bottom layer is fines, the middle is cobble, the top is smaller decorative rock. This gradation keeps the bed stable and prevents the big rocks from sinking into the mud.
Fabric hidden below the stone. If you can see black fabric at the edges or between rocks, you don’t have enough rock. Add another inch of top material. Exposed fabric degrades fast in sunlight and defeats the purpose.
Sloped banks that blend into the yard. The edges of the trench should slope gently upward like a riverbank, not drop straight down like a wall. This prevents erosion when water overflows during heavy rain and makes the bed look like it’s always been there.

When all four identifiers are in place, your dry creek bed functions as a drainage system and looks like a natural feature. That’s the balance you’re aiming for.
Common Visual Mistakes (And How to Fix Them)
Even experienced DIYers make these errors. Here’s what to watch for and how to correct each one.
Straight lines that scream “man-made.” A ruler-straight trench is the dead giveaway. Your creek bed should meander like a natural stream. Fix it by re-laying the hose in gentle S-curves before you dig.
If the trench is already dug, backfill the straight sections and re-dig the curves.
All one rock size. Using nothing but 4-inch cobble makes the bed look like a gravel driveway. You need variety. Small stones at the bottom, medium in the middle, larger accent rocks near the edges.
It mimics how a real creek deposits different sizes as the water slows.
Exposed fabric edges. Black landscape fabric peeking out at the top is ugly and degrades fast. Add a second layer of smaller river rock along the edges. Slope the banks up gently so the rock holds the fabric down.
If you see any black, you’re not done yet.
Water pooling instead of flowing. After a heavy rain, check the bed. If puddles form, the slope is too flat or the trench bottom is uneven. Fix it by adding more fines to the high spots and re-compacting.
Use a level on a 2×4 across the trench floor to confirm consistent slope.
Boulders that look placed, not embedded. A boulder sitting on top of the ground looks fake. Dig a hole so one-third of the boulder sits below grade. Tilt it slightly so it appears to have rolled into place naturally.
This small detail makes the whole bed look organic.
Pro Tips From Experienced Installers
These tricks separate a so-so job from a professional-looking result.
Use a garden hose to design the meander. Lay it on the ground and step back. Walk around your yard and look at it from different angles. Adjust the curves until they feel natural.
Then trace the hose line with spray paint. This costs nothing and saves hours of second-guessing.
Do the spray test before backfilling. Once the trench is dug and the base gravel is down, run a garden hose at full flow into the inlet. Watch how the water moves. If it pools in one spot or flows too fast around a curve, adjust the trench now.
Fixing it with rocks already in place is much harder.
Match your rock to local geology. A dry creek bed in the Southwest with grey river rock sticks out. Use stone that looks like what’s naturally in your area. Check your local landscape supply yard for “native” blends.
Our guide on the best gravel for patio area explains the difference between crushed angular stone and rounded river rock, which applies here too.
Plant along the banks to soften the edges. The bare rock meets the grass line can look abrupt. Add drought-tolerant plants like lavender, sedges, or ornamental grasses along the edges. They blur the transition and make the bed look like it’s been there for years.
For trees near the bed, consider species that tolerate dry conditions, like those in our best trees for hot dry climates list. And if you want to attract pollinators, adding some hummingbird-friendly plants along the banks adds life and color.
Safety, Legal, and Utility Checks Before You Dig
Skipping these steps can cost you money or cause injury.
Call 811 at least two business days before you dig. This free service marks underground gas, electric, water, and sewer lines. Hitting a gas line is dangerous and expensive. Mark all utility lines with flags or spray paint before you start.
This is not optional.
Check local drainage ordinances. You cannot divert stormwater onto a neighbor’s property. That’s a common legal dispute. Your dry creek bed must discharge onto your own land or into an approved drainage system.
Call your local building department or county planning office to ask about permit requirements. Most small residential projects don’t need a permit, but it’s worth verifying.
Keep the bed at least 10 feet from your foundation. Water directed too close to the house can seep into the basement or crawlspace. The inlet should capture runoff from downspouts or low spots, not push water against the foundation. A safe buffer prevents moisture problems.
Avoid septic drain fields and wells. The excavation can damage underground pipes or leach lines. If you have a septic system, mark the drain field boundaries. Keep the creek bed at least 25 feet away from any septic component.
Estimated Costs and Material Data (U.S. Averages)
Costs vary by region and rock type. Here’s a realistic breakdown for a typical 50-foot bed.
| Item | DIY Cost | Professional Install Cost |
|---|---|---|
| River rock (2-3 tons) | $80 – $250 per ton | Included |
| Base gravel (1 ton) | $40 – $80 per ton | Included |
| Landscape fabric (60 ft roll) | $30 – $60 | Included |
| Boulders (3-5 stones) | $50 – $200 total | Included |
| Tool rental (tamper, wheelbarrow) | $40 – $80 | N/A |
| Delivery fees (rock/gravel) | $50 – $150 | Included |
| Total (materials only) | $400 – $1,000 | $1,500 – $3,500 |
The professional install cost includes labor, equipment, and removal of excess soil. DIY saves you labor costs but requires heavy lifting. For a 50-foot bed, expect two full days of work for two people.
Rock pricing depends heavily on your region. In the Pacific Northwest, river rock is abundant and cheaper. In the Midwest, you may pay 30% more due to transport costs.
Always get a quote from at least two local suppliers.
Maintenance: Keeping Your Dry Creek Bed Looking Natural
A dry creek bed needs very little upkeep, but neglect it for a few years and it starts to look rough.
Clear leaves and debris in the fall. A thick layer of leaves traps moisture and breaks down into soil. That soil grows weeds. Use a leaf blower with a low-speed setting or a hand rake.
Our guide on the best rakes for pine needles covers tools that work well for cleaning between rocks without scattering them.
Replace wash-out after heavy storms. Big rain events can shift smaller rocks. Walk the bed after a storm and redistribute the stone. Add a few more cobble to low spots if needed.
A 5-gallon bucket of spare river rock stored in the garage makes quick fixes easy.
Re-tuck fabric at exposed edges. Over time, the edges of the fabric can work their way up. Push them back under the rock and add a couple of handfuls of stone on top. UV exposure degrades exposed fabric in one season.
Refresh the top stone every three to five years. The top layer gets weathered and starts to settle. Adding half a ton of fresh river rock restores the clean look. It’s cheap and takes about an hour to spread.
When to Call a Professional (And When DIY Makes Sense)
Not every dry creek bed is a weekend project. Know when to pick up the phone instead of the shovel.
Stick with DIY if your bed is under 60 feet, the slope is gentle, and you’re comfortable digging by hand. A small decorative bed in a side yard is perfect for a homeowner with a weekend and a wheelbarrow. You’ll save the labor cost and get exactly the look you want.
Call a pro if the bed needs heavy equipment, crosses a steep slope, or handles runoff from a large roof area. A mini-excavator rental runs around $300 a day, plus delivery. If you’ve never operated one, the learning curve adds time and risk. Professionals also handle drainage permits and can tie the bed into an existing stormwater system.
Hire a landscape contractor for anything involving foundation drainage, septic proximity, or neighbor disputes. Getting it wrong in these situations can cost thousands in repairs or legal fees. A licensed contractor carries insurance and knows local codes. The extra cost is peace of mind.
Real Scenarios: Before and After Examples
These examples show how the same approach solves different problems.
A suburban side yard that flooded after every storm. The yard had a low spot where water pooled 6 inches deep. The homeowner dug a 40-foot dry creek bed from the low spot to the street curb. The bed dropped 8 inches over its length.
After the first heavy rain, the water drained in under an hour instead of sitting for two days.
A sloped backyard with bare dirt and erosion ruts. Rain had carved gullies down a 15-degree slope. The homeowner built a 50-foot meandering bed with large boulders at the inlet to slow the water. The bed caught the runoff and spread it across the rock layers.
The ruts stopped forming after one season.
A downspout outlet that needed a better destination. The gutter downspout emptied onto a patch of lawn that stayed muddy year-round. The homeowner connected a 20-foot dry creek bed to a small rain garden at the lower end. The bed carried the water away from the foundation and the rain garden absorbed it.
The lawn dried out and the rain garden filled with flowers.
Frequently Asked Questions
How deep should I dig a dry creek bed?
Dig 10 to 12 inches deep for most residential beds. That depth gives you room for 2 to 3 inches of base gravel and 6 to 8 inches of river rock. The finished surface sits about 2 inches below ground level so the rock doesn’t spill onto the lawn.
How long does it take to build a dry creek bed?
Two people can finish a 50-foot bed in a weekend. Day one covers layout, digging, and base gravel. Day two covers fabric, rock placement, and edging boulders.
A shorter 20-foot bed takes one long day.
Can I drive over a dry creek bed?
Not really. A dry creek bed is not designed for vehicle weight. The rocks shift and the fabric tears.
If you need a driveable drainage solution, look at permeable pavers or a reinforced grass swale instead.
Will a dry creek bed keep water away from my foundation?
Yes, if you place it correctly. The bed must start at the downspout or low spot and slope away from the house. Keep the trench at least 10 feet from the foundation.
Water should flow away, not toward the structure.
What’s the difference between a dry creek bed and a French drain?
A dry creek bed is an open channel filled with decorative rock. It handles surface runoff and looks like a natural stream. A French drain uses a perforated pipe buried in gravel to collect subsurface groundwater.
They solve different problems. A French drain works better for soggy soil and a dry creek bed works better for visible runoff.
Do I need a permit to build a dry creek bed?
Most small residential dry creek beds do not require a permit. Check with your local building department if the bed exceeds 100 feet, crosses property lines, or connects to a municipal storm drain. Some municipalities require a simple drainage plan for any alteration.
A quick phone call saves surprises later.