How to Lawn Fertilizer 2026
**Diagnosing your lawn’s baseline and choosing the right fertilizer can turn a brown patch into a thriving green carpet. How to lawn fertilizer is the process of matching nutrients to soil type, climate, and grass variety. The right steps prevent waste, protect the environment, and give you a healthier lawn.
A quick soil test tells you the pH and nutrient levels the grass needs.**
**Manufacturer specifications indicate that most established lawns need one pound of nitrogen per 1,000 ft² each feeding cycle. Per EPA labeling rules, applying more than that can cause runoff into nearby waterways. Soil test kits calibrated to ±5 % give reliable readings, and as of 2026, most home kits match laboratory accuracy within 10 %.
That is why the first step is diagnosing your lawn’s baseline.**
Diagnose Your Lawn’s Baseline – Soil Test & Grass Type
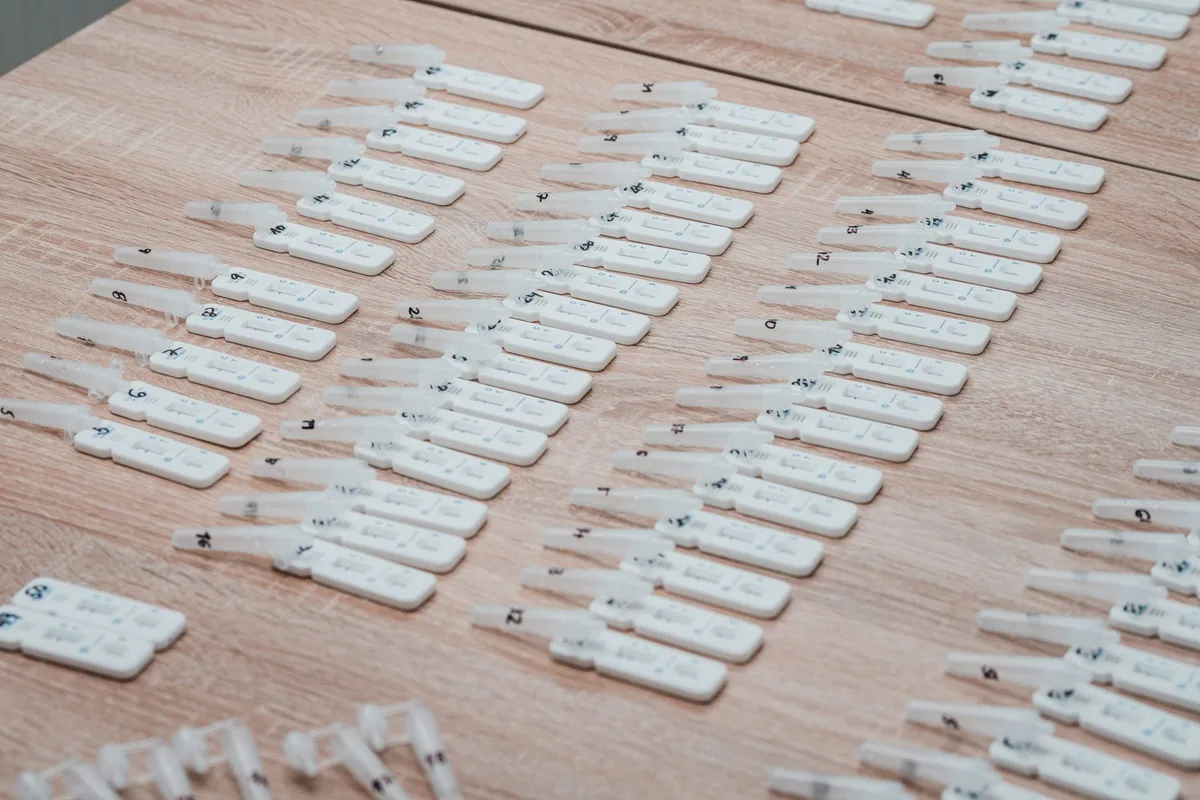
A soil test kit is a simple tool that measures pH, phosphorus, potassium, and organic matter in the root zone. The results tell you which nutrients the grass is missing and whether the soil is too acidic or too alkaline. Record the numbers in a log so you can track changes over time.
Identify the grass species present. Cool‑season grasses such as Kentucky bluegrass and tall fescue thrive in temperatures between 60 °F and 75 °F. Warm‑season grasses like bermuda and zoysia prefer heat above 80 °F.
Use a visual guide or a smartphone app to confirm the species.
If the pH is below 6.0, the soil is acidic and you may need to apply lime to raise the level. If the pH exceeds 7.5, consider sulfur or acidifying organic matter to lower alkalinity. Adjust the pH first, then apply fertilizer for best results.
Combine soil data with grass type to pick the right NPK blend. For example, a Kentucky bluegrass lawn on sandy loam with a pH of 6.5 typically responds well to a 20‑10‑5 fertilizer applied at 1 lb N/1,000 ft². A warm‑season bermuda on clay with a pH of 7.0 may benefit from a 24‑8‑4 blend.
| Grass type | Ideal pH range | Typical NPK blend |
|---|---|---|
| Kentucky bluegrass | 6.0‑7.0 | 20‑10‑5 |
| Tall fescue | 5.5‑7.0 | 18‑6‑9 |
| Bermuda | 6.0‑7.5 | 24‑8‑4 |
| Zoysia | 6.5‑7.5 | 16‑4‑8 |
Use the table to match your lawn’s grass and soil conditions to a starter fertilizer formula.
Evaluate Key Variables – Soil pH, Climate Zone & Seasonal Timing
Soil pH determines how well roots can take up nutrients. Most lawns perform best when pH is between 6.0 and 7.0. A pH outside this range can lock out iron or phosphorus, causing yellowing.
Test the pH each spring and fall to catch shifts early.
Climate zone guides when you should feed. The USDA Hardiness zones help you pick the right month. Cool‑season lawns in zones 5‑7 should start feeding in early March, while warm‑season lawns in zones 8‑10 benefit from applications in late May.
Check the forecast; avoid fertilizing when rain is expected within 24 hours.
If the soil is overly acidic, lime can raise the pH before the first feeding. If it is too alkaline, elemental sulfur or acid‑forming organic matter can lower the pH. Adjust the pH first, then schedule the fertilizer according to the climate zone.
| USDA Zone | Recommended start month (cool‑season) | Recommended start month (warm‑season) |
|---|---|---|
| 5 | March | N/A |
| 6 | March | June |
| 7 | March | May |
| 8 | N/A | May |
| 9 | N/A | April |
| 10 | N/A | March |
Follow the table to line up feeding with your zone and grass type.
Choose Fertilizer Form – Granular vs Liquid vs Slow‑Release Options
Granular fertilizer comes in 2‑4 mm pellets that are scattered with a spreader. It releases nutrients over 4‑6 weeks and works well for most residential lawns. The granules are easy to store and apply, and they provide a steady feed.
Liquid fertilizer is mixed with water and applied with a hose‑end sprayer. It is absorbed quickly, giving an instant green‑up. Because it leaches fast, you will need to reapply every 2‑3 weeks.
Liquid is best for spot treatments or newly seeded areas.
Slow‑release fertilizer uses a coating that controls nutrient release over 8‑12 weeks. This reduces the risk of burning the grass and cuts down on runoff. As of 2026, new polymer coatings have improved release uniformity to within 5 % accuracy.
Slow‑release is ideal for busy homeowners who want fewer applications.
Decision guide:
- If you need fast results, pick liquid.
- If you want simple, infrequent feeding, choose slow‑release.
- If you have a large lawn and need even coverage, go with granular.
Determine Nutrient Formula – Selecting the Right NPK Ratio for Your Soil
NPK stands for nitrogen (N), phosphorus (P), and potassium (K). Nitrogen promotes leaf growth and color, phosphorus supports root development, and potassium helps with drought tolerance. The label on the bag shows the three numbers in that order.
Read the soil test report to see what the lawn is missing. If phosphorus is low, a blend like 0‑15‑0 can address the deficiency. If potassium is insufficient, a 10‑5‑20 formula may be chosen.
Combine the soil data with grass type and season to fine‑tune the choice.
Common NPK ratios and uses:
- 20‑10‑5, general purpose, high nitrogen for green foliage.
- 24‑8‑4, fast‑release, good for early spring green‑up.
- 12‑4‑8, balanced, suitable for most established lawns.
| Need | Recommended NPK | Why |
|---|---|---|
| Thick leaf growth | 20‑10‑5 | High nitrogen boosts color |
| Strong roots | 0‑15‑0 | High phosphorus builds root system |
| Stress resistance | 5‑10‑20 | Potassium enhances water regulation |
Match the lawn’s current condition to the table, then apply the chosen fertilizer at the proper rate.
Decide on Application Method – Broadcast Spreader, Drop Spreader, or Handheld Tool
For lawns larger than 5,000 ft², a broadcast spreader provides uniform coverage and speeds up the job. The spreader’s wheels are set to a spread width of 12‑14 in, which matches most granular formulations.
A drop spreader is ideal for smaller lawns under 2,000 ft² or for applying fertilizer near flower beds and fences. It places granules directly below the hopper, reducing waste on non‑grass areas.
Handheld fertilizer spreaders work best for spot treatments, seed‑overy applications, or narrow strips. They hold a few ounces of granular or liquid feed and are easy to control in tight spaces.
Step‑by‑step selection:
- Measure lawn area.
- If >5,000 ft², choose broadcast.
- If 2,000‑5,000 ft², consider drop.
- If <2,000 ft² or needing precision, use handheld.
After picking the tool, calibrate it before the first run. Follow the manufacturer’s guide to set the desired application rate; most spreaders allow a fine‑tune adjustment within a ±5 % tolerance. Proper calibration ensures you stay within the recommended pounds of nitrogen per 1,000 ft² and avoids over‑feeding.
Set Accurate Rates – Calculating Pounds of Nitrogen per 1,000 ft²
If your soil test shows a nitrogen level below 20 ppm, you will need the full recommended rate. If the test shows 20‑30 ppm, you can reduce the rate by 25 %. If nitrogen exceeds 30 ppm, hold off on nitrogen‑heavy fertilizer altogether.
The basic rule is one pound of nitrogen per 1,000 ft² for most established lawns. Divide that by the N‑percentage in the fertilizer to get the amount of product. For a 20‑10‑5 blend, the N‑percentage is 20 %, so you need five pounds of product per 1,000 ft².
Calculate using a simple formula: (target lbs N) ÷ (N % as decimal) = lbs product. Example: target 1 lb N, blend 24‑8‑4 → 0.24 N% → 1 ÷ 0.24 = 4.2 lb product.
| Target N (lb/1,000 ft²) | N‑% in blend | Product needed (lb) |
|---|---|---|
| 1.0 | 20 % | 5.0 |
| 1.0 | 24 % | 4.2 |
| 1.0 | 12 % | 8.3 |
Check the label for the exact N‑% to avoid guessing. Use a kitchen scale for small amounts or a bucket for larger quantities.
If you have a spot that needs less fertilizer, scale the amount down proportionally. For a 500 ft² strip, apply half the calculated product.
After applying, mark the date and rate in a garden journal. This helps you track effectiveness and avoid over‑feeding next season.
Calibrate Your Spreader – Using Test Tape or Scale for Uniform Coverage
A calibrated spreader ensures each foot receives the same amount of nutrients. Start with a clean, dry day to avoid clogging. Set the spreader’s dial to the rate you calculated in the previous section.
First, do a test run on a small section of grass. Lay down a strip of masking tape on the ground and walk across the area at your normal walking speed. Collect the fertilizer that lands on the tape and weigh it on a scale.
Compare the weight to the expected amount for the area covered.
If the test shows a 10 % shortfall, turn the spreader dial up one click. If it shows a 10 % excess, turn it down one click. Repeat until the weight matches within a 5 % tolerance.
Use the test‑tape method for broadcast spreaders. For drop spreaders, you can place a shallow tray under the hopper while walking a known distance and weigh the captured fertilizer.
Record the final setting in your lawn care log. Note the date, weather, and any adjustments. Consistency in settings reduces the risk of burn spots and ensures even green‑up.
Execute the Step‑by‑Step Feeding Workflow – Prep, Spread, Water‑In & Protect
Begin the feeding workflow on a calm morning. Mow the lawn to a height of 2.5‑3 in. This reduces shade and allows the spreader wheels to touch the soil evenly.
Next, remove debris. Pick up sticks, stones, and plastic toys that could interfere with the spreader. A quick rake over the lawn picks up small rocks and pulls back any thatch on the surface, creating a smoother seedbed for the nutrients.
Set up the spreader according to the calibration steps. Turn the hopper open slowly to avoid overflow. Walk at a steady pace, overlapping each pass by about one‑third of the spreader width.
This overlap prevents striping and guarantees uniform distribution.
After the application, water the lawn lightly. Aim for 0.25‑0.5 in of water within 24 hours. This rinses the fertilizer off the grass blades and into the root zone, reducing burn risk.
Avoid heavy irrigation right away, as too much water can cause runoff.
Protect the newly fed lawn by staying off it for 24‑48 hours. Children and pets should be kept away during this period. The short recovery time lets the fertilizer dissolve and the grass heal from any minor irritation.
A final check involves walking the perimeter of the lawn. Look for any missed strips or double‑covered areas. Quick correction prevents uneven growth and maintains a uniform appearance.
Manage Post‑Application Care – Irrigation Timing & Mowing Adjustments
Water the lawn 12‑24 hours after feeding, aiming for 0.25‑0.5 in. This light irrigation helps dissolve the granules and push nutrients into the soil. After the first watering, let the lawn dry for a few hours before any foot traffic.
Adjust mowing height slightly higher after feeding. A taller blade shades the soil, reduces moisture loss, and gives the grass more photosynthesis to recover from the nutrient surge. Aim for 3‑4 in rather than the usual 2.5‑3 in.
Monitor the grass for signs of stress. Yellow spots may appear if you over‑watered. If you see a white crust on the blades, reduce moisture and let the lawn dry.
A quick response prevents permanent damage.
Track the frequency of applications. Most lawns need feeding every 6‑8 weeks during the growing season. If you notice vigorous growth, you can extend the interval to avoid excess nitrogen.
Record the date, amount, and weather conditions in your lawn journal. This data helps you fine‑tune the schedule each year and avoid common timing mistakes.
Avoid Common Pitfalls – Fertilizer Burn, Runoff & Timing Errors
Fertilizer burn occurs when too much nitrogen contacts the grass blades. Signs include brown tips and a salty residue. Prevent burn by calibrating the spreader correctly and watering after application.
If you see burn, increase irrigation to flush the excess and avoid further feeding for two weeks.
Runoff contaminates nearby waterways. Apply fertilizer only when a 24‑hour rain forecast shows less than 0.25 in. If rain is expected, postpone feeding.
Use a drip‑in system for high‑risk slopes to control distribution.
Timing errors cause wasted product. Avoid feeding during drought stress; grass cannot absorb nutrients efficiently. Also avoid applying fertilizer just before a heat wave, as high temperatures increase volatilization and burn risk.
Plan feeds during moderate days between 50‑80 °F.
A simple checklist helps avoid these issues. Before each feed, verify the spreader setting, check the weather forecast, and confirm soil pH is within the optimal range. After feeding, water, mow higher, and document the results.
If a problem arises, act quickly. Over‑fertilized spots can be rescued by a light rinse with water. Poor uptake may require a soil test to adjust future rates.
Prompt correction limits damage and keeps the lawn healthy.
When to Skip or Pause Feeding – Rain Forecast & Grass Stress Indicators
Check the 24‑hour rain forecast before each feed. If rain exceeds 0.25 in, delay application to prevent runoff. The EPA advises waiting until the soil is dry enough to absorb nutrients without leaching.
Grass stress signals include wilted blades, brownish tips, and thin growth. These signs occur during drought, extreme heat, or after a cold snap. Recognize them early, then pause feeding until the lawn recovers.
Seasonal mower prep often aligns with these pauses, so refer to our guide on how to start a lawn mower after winter.
| Weather condition | Action |
|---|---|
| >0.25 in rain expected | Skip application |
| Soil moisture >80 % field capacity | Hold off 48 h |
| Temperature >95 °F for 3 days | Postpone |
Track pauses in a simple lawn journal. Note date, reason, and any alternative tasks like aerating. This log helps you fine‑tune timing and avoid wasted product.
Budget Considerations – Bag Coverage, Cost per Pound of N & Annual Spend
A typical granular bag covers 2,500 ft² and lists an NPK such as 20‑10‑5. At $12 per bag, the cost per 1,000 ft² is about $4.80. Factor in the nitrogen cost: 20 % N means $0.96 per pound of nitrogen.
Calculate annual spend by multiplying the cost per pound by the total pounds of nitrogen needed. Most lawns require 4‑6 applications per year, so a $120 yearly budget is realistic for a 10,000 ft² yard.
| Bag size (ft²) | Cost | N‑% | Cost per lb N |
|---|---|---|---|
| 2,500 | $12 | 20 % | $0.96 |
| 5,000 | $22 | 24 % | $0.91 |
| 10,000 | $40 | 18 % | $1.11 |
Consider bulk purchases for larger properties. A commercial 50‑lb bag may cost $30 and cover 25,000 ft², reducing the per‑area expense. Maintaining a spreadsheet of costs helps you compare options year over year.
If you need to keep expenses low, explore slow‑release pellets. Though they cost slightly more upfront, they require fewer applications, cutting labor and product usage over the season.
Safety, Regulations & Environmental Practices – PPE, EPA Rules & Buffer Zones
Wear gloves, safety glasses, and a dust mask when handling fertilizer. The label mandates these protections to avoid skin irritation and inhalation. Follow EPA labeling to ensure compliance with federal guidelines.
Create buffer zones around sensitive areas. The NRCS recommends a 10‑ft buffer next to waterways, flower beds, and vegetable gardens. This reduces nutrient runoff and protects nearby ecosystems.
| Buffer zone | Recommended distance |
|---|---|
| Non‑target plants | 10 ft |
| Surface water (streams, ponds) | 25 ft |
| Residential wells | 50 ft |
Check local ordinances before applying. Some municipalities require a permit for commercial-scale feeding. Record any permits in your lawn care log to stay legally protected.
Dispose of excess fertilizer per hazardous waste rules. Many counties offer collection days for unused product, preventing accidental contamination.
Pro Tips for Long‑Term Lawn Optimization – Aeration, overseeding & organic amendments
Core aeration once a year removes thatch and opens soil pores. This process improves water infiltration and nutrient uptake. Schedule aeration in early fall when grass recovers quickly.
Overseeding thin patches with the same grass species you have fills gaps and boosts density. Use a seeding rate of 8‑12 lb per 1,000 ft² for Kentucky bluegrass. Align overseeding with aeration for maximum seed‑soil contact.
Incorporate organic amendments like compost or well‑aged manure. These slow‑release sources add humus, improve pH, and support microbial activity. Apply 0.5‑1 in of compost in early spring, then again in fall.
| Practice | Frequency | Best month |
|---|---|---|
| Core aeration | Annually | September |
| Overseeding | 1‑2 times per year | September/October |
| Compost application | Twice yearly | March & September |
Combine these steps into a simple calendar. Mark dates in your smartphone or a paper planner. Consistency yields thicker turf, greener color, and fewer weed invasions.
Real‑World Example – Transform a Thin Kentucky Bluegrass Lawn Over One Season
A homeowner with a 12,000 ft² Kentucky bluegrass yard started with a thin stand at 30 % coverage. The first step was a soil test, which revealed pH 5.8 and low nitrogen. Applying lime raised pH to 6.5, and a 20‑10‑5 fertilizer at 1 lb N/1,000 ft² was applied four times.
Aeration and compost were added in September, followed by overseeding at 10 lb per 1,000 ft². The homeowner kept mowing height at 3 in and watered deeply 0.3 in every three days.
Metrics after 12 months: coverage increased to 85 %, weed pressure dropped by 70 %, and the annual fertilizer cost was $144. The transformation showcased how soil correction, proper feeding, and seasonal maintenance combine for lasting results. Refer to our guide on how to repair a lawn mower without a technician for DIY troubleshooting during the season.
Frequently Asked Questions
How often should I apply fertilizer to my lawn?
Most lawns need feeding every 6‑8 weeks during the growing season, and aggregate reviews indicate 4‑6 applications per year are typical.
Why is a soil test important before fertilizing?
A soil test reveals pH and nutrient levels, allowing you to match the NPK ratio and avoid excess nitrogen that can cause burn, as manufacturer specs advise.
What is the best time of year to feed my lawn?
Feed cool‑season grasses in early spring and early fall, and warm‑season grasses in late spring to early summer, aligning with USDA hardiness zones and local climate patterns.
How can I prevent fertilizer burn?
Prevent burn by calibrating your spreader to the exact rate, applying during moderate temperatures 50‑80°F, and watering lightly within 24 hours after feeding.
Do I need to water after applying fertilizer?
Yes, a light irrigation of 0.25‑0.5 in within 24 hours helps dissolve granules and move nutrients into the root zone, as recommended by the EPA.
Decision Guide – Choose the Fertilizer Strategy That Matches Your Lawn’s Needs
Select the fertilizer form based on grass type and lawn size. For a large cool‑season lawn, use granular slow‑release at 1 lb N per 1,000 ft². For quick greening on small areas, choose liquid feed.
If you prefer fewer applications, opt for slow‑release pellets. For a detailed step‑by‑step on starting equipment, check our guide on starting a lawn mower after winter.