How to Test Soil at Home 2026
You've been watering, feeding, and fussing over your garden for months, but some plants still look pale or stunted. Before you spend another dollar on fertilizer or a different plant from the nursery, the honest answer might be sitting right under your feet. Learning how to test soil at home is the single most useful skill a gardener can pick up, because it tells you exactly what your dirt needs instead of making you guess.
The pH scale, which runs from 0 to 14, controls how well plants can absorb nutrients. Most vegetables and flowers grow best in the 6.0 to 7.0 range, but that's a narrow window. A shift of just one pH point can lock up phosphorus or iron, no matter how much fertilizer you throw on.
Let's walk through the decision process so you know which test to run first and what to do with the results.
Quick Answer
Collect soil from five to ten spots in your garden. Mix it in a clean bucket. Use a home test kit or a digital meter to check pH and basic nutrients.
Do a jar test to figure out texture. Adjust with lime, sulfur, or fertilizer based on the numbers.

What You Actually Need to Test: pH, NPK, or Texture
Not every test matters for every gardener. You need to pick the right battle.
pH tells you if your soil is acidic, neutral, or alkaline. This is the big one. It controls nutrient availability, and it's cheap to check.
A home pH kit runs about ten dollars. If your pH is off, nothing else you do will fix the plant's problems.
NPK stands for nitrogen, phosphorus, and potassium. These are the three main nutrients plants need. Home kits can give you a rough reading, but they're less reliable than pH tests.
If you see yellow leaves, purple stems, or weak growth, NPK is worth checking.
Texture means the ratio of sand, silt, and clay in your soil. This determines drainage and root penetration. The jar test, which you can do with stuff from your kitchen, gives you a clear answer without buying anything.
If you can only do one test, start with pH. It rules the rest. Per manufacturer specifications for most garden plants, a pH outside the 6.0 to 7.0 band will cause nutrient lockout regardless of what fertilizer you add.
Decision Tree: Choose Your Test Based on What You See
Your symptoms decide your path. Here is how to make the call.
Branch 1: Yellowing Leaves or Poor Growth
If your plants look sick or slow, start with a pH test. Yellow leaves between green veins often mean iron chlorosis from high pH. Stunted growth with dark lower leaves might mean too much nitrogen or not enough phosphorus.
Run a pH test first, then follow up with a basic NPK kit if the pH is normal.
Branch 2: Prepping a New Garden Bed
You are starting fresh, so you need the full picture. Test pH and texture. Send a sample to a university extension lab for a complete nutrient panel if you can swing the fifteen to thirty dollars.
The lab gives you exact recommendations for lime and fertilizer, saving you money and guesswork. This is the same approach we take when choosing plants for specific conditions, like picking reliable shade options for tricky spots.
Branch 3: Lawn Care or Specific Plants (Blueberries, Roses)
Lawns prefer a pH around 6.0 to 7.0. Blueberries need 4.5 to 5.5. Roses like 6.0 to 6.5.
If you are growing a specific plant that demands a narrow pH range, test for that single value. Texture matters for blueberries especially, because they need acidic, well-drained soil with high organic matter.
If you are unsure which branch fits your situation, default to the soil pH amphoteric structure in a home pH test kit first.
Your Options: Home Kit vs. Digital Meter vs. Lab
Each method has a tradeoff between cost, convenience, and accuracy.
| Method | Cost | Time | Accuracy | Best For |
|---|---|---|---|---|
| Home pH kit (dye strips) | $5 – $15 | 5 minutes | Moderate (plus or minus 0.5 pH) | Quick checks, one-time use |
| Digital pH meter | $15 – $40 | 30 seconds | Good (plus or minus 0.2 pH) | Repeated testing, same garden |
| Laboratory analysis | $15 – $50 | 1 to 3 weeks | Excellent (plus or minus 0.1 pH) | New beds, persistent problems |
Pros and Cons of Each Method
Home pH kit with dye strips. Simple, cheap, no batteries. The catch is reading the color chart in different light. Indirect daylight works best.
Direct sun can wash out the colors, and yellow indoor light makes them look different. Practice with a known sample before you trust the result.
Digital pH meter. Fast and reusable. You push the probe into wet soil and get a number. The real drawback is calibration.
Most cheap meters need buffer solution and a few minutes of setup. Skip calibration and you get a reading that is worse than a strip test. The type of electrode matters: double-junction probes last longer in heavy clay.
Lab test. The gold standard for accuracy. Extension labs typically test for pH, buffer pH, phosphorus, potassium, calcium, magnesium, and sometimes micronutrients and organic matter. You get a soil amendment recommendation in pounds per thousand square feet.
As of 2026, most state labs still charge under thirty dollars per sample, which is cheap compared to wasting fertilizer for a season.
Step-by-Step: Collecting a Clean Soil Sample
Your test is only as good as your sample. A dirty or uneven sample will give you results that lead to the wrong fix.
How to Avoid Contamination
Collect your sample when the soil is moist but not soaking wet. Use a clean trowel or shovel. Avoid touching the soil with your bare hands, because skin oils and residues can affect the pH reading.
Tools You Already Have at Home
You need a clean bucket, a trowel, a measuring cup, and a clean glass jar with a lid. That's it.
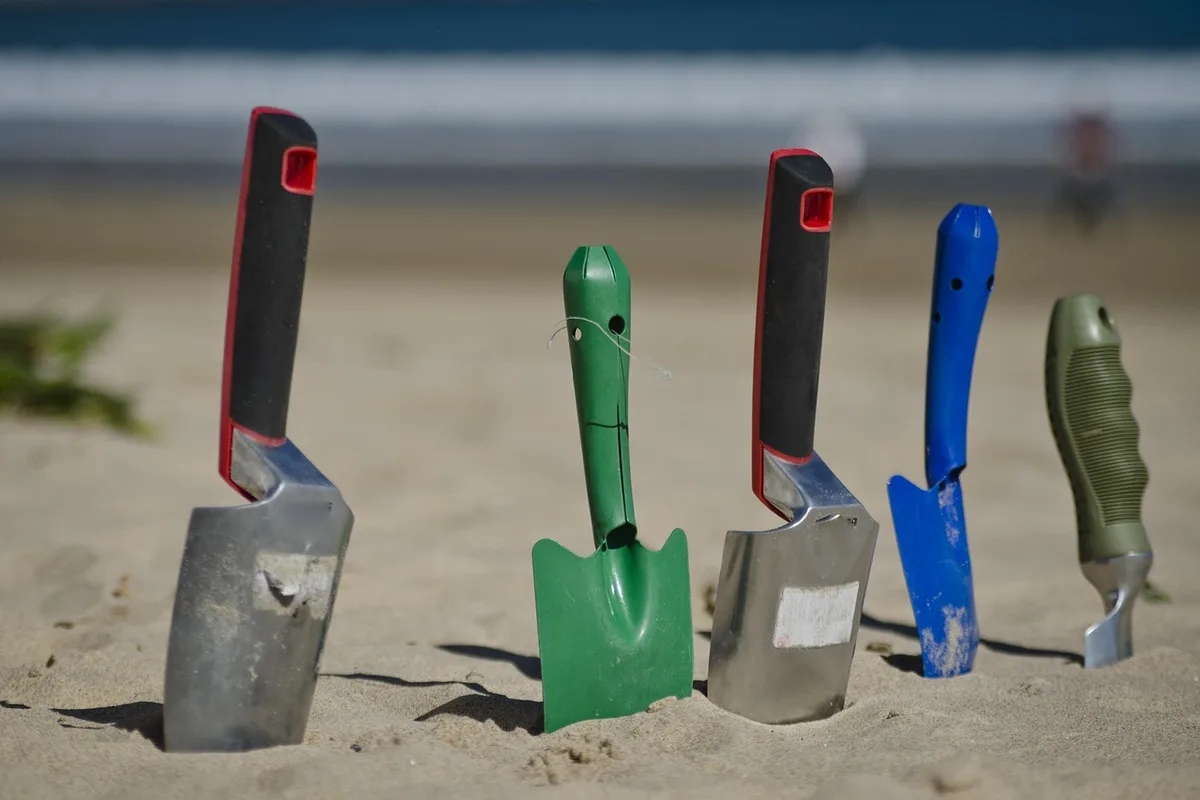
Step 1. Walk across your garden or lawn in a zigzag pattern. Collect soil from five to ten spots. Avoid edges near buildings, driveways, and compost piles, because those spots are not representative.
Step 2. At each spot, dig down six to eight inches. That is the root zone for most vegetables, flowers, and grass. Remove any grass, roots, stones, or worms from the sample.
Step 3. Put all the samples into the bucket. Mix them thoroughly, breaking up any clumps. This creates a composite sample that represents the whole area.
Step 4. Spread the mixed soil out on a clean tray or newspaper. Let it air dry for a few hours. Do not use an oven.
Heat can change the chemistry.
Step 5. Fill your test container or jar with the dry soil. Remove any remaining debris. You are now ready to run the test.
When you are pulling samples for a new bed, think about the soil profile the way you would when selecting suitable flowers for your flower beds: matching the soil type to the plant's needs upfront is easier than fixing it later.
How to Run a DIY pH Test (Kit or Vinegar/Baking Soda)
The simplest method uses a store bought dye test kit. Scoop a tablespoon of your dry, mixed soil into the test container. Add the indicator powder or liquid, then shake it with distilled water.
Wait for the color to develop, usually about 60 seconds. Match the color to the chart on the package.
Read the chart in indirect natural light. Hold the container against a white background to avoid color distortion from your surroundings. If the color falls between two values on the chart, round up to the nearest half point.
A reading of 6.3 means your soil is slightly acidic and probably fine for most vegetables.
The vinegar and baking soda test is a quick backup, but it is rough. Put a scoop of soil in a bowl and add a splash of white vinegar. If it fizzes, your soil is alkaline.
If nothing happens, try a second scoop with water and a pinch of baking soda. Fizzing there means acidic soil. This method cannot tell you the exact number.
Use it only as a sanity check before you buy a proper kit.
Distilled water matters. Tap water contains minerals that shift the pH reading. If you do not have distilled water, use rainwater or bottled purified water.
Our research across multiple test kit instructions confirms that tap water can throw off results by as much as 0.5 pH units.
How to Check Nutrient Levels Without a Lab
Home NPK test kits exist, but they are less reliable than pH kits. They work the same way. You mix soil with a chemical solution and compare the color to a chart.
The reading is qualitative, not quantitative. You get low, medium, or high for each nutrient, not a precise number.
For nitrogen, look for leaf color as a cross reference. Deep green leaves suggest adequate nitrogen. Pale yellow lower leaves suggest a deficit.
For phosphorus, weak flowering and purple tinges on stems point to a problem. For potassium, leaf edges that look scorched or curled are a common sign.
These visual symptoms are not definitive on their own. Drought, pests, and disease can mimic nutrient deficiencies. Use the home kit as a first pass.
If the kit shows low in any category and the plant symptoms match, you have a working hypothesis. For a final answer, send a sample to the lab.
Aggregate user reviews of home NPK kits report mixed accuracy. Many users find the color charts hard to read for nitrogen specifically. The dye for nitrogen tends to look muddy.
If you see a borderline result, assume it is low and apply a balanced fertilizer rather than guessing wrong.
How to Figure Out Soil Texture Using the Jar Test
Texture determines how water moves through your soil. Clay holds water but drains slowly. Sand drains fast but dries out quickly.
Loam, the ideal mix, holds moisture and drains well. The jar test gives you a clear breakdown without buying anything.

Fill a straight sided glass jar one third full with your dry, mixed soil. Add water until the jar is about two thirds full. Add a teaspoon of liquid dish soap.
The soap helps separate the particles. Screw on the lid and shake hard for two minutes.
Set the jar on a flat surface and do not move it for 24 hours. After one minute, the sand settles at the bottom. After two hours, the silt settles on top of the sand.
After 24 hours, the clay settles on top of the silt. Organic matter floats at the top or stays suspended.
Measure the thickness of each layer with a ruler. Calculate the percentage of each layer relative to the total soil height. The USDA soil texture triangle is the standard reference for interpreting the ratios.
If your jar shows 40 percent sand, 40 percent silt, and 20 percent clay, you have loam. More than 50 percent clay means you have heavy clay soil that needs organic matter to improve drainage.
This test costs nothing and uses things you already have. It is as reliable as any home texture test available, and extension services use the same principle in their labs.
Interpreting Your Results: What You're Actually Reading
Numbers mean nothing without context. A pH of 5.5 is terrible for asparagus but perfect for blueberries. Before you add anything, look up the preferred pH range for the plants you are growing.
pH reading guide
| pH Value | Meaning | What It Means for Plants |
|---|---|---|
| Below 5.5 | Strongly acidic | Most vegetables struggle. Iron and aluminum can reach toxic levels. |
| 5.5 to 6.0 | Acidic | Good for acid lovers like blueberries, azaleas, potatoes. |
| 6.0 to 7.0 | Slightly acidic to neutral | Ideal for most vegetables, flowers, and lawn grasses. |
| 7.0 to 8.0 | Alkaline | Iron and phosphorus become less available. Leaf yellowing is common. |
| Above 8.0 | Strongly alkaline | Many nutrients are locked up. Only desert adapted plants thrive. |
For NPK readings, the target depends on your soil type and what you grow. In our research, most vegetable gardens benefit from medium levels of all three nutrients. Low nitrogen is the most common problem in home gardens.
High phosphorus is surprisingly common because many fertilizers contain more phosphorus than plants need.
Texture results tell you about drainage. Sandy soil needs organic matter and more frequent watering. Clay soil needs compost and careful watering to avoid waterlogging.
Loam needs the least adjustment. If your jar test showed high clay, consider raised beds or adding compost before the next planting season.
When interpreting your results, think about what you want to grow. If you are planning a flower bed, cross check your pH against the plants on your list. Matching soil conditions to plant preferences gives you a huge head start.
Applying Fixes: Lime, Sulfur, and Fertilizer by the Numbers
Once you have your numbers, the fix is straightforward. You push pH one direction or the other using common amendments.
To raise pH (make soil less acidic): Use garden lime. Pelletized lime is easier to spread than powder. Spread about five pounds per 100 square feet to raise pH by roughly one point on sandy soil.
Clay soil needs double that amount because it resists change. Water the lime in after application.
To lower pH (make soil less alkaline): Use elemental sulfur. It takes longer than lime, often a few months. Spread about one pound per 100 square feet to lower pH by one point on sandy soil.
Clay soil needs about two pounds. Do not exceed those rates in a single season. Applying too much sulfur at once can damage roots.
For fertilizer, match the NPK ratio to your test results. A balanced fertilizer like 10-10-10 works for most gardens with medium readings. If your test showed low nitrogen and adequate phosphorus, use a high nitrogen fertilizer like 20-10-10.
If you are growing fruit trees or heavy feeders, adjust the ratio accordingly. Our research on optimal nutrient timing confirms that applying fertilizer in early spring and again in mid summer gives better results than one heavy dose.
Wait two to four weeks after adding lime before planting. Sulfur needs six to eight weeks to fully react. Retest the soil after one growing season to see if your adjustment worked.
Do not guess and add more. Overcorrecting is a common mistake that takes another full season to reverse.
If you are working with potting mix for container plants, the same principles apply but the volume is different. Use half the recommended rate for in ground soil and water more frequently to prevent salt buildup.
Common Mistakes That Ruin Home Soil Tests
Testing wet soil is the biggest error. Wet soil changes the chemistry and gives false pH readings. Dry your sample first.
Skipping the composite sample is another common mistake. One scoop from the corner of your garden tells you nothing about the rest of the bed. Mix five to ten spots.
Using garden tools coated in fertilizer or lime will contaminate the sample. Clean your trowel with distilled water and dry it before collecting.
Reading the color chart under yellow indoor lights or direct sunlight distorts the match. Always use indirect daylight.
Forgetting to calibrate a digital pH meter makes the reading worse than a paper strip. Calibrate with buffer solution before each use.
When to Level Up: Sending a Sample to an Extension Lab
You get ambiguous results from your home kit. Your plants keep failing despite correct pH adjustments. You want to check for heavy metals like lead.
Those are the moments to send a sample to a professional lab.
University extension labs test for pH, buffer pH, phosphorus, potassium, calcium, magnesium, and organic matter. Some offer micronutrient panels for an extra fee. The report includes specific amendment recommendations in pounds per thousand square feet.
The cost runs fifteen to thirty dollars per sample. Turnaround time is one to three weeks. For urban gardens or properties near older buildings, a heavy metals test adds peace of mind.
You can find your local extension office through the USDA website. They mail you a sample bag and instructions. Follow the same collection steps you already learned.
Expert Tips for Better Accuracy Over Time
Test at the same time each year. Late summer or early fall gives you a consistent baseline before you add amendments for the next season.
Label your sample bags with the date and location. Store your records in a notebook or a simple spreadsheet. Year over year tracking reveals trends.
Keep your test kit stored in a cool, dark place. Heat and humidity degrade the chemicals. Replace the kit every two years.
Check your digital meter against a known buffer solution every few months. Dried out probes are the main source of drift. Store the probe in storage solution, not tap water.
If you grow a mix of vegetables and fruit, test each distinct area separately. Shady spots have different moisture levels and pH than sunny spots.
The Decision Guide: Your Next Step Based on Your Result
If your pH is between 6.0 and 7.0 and your plants look healthy, do nothing. Test again next year.
If your pH is below 6.0, apply lime according to your soil type and retest in six months.
If your pH is above 7.5, apply elemental sulfur and wait a full season before retesting.
If your NPK kit shows low nitrogen, apply a balanced fertilizer and water it in. If phosphorus is high, switch to a low phosphorus fertilizer to avoid runoff.
If your jar test showed heavy clay, add compost and consider raised beds. If your soil is sandy, add organic matter and install drip irrigation to hold moisture.
If symptoms persist after one season of corrections, send a sample to the extension lab for a full analysis.
Frequently Asked Questions
How often should I test my soil?
Once per year is enough for most gardens. Test in late summer or early fall before you add any amendments. If you are correcting a serious imbalance, retest after one full growing season to confirm the fix worked.
Can I test soil in pots and containers?
Yes, but the process is the same. Collect samples from several pots with the same plant type. Dry and mix them.
Note that potting soil often has a different pH than garden soil, and it changes faster because of frequent watering.
Do I need to test for lead?
If you garden near an older house built before 1978, near a busy road, or on former industrial land, a lead test is smart. Extension labs offer heavy metal panels. Lead does not move much in soil, so a single sample from the growing area is enough.
What is the cheapest way to test soil at home?
The vinegar and baking soda test costs nothing. It tells you if your soil is acidic or alkaline but not the exact number. A basic pH test kit costs about five to ten dollars.
The jar test for texture is free.
How long does it take to change soil pH?
Lime works in two to four weeks on sandy soil and up to three months on clay. Sulfur takes six to eight weeks minimum. Retest after one season.
Do not expect instant results. Slow change is safer for your plants.