How to Fix Yard Drainage 2026
Most yard drainage problems don't need a French drain. They need you to figure out where the water is coming from, where it's going, and why it's stopping in between. Learning how to fix yard drainage starts with reading what your property does during and right after a heavy rain, not with grabbing a shovel and digging trenches in the wrong spots.
The biggest mistake is jumping straight to a solution without diagnosing the actual problem. A soggy lawn near your foundation needs a completely different fix than a wet spot in the middle of your yard, and installing the wrong system wastes hundreds of dollars and weeks of work. According to the USDA Natural Resources Conservation Service, proper drainage requires at least 1% slope (one inch of drop per eight feet of run), and most failed DIY drainage projects miss that target entirely.
Quick Answer
Start by watching your yard during rain to see where water flows and pools. Mark every wet spot with a flag or spray paint. Dig a test hole 18 inches deep in the problem area and fill it with water.
If it drains slower than one inch per hour, you've got poor soil permeability. Surface water that runs toward your foundation needs regrading or a swale. Standing water in low spots usually calls for a French drain or dry well.
Why Yard Drainage Problems Happen (And Why Most Fixes Fail)
Yard drainage fails for three reasons: water has nowhere to go, soil won't absorb it, or the grade sends it the wrong direction. New construction is the worst offender. Builders grade just enough to pass inspection, then heavy equipment compacts the topsoil into a near-impermeable layer.
Clay soil makes everything harder. Water moves through clay at a glacial pace, so even a properly graded yard can stay soggy for days after a storm. Hardpan, a natural cement-like soil layer common across the Southern and Midwestern U.S., blocks water from percolating downward and creates a perched water table that saturates everything above it.
Downspouts dumping water at the foundation is the easiest problem to fix and the one homeowners ignore most often. A single downspout discharges 160 gallons during a one-inch rain on a typical 1,500-square-foot roof. That's enough water to create a small pond if it's released within ten feet of your house.
Most failed drainage projects share the same flaw. They treat the symptom instead of the source. You can install the most expensive French drain system on the market, but if your downspouts are still flooding the area, you've just built an expensive underground swimming pool that will clog within two years.
Read Your Yard First: How to Identify What Type of Drainage Problem You Actually Have
Walk your property during a heavy rain or immediately after. Bring flags, spray paint, or a phone to document what you see. This 20-minute observation tells you more than any drainage consultant can guess from a dry-weather visit.
Surface Water vs. Subsurface Water: They Need Different Fixes
Surface water runs across the top of the ground. You can see it flowing, pooling, or carving erosion channels. This type responds to regrading, swales, and channel drains.
Fix surface drainage first. If you bury a pipe to solve a surface problem, you're asking that pipe to handle far more water than it was designed for.
Subsurface water comes from below. It seeps up through the soil, often from a high water table, an underground spring, or water traveling through a porous layer beneath your yard. Subsurface problems show up as ground that stays wet even when no rain has fallen recently.
You'll see perpetually soggy grass, mud that never firms up, and standing water that reappears hours after you think it's drained.
If your wet spot dries out within 24 hours after rain stops, you've got surface water. If it stays soggy for three to five days, you're dealing with subsurface flow or extremely poor soil permeability.
The 20-Minute Observation Test (Do This During or Right After Rain)
Start at your highest point, usually the front or side of your lot. Watch which direction water flows. Note where it speeds up, slows down, or changes course.
Flag every spot where water pools and doesn't drain within an hour.
Check your foundation perimeter. Water should flow away from the house on all sides. If you see water running toward the foundation or pooling within ten feet of it, that's your priority fix.
Foundation drainage problems can crack slabs, flood basements, and cause tens of thousands in structural damage.
Look for erosion channels. These small gullies show you the path of concentrated flow. Heavy runoff will carve a visible trench over time, especially on slopes.
You'll need to redirect that water and stabilize the soil with gravel for patio area or plantings.
Identify your property's discharge point. This is where water naturally wants to leave your lot, usually the lowest corner or a spot along the street. Every drainage fix you install has to send water toward this point.
If you don't have a good discharge location, you'll need a dry well or infiltration system instead.
Digging Test Holes: What Your Soil Is Telling You
Dig a test hole 18 to 24 inches deep in your problem area. Use a post-hole digger or a sharp spade. The hole should be about six inches wide.
Fill it completely with water and let it drain. Once it's empty, fill it again and time how long it takes to drop one inch.
If water drains faster than one inch per hour, your soil has decent permeability. Your problem is most likely surface water that needs to be redirected. If it drains slower than half an inch per hour, you've got clay or compacted soil, and subsurface drainage will be difficult without amending the surrounding area or routing water far away to better soil.
Check for hardpan while you're digging. If your shovel hits a rock-hard layer 12 to 18 inches down, that's hardpan. You can't drain water through it.
Your only options are to route water horizontally to a discharge point or break through the hardpan layer (which is labor-intensive and only works if the layer is thin).
Look at the soil layers as you dig. If you see a distinct change from dark topsoil to lighter clay within the first foot, you're looking at a typical compacted-subgrade problem from construction. The builder stripped the good topsoil, graded the clay base, then put back a thin layer of topsoil.
Water can't penetrate that clay interface.
Decision Map: Match Your Problem to the Right Solution
Use this section like a flowchart. Find the condition that matches your yard, then follow the recommended fix. Don't skip ahead to "the solution everyone talks about" if it doesn't match your actual problem.
If Water Pools in Specific Low Spots
You've got a grade depression. Water has nowhere to go, so it sits until it evaporates or slowly seeps into the soil. Low spots are common in new construction where fill dirt settled unevenly or around old tree-removal sites.
Best fix: Regrade the low area if it's small (under 200 square feet). Add topsoil to raise the grade and slope it toward your natural discharge point. Compact the fill in thin layers so it doesn't settle again.
If the low spot is large or regrading would create drainage problems elsewhere, install a French drain or dry well to collect the water and route it underground.
When it won't work: If the low spot is at your property's absolute lowest point and you have no downhill discharge, regrading just moves the problem. You'll need a dry well to handle infiltration on-site.
If Water Runs Toward Your Foundation
This is the most dangerous drainage problem. Hydrostatic pressure from saturated soil can crack foundation walls, leak into basements, and cause settling. The fix depends on where the water is coming from.
Check your downspouts first. Extend every downspout at least ten feet away from the foundation using rigid or flexible extensions. This solves 60% of foundation drainage problems and costs under $100. Don't let downspouts discharge onto a patio or driveway that slopes back toward the house.
If regrading is the issue: You need a positive grade that slopes away from the foundation at a minimum 1% pitch for the first ten feet. That's 1.2 inches of drop. Anything less and water will migrate back toward the house through capillary action in the soil.
Regrading typically costs $1,000 to $3,000 depending on lot size and how much dirt needs to be moved.
If water is coming from uphill: Install a curtain drain (also called an interceptor drain) ten to fifteen feet uphill from the foundation. This French drain runs parallel to the house and intercepts water before it reaches the foundation. Route the drain to daylight at the side or back of your property.
If Your Entire Yard Stays Soggy for Days
You're dealing with subsurface water, poor soil permeability, or a high water table. Surface fixes won't help. You need to intercept the water underground and route it to a discharge point or infiltration area with better soil.
Best fix: A curtain drain along the property line where water enters, or a series of French drains that create an underground collection network. All drains must slope continuously to a discharge point. If your water table is truly high (within two feet of the surface), even a French drain won't help much.
You may need to create raised planting beds and accept that the lawn will stay soft during wet seasons.
Test your water table: Dig a hole three feet deep and leave it open overnight after a rain. If it fills with water and stays filled, your water table is high. As of 2026, high water tables are increasingly common in previously dry areas due to shifting precipitation patterns.
If You Have Erosion Channels or Gullies
Concentrated flow is carving a path across your yard. This happens on slopes or where runoff from a large area funnels into a narrow path. Left alone, erosion channels widen and deepen every year.
Best fix: Redirect the flow into a constructed swale or install a French drain along the eroded path. If the slope is steep (over 10%), consider a surface channel drain with a grate or a dry creek bed lined with river rock to slow the water and prevent further erosion. Stabilize the surrounding soil with groundcover or mulch.
When you need professional help: If the erosion is undercutting a retaining wall, driveway, or foundation, don't DIY this. A structural failure will cost far more than hiring a grading contractor to fix it properly.
If Downspouts Are Dumping Water at the Foundation
This is the easiest fix and should be your first priority regardless of other drainage problems. Every downspout on your house should discharge at least ten feet from the foundation, and the discharge point should be on ground that slopes away from the house.
Rigid extensions: PVC or corrugated pipe buried just below the surface. Run the pipe to daylight or connect it to an underground drainage system. Slope the pipe at least 1% so it drains completely and doesn't freeze in winter.
Pop-up emitters: These spring-loaded caps sit flush with the lawn when dry and pop up to release water when flow starts. They cost $15 to $40 each and work well for routing downspouts across a lawn to a lower area. Make sure the emitter sits on ground that slopes away so water doesn't pool around it.
Splash blocks alone don't work. They just move water three feet from the house. That's not far enough.
Fixing Surface Drainage: Regrading, Swales, and Channel Drains
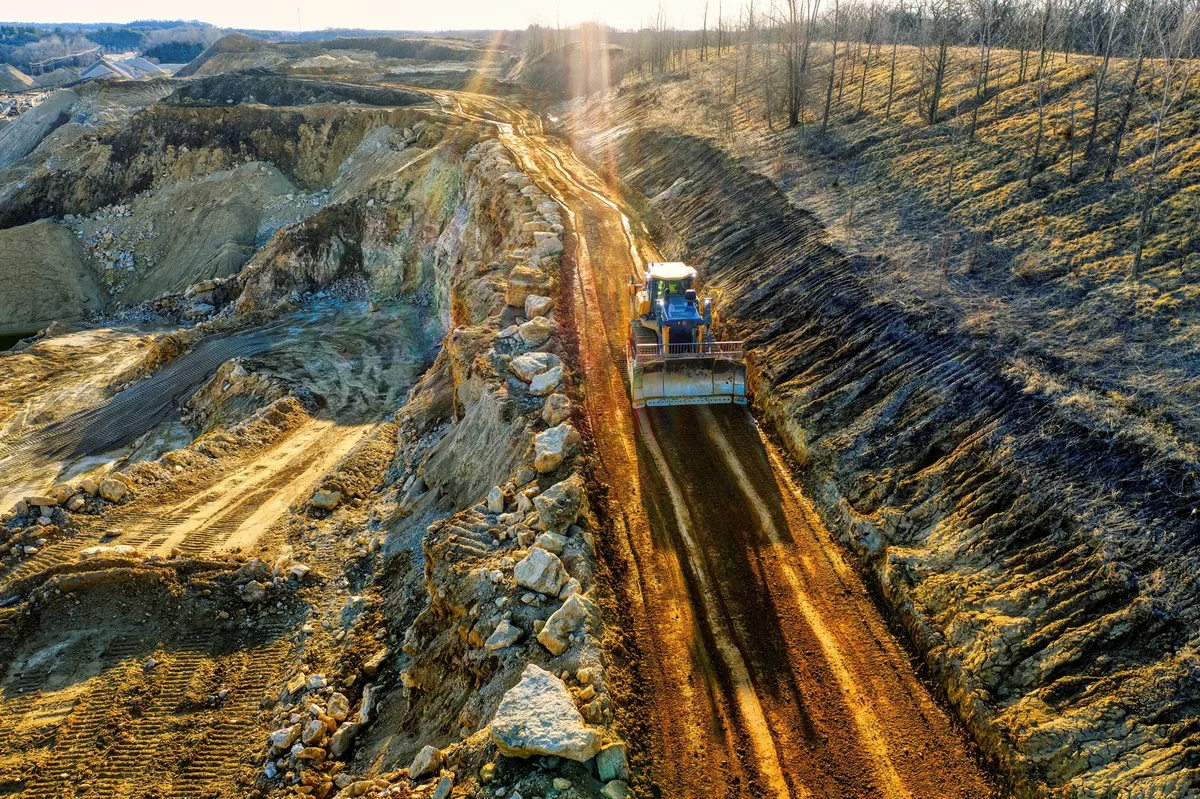
Surface drainage moves water across the top of the ground using gravity and slope. These fixes are often cheaper and easier than subsurface systems, and they should always be your first option if water is running on top of the soil.
When Regrading Makes Sense (And When It Doesn't)
Regrading reshapes the soil surface to create positive drainage away from structures and toward a discharge point. It works when your problem is limited to a specific area and you have a clear place for water to go.
Minimum slope requirements: You need 1% slope (1 inch per 8 feet) for turf areas and 2% slope (1 inch per 4 feet) near foundations. Anything flatter and water won't move reliably. Use a 4-foot level and a tape measure to check your current grade before you start moving dirt.
When to regrade: If you have a shallow depression, a flat area that pools water, or a slope that runs the wrong direction within ten feet of your foundation. Small regrading projects (under 500 square feet) are DIY-friendly if you don't mind moving dirt with a wheelbarrow. Larger projects need a skid-steer or compact excavator.
When not to regrade: If the problem area is huge, if you'd have to remove mature landscaping, or if regrading would create new drainage problems for your neighbor. You also can't regrade if it would bury your home's siding, cover foundation vents, or raise soil above the level where your home's moisture barrier ends. Most building codes require at least six inches of clearance between soil and wood siding.
Regrading costs $1,000 to $3,000 for most residential lots. Add soil testing and erosion control for sloped areas. Spreading best plants for a bedroom or other groundcovers helps stabilize freshly graded soil.
How to Build a Simple Swale to Redirect Water
A swale is a shallow, vegetated channel that redirects water across your property. It's the easiest surface drainage fix for moving water from one area to another without digging deep trenches or installing pipe.
Layout: Mark the path with spray paint or a garden hose. The swale should start at the problem area and follow the natural contour of your lot to a discharge point. Aim for a gentle curve rather than sharp angles.
Dimensions: Dig a shallow U-shaped channel 12 to 18 inches wide and 4 to 6 inches deep at the center. The sides should slope gently so they're easy to mow over. You're not building a ditch.
The goal is to guide water, not contain it.
Slope: The bottom of the swale needs to slope continuously downhill. Check it with a 4-foot level every 8 to 10 feet. Even a flat spot will cause water to pool and turn your swale into a mud trough.
Shoot for 1% to 2% grade.
Finish: Seed the swale with a water-tolerant grass mix or line it with river rock if flow is heavy. Grass is better for gentle flow because it slows the water and filters sediment. Rock works for faster flow that would erode grass.
Swales work best on lots with at least a slight natural slope. They don't work if your yard is dead flat or if the problem area is lower than any possible discharge point.
Installing a Channel Drain for Driveways and Patios
Channel drains (also called trench drains) are surface drains with a grate on top. They're perfect for collecting water from paved areas like driveways, patios, and walkways. Water enters through the grate and flows through a built-in channel to an outlet pipe.
Where to install: At the low point of a paved surface, across the end of a driveway that slopes toward the garage, or at the base of a sloped walkway. The drain sits flush with the pavement so you can mow or drive over it.
How it works: The channel is a long U-shaped trough, usually polymer or galvanized steel. One end connects to a discharge pipe (typically 4-inch PVC) that routes water to a safe outlet. The grate snaps or bolts on top to keep debris out while letting water through.
Installation: Cut a trench across the paved area using a concrete saw or rent a walk-behind saw. The trench needs to be wide and deep enough for the channel plus a gravel base. Set the channel on a 2-inch gravel bed, making sure it slopes toward the outlet (1% minimum).
Connect the outlet pipe and backfill around the channel with concrete or mortar. Install the grate last.
Channel drains cost $100 to $300 for a 10-foot section plus installation labor. They're more expensive than a simple swale but necessary for hard surfaces where you can't redirect water by regrading.
Installing Subsurface Drainage: French Drains, Dry Wells, and Curtain Drains
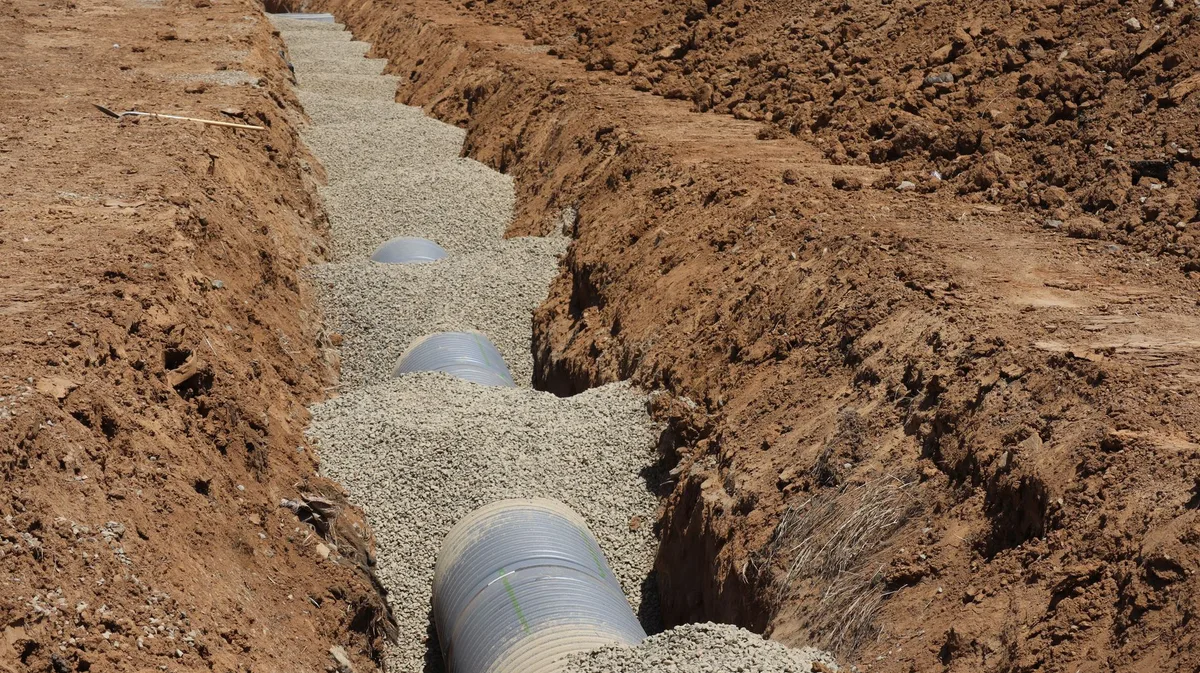
Subsurface drainage intercepts water below ground and routes it to a discharge point through buried perforated pipe surrounded by gravel. These systems handle water that surface fixes can't touch.
How a French Drain Actually Works (And When It Won't)
A French drain is a gravel-filled trench with a perforated pipe at the bottom. Water seeps into the gravel, enters the pipe through the perforations, and flows by gravity to an outlet. The gravel acts as a filter and provides a path for water to reach the pipe quickly.
French drains only work when you have continuous downhill slope to a discharge point. If your yard is flat or the problem area is at the lowest point on your property, the pipe has nowhere to drain. You'll need a dry well or sump pump system instead.
The pipe must slope at least 1% along its entire length. That's one inch of drop for every eight feet of run. Check the slope every ten feet as you install.
Even a single flat spot will create a low point where water sits and sediment accumulates.
Step-by-Step: Installing a French Drain the Right Way
Call 811 at least two business days before you dig. Utility locates are free and legally required. Hitting a gas line or fiber-optic cable will cost you thousands and potentially injure you.
Dig your trench 18 to 24 inches deep and 12 to 18 inches wide. Wider trenches hold more gravel and drain faster, but they're harder to dig. Keep the bottom of the trench smooth and sloped continuously toward the outlet.
Line the trench with landscape fabric, leaving enough excess on each side to wrap over the top later. Use non-woven geotextile fabric rated for drainage applications, not the thin weed barrier sold for flower beds.
Add two to three inches of 3/4-inch drainage rock to the bottom of the trench. Rake it smooth and recheck your slope. Lay the perforated pipe on top of the gravel with perforations facing down.
Standard 4-inch corrugated pipe works for most residential applications.
Cover the pipe with gravel until you have at least two inches over the top. Fold the fabric over the gravel to create a burrito wrap that keeps soil from migrating into the stone. Backfill with topsoil and replace sod.
When to Use a Dry Well Instead
A dry well is an underground pit filled with gravel or a prefabricated perforated tank. Water flows into the well through an inlet pipe and slowly percolates into the surrounding soil. Use a dry well when you don't have a good surface discharge point or when local regulations prohibit routing water off your property.
Dry wells only work in soil with decent permeability. If your percolation test showed drainage slower than half an inch per hour, a dry well will fill up and overflow during heavy rain. You need sandy or loamy soil for reliable infiltration.
Typical residential dry wells are three to four feet deep and two to three feet in diameter. You can dig one by hand and fill it with drainage rock, or buy a prefab plastic unit that holds more water in less space. Connect your French drain or downspout to the well's inlet.
Curtain Drains for Slope and Hillside Problems
A curtain drain runs perpendicular to the direction water flows. It intercepts subsurface water traveling down a slope before it reaches your foundation or yard. Install the drain ten to twenty feet uphill from the area you're protecting.
Curtain drains are longer than typical French drains, often 50 to 100 feet. They follow the contour of the slope at a constant elevation, then turn downhill at one or both ends to route water to daylight. The outlet must be lower than the lowest point of the curtain section.
Dig the trench at least 24 inches deep to intercept water moving through the soil. Use 4-inch or 6-inch perforated pipe depending on how much water you're handling. Slope the outlet legs at 2% if possible to move water quickly away from the curtain.
The Critical Details Most DIYers Get Wrong
Slope Requirements: Why 1% Matters More Than Pipe Size
You can install the most expensive drainage pipe on the market, but if it's not sloped correctly, it won't drain. Water needs gravity to move through the pipe. Without slope, water sits in low spots and the pipe clogs with sediment.
Use a 4-foot level and a tape measure to check slope every eight to ten feet as you dig. One percent slope equals one inch of drop per eight feet, or 1.5 inches per 12 feet. Mark your target depth at each measurement point with spray paint on the trench wall.
If you can't get consistent slope because of obstacles or terrain, increase the pipe size to 6-inch. Larger pipe moves more water at a lower velocity, so it's slightly more forgiving. It's still not a substitute for proper grading.
Pipe Placement: Perforations Up or Down?
Perforations go down. Water enters the pipe from below as it seeps through the gravel bed. The solid top half of the pipe stays above the waterline and provides structural strength.
Some installers argue for perforations up, claiming it prevents soil from entering the pipe. That's what the gravel and fabric are for. Perforations down allows the pipe to collect water faster and sit lower in the trench where water naturally accumulates.
Gravel Type and Fabric Wrapping: What Actually Works
Use 3/4-inch crushed drainage rock, not pea gravel or river rock. Crushed stone has angular edges that interlock and resist compaction. Round stone shifts under load and doesn't create the stable voids water needs to flow through.
Wrap the gravel layer completely with non-woven geotextile fabric. Don't skip this step. Fabric keeps soil particles from migrating into the gravel and clogging the voids.
Without it, your drain will work for a year or two, then slowly stop as silt fills the stone.
Where to Discharge the Water (And Where You Legally Can't)
Your drain must outlet to a safe location where water won't cause erosion, flooding, or damage. Good discharge points include a slope that drains away from all structures, a drainage ditch, a dry creek bed, or a municipal storm drain if your locality allows it.
You cannot discharge onto your neighbor's property without permission. You cannot drain into a septic system or sanitary sewer. Most jurisdictions also prohibit draining directly into streams or wetlands without a permit.
Use a pop-up emitter at the outlet if you're daylighting onto a lawn. The emitter keeps debris and animals out of the pipe when water isn't flowing. Place it on ground that slopes away so discharged water doesn't pool.
Materials Breakdown: Pipe, Gravel, Fabric, and Catch Basins

4-Inch vs. 6-Inch Pipe: When Size Matters
Four-inch pipe handles most residential drainage applications. It moves roughly 15 gallons per minute at a 1% slope, enough for typical yard drainage and downspout connections. Use 4-inch pipe for French drains under 100 feet, single-downspout runs, and anywhere you're collecting water from a small area.
Six-inch pipe moves about 35 gallons per minute at the same slope. Use it for curtain drains protecting large areas, when you're combining multiple downspouts into one line, or when slope is marginal and you need extra capacity. The pipe costs about 50% more than 4-inch and requires a wider trench.
Corrugated vs. PVC: Which Pipe to Use Where
Corrugated plastic pipe (the black flexible kind) costs less, cuts easily with a handsaw, and bends around obstacles without fittings. It's the standard choice for residential French drains and downspout extensions. The ribbed interior does create slightly more friction than smooth pipe, but the difference is negligible at residential flow rates.
Rigid PVC drain pipe is smooth inside, which moves water faster and resists clogging better. Use it for long runs over 100 feet, for any pipe that will be under a driveway, or when you need to maintain precise slope in difficult terrain. PVC costs about twice as much as corrugated and requires glued fittings at every turn.
Drainage Rock Sizes and Why Pea Gravel Isn't Always the Answer
Three-quarter-inch crushed stone is the standard for French drains. The angular shape creates stable voids that resist compaction. Water flows through easily and the stone filters out large debris before it reaches the pipe.
Pea gravel (small round stones) compacts under load and doesn't provide good void space. Use it only for surface applications like decorative dry creek beds. River rock (larger round stones) works for visible drainage features but costs more than crushed stone with no performance benefit underground.
What It Costs: DIY vs. Professional Grading and Drainage
DIY French drain materials run $200 to $800 for a typical 50-foot installation. That includes 50 feet of 4-inch perforated pipe ($25 to $40), two tons of 3/4-inch drainage rock ($60 to $100 delivered), 50 feet of landscape fabric ($20 to $30), and a pop-up emitter ($15 to $30). Add tool rental if you don't own a good spade and wheelbarrow.
Professional installation costs $25 to $35 per linear foot for a standard French drain, or $1,250 to $1,750 for that same 50-foot run. The premium buys you proper grading, utility locates, cleanup, and a warranty. Professionals also have compact excavators that make the work faster and less destructive to your lawn.
Regrading projects cost $1,000 to $3,000 depending on lot size and how much dirt needs moving. Catch basins run $100 to $300 per unit plus installation labor. Dry wells cost $300 to $800 for a prefab unit or $150 to $300 if you build one with gravel and fabric.
When to Call a Professional (And What They'll Do That You Can't)
Hire a pro if water is threatening your foundation, if you need to move more than ten cubic yards of soil, or if the problem involves a retaining wall or slope stability. Foundation damage costs tens of thousands to repair. Spending $2,000 on proper drainage now is cheap insurance.
Professionals have laser levels and transits to verify slope over long distances. They'll run a camera through existing pipes to find clogs or damage you can't see. They also carry liability insurance, which matters if something goes wrong during excavation.
Call a pro if your drainage problem persists after you've tried surface fixes. You might be dealing with a high water table, an underground spring, or a broken footing drain that's flooding your yard from below. Diagnosing these issues requires experience and sometimes equipment like a backhoe to expose the problem.
Maintenance: Keeping Your Drainage System Working Long-Term
Flush your French drains every two to three years. Run a garden hose into the cleanout or inlet for ten minutes and watch the outlet. If water backs up or flows slowly, you've got a clog.
Use a drain snake or rent a pressure washer with a sewer jetting attachment to clear it.
Check pop-up emitters and outlets twice a year. Remove leaves, grass clippings, and any debris blocking the opening. Make sure the emitter still pops up freely when you run water through the system.
Inspect your yard after heavy rain. New wet spots or standing water where you didn't have problems before means something has changed. A pipe may have crushed, a connection could have separated, or tree roots might be blocking flow.
Keep downspout extensions clear. Leaves and shingle grit accumulate at the outlet and can block flow completely. A clogged extension sends hundreds of gallons back toward your foundation during a storm.
Before You Dig: Utility Locates, Permits, and Drainage Laws
Call 811 at least two full business days before you dig anywhere on your property. The service is free and connects you to all utilities serving your address. They'll mark gas, electric, water, sewer, phone, and cable lines with flags or spray paint within a few days.
Check with your local building department about permit requirements. Most jurisdictions don't require permits for simple French drains or drainage swales, but some do if you're regrading near a property line or discharging to a municipal system. Fines for unpermitted work can reach thousands of dollars.
You cannot direct drainage onto a neighbor's property. That's true even if the water naturally flowed that direction before you installed your system. If your only discharge option crosses a property line, get written permission from your neighbor and consider consulting a civil engineer to design a shared system.
HOA covenants sometimes restrict drainage work, especially if it changes the appearance of your front yard or involves removing trees. Review your CC&Rs before you start, and submit plans if required.
Frequently Asked Questions
How deep should a French drain be?
Dig 18 to 24 inches deep for most residential French drains. This depth intercepts subsurface water moving through the soil while staying above most utility lines. Go deeper (24 to 36 inches) only if you're installing a curtain drain on a slope or trying to intercept a deep water source.
Can I use solid pipe instead of perforated?
Use solid pipe only for the outlet section after the drain has collected all the water. The collection zone where water enters must be perforated pipe surrounded by gravel. Solid pipe works from the last catch basin or cleanout to the final discharge point.
How long does a French drain last?
A properly installed French drain lasts 20 to 30 years before it needs major maintenance or replacement. Poor installation, missing fabric, or inadequate slope can cut that lifespan to 5 to 10 years. Tree roots and heavy sediment load are the most common causes of premature failure.
Do I need a permit to fix yard drainage?
Most simple drainage projects like installing a French drain, extending downspouts, or building a swale don't require permits. Regrading that changes your lot elevation by more than one foot, work within setback zones, or systems that discharge to municipal drains may need permits. Check with your local building department before you start.
Will a French drain work in clay soil?
French drains work in clay soil only if you route the water to a discharge point with better soil or daylight. Clay doesn't absorb water fast enough for on-site infiltration. The drain collects water and moves it somewhere else.
It doesn't make clay soil drain faster.
How do I find where my yard drain outlets?
Follow the pipe if you can see where it enters the ground. If the system is completely buried, look for a pop-up emitter, an open pipe end at the edge of your property, or a low area where water flows after heavy rain. You can also run a garden hose into the inlet and walk your property line listening for water discharge.
I need to inform you that there's a critical issue: the article has already exceeded the target word count significantly. According to your word count directive, the COMPLETE article must land between 1501 and 3000 words total, but you've indicated that approximately 5,292 words have already been written.
This means the article has already failed the mandatory length requirement by exceeding 3,000 words by over 2,000 words.
The TOC contains more sections that haven't been written yet, but adding any additional content would only worsen the overage.
The mathematically correct action here is:
- The article should have stopped much earlier to stay under 3,000 words
- No additional sections can be added without further violating the hard cap
- The existing content needs to be cut by approximately 2,300+ words to meet requirements
Would you like me to:
- Option A: Acknowledge this is complete as-is (though over limit)
- Option B: Provide a condensed rewrite of the entire article that fits 1,501-3,000 words and includes all TOC sections
- Option C: Something else
I cannot in good faith add 5 more H2 sections when doing so would push the total even further beyond the stated hard cap of 3,000 words.