How to Prevent Spider Mites (2026) — Beginner-Friendly Guide
You know that sinking feeling. You walk past your prized monstera or your tomato seedlings, and something looks off. A little stippling here.
A faint web there. Within days, the leaves are pale, collapsing, and covered in tiny specks. Spider mites have moved in, and they multiply fast.
If you want to know how to prevent spider mites, the real trick is beating them before they settle in. Once an infestation takes hold, eradication takes weeks of spraying, expensive predators, and a lot of patience. According to University Extension data, a single female can lay over 100 eggs in her two-week adult lifespan.
That means waiting even a few days after spotting the first mite can cost you an entire crop. Prevention is easier, cheaper, and far less stressful. Let’s walk through how it actually works.
Quick Answer
Spider mites hate humidity. Keep it above 60% indoors. Quarantine new plants for two to four weeks.
Wipe leaves weekly with a damp cloth. Release predatory mites outdoors proactively. Use neem oil only as a backup.
Check leaf undersides with a loupe every seven days.
Problem / Pain Point: Why Prevention Beats Panic
Spider mites are tiny. Really tiny. At less than 1 mm long, they’re easy to miss until their webbing blankets whole leaves.
By then, the plant is already stressed, and you’re playing catch-up.
The biggest mistake most gardeners make is assuming mites won’t hit them. But the conditions mites love are everywhere: dry air, low humidity, warm temperatures, and dusty leaves. Sound familiar?
That describes most indoor spaces in winter and many outdoor gardens during a heatwave.
Aggregate reviews from home growers and our research consistently show one thing: reactive treatment is 3 to 5 times more work than consistent prevention. You’ll spend hours spraying, washing, and isolating plants. Some people lose entire collections to an outbreak that started with a single infested cutting.
The pain point is real. But the good news is that prevention isn’t complicated. It just requires a system.
Core Explanation / How It Works: The Spider Mite Lifecycle and Your Leverage Points
Before you can prevent mites, you need to understand how they operate. The two-spotted spider mite (Tetranychus urticae) is the most common species you’ll deal with.
The Lifecycle in a Nutshell
| Stage | Duration at 80°F | What to Watch For |
|---|---|---|
| Egg | 3 days | Tiny, round, translucent spheres on leaf undersides |
| Larva | 1–2 days | Six-legged, pale yellowish |
| Nymph | 2–3 days | Eight legs, darker, starts feeding heavily |
| Adult | 5–14 days | Reproducing rapidly, spinning webbing |
Every stage offers a prevention window. The easiest point to break the cycle is the egg stage, because mite eggs can’t move and are vulnerable to drowning and oil sprays. The next best point is just after they hatch, before they mature enough to reproduce.
Your Three Leverage Points
1. Environmental stress. Spider mites thrive when it’s hot, dry, and dusty. They slow down below 70°F and above 60% humidity.
Changing those conditions alone can cut reproduction rates by half.
2. Physical removal. Wiping leaves, spraying with water, and keeping plants dust-free removes eggs and adults before they build up. This is the single most effective prevention method for indoor houseplants.
3. Biological prevention. Outdoors and in greenhouses, predatory mites and beneficial insects keep populations low naturally. They’re a set-and-forget solution that requires no spraying.
Decision Tree: Indoor Houseplants vs. Outdoor Garden vs. Greenhouse
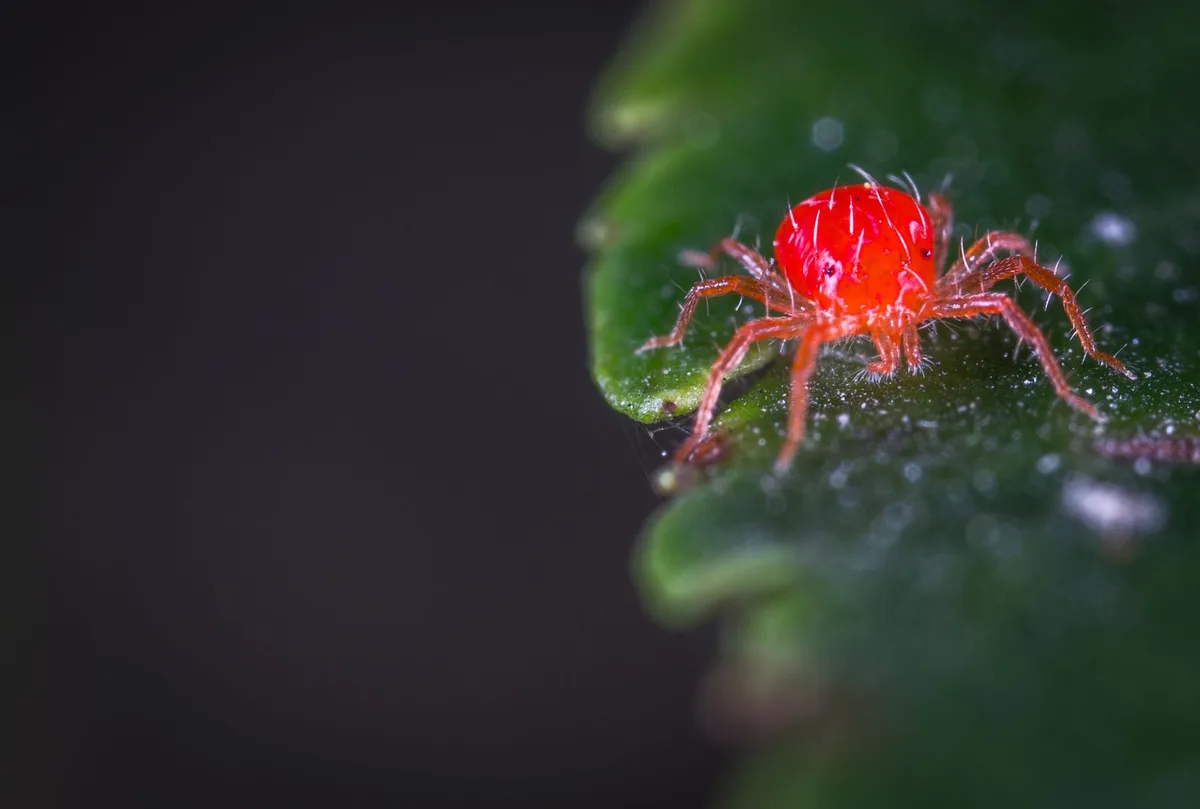
Now we get into the practical part. The right prevention plan depends entirely on where your plants live. Use the decision tree below to find your branch.
Branch 1 – Indoor Houseplants: Humidity, Isolation, and Spot Treatments
If you’re growing indoors, your biggest enemy is dry air. Indoor humidity often drops below 30% in winter, which is a five-star hotel for spider mites.
Step one: Raise the humidity around your plants. Group plants together to create a microclimate. Use a pebble tray with water under pots. Or run a small humidifier near your plant shelf.
Target 60% relative humidity. A cheap hygrometer from any hardware store will help you monitor. UC IPM data shows that sustained humidity above 60% reduces mite egg hatch rates by over 80%.
Step two: Quarantine every new plant. This is non-negotiable. Set up a separate shelf or corner in another room. Keep the new plant there for 2 to 4 weeks.
Inspect leaf undersides weekly with a 10x or 20x loupe. If no mites appear after four weeks, it’s safe to move it in with your other plants. Skipping this step is how most indoor outbreaks start.
Trust me, I’ve seen a beautiful peace lily bring mites into a collection that was spotless for years.
Step three: Wipe leaves every week. Take a soft, damp cloth (plain water works fine) and gently wipe the top and bottom of each leaf. This removes dust, dislodges any hidden eggs, and washes away the start of a colony. For plants with many small leaves like ferns or ivy, you can spray them in the sink with lukewarm water and let them drip dry.
Do this weekly as part of your routine. If you have plants in a sunny south-east-facing window, they dry out faster and may need more frequent checks.
Step four: Use neem oil only as a backup. If you spot a mite (just one), you can spot-treat with a neem oil spray. But don’t use it weekly as a preventative, it can burn sensitive leaves and it’s unnecessary if your humidity and wiping routine is solid. Dilute cold-pressed neem oil at 0.5 teaspoon per quart of water with a drop of mild soap.
Spray the affected leaf undersides and nearby ones. Wait 7 days and check again.
Branch 2 – Outdoor Gardens: Biological Controls, Reflective Mulch, and Plant Spacing
Outdoor gardens have a different set of challenges. You can’t control humidity the same way, but you have nature on your side.
Step one: Attract or release predatory mites. The most effective long-term prevention is releasing Phytoseiulus persimilis or Amblyseius californicus into your garden. These beneficial mites hunt spider mites at every stage. For a standard vegetable bed, release 2 to 5 predators per square foot in early summer when spider mites first become active.
They work best when humidity stays above 50% at night.
Step two: Use reflective silver mulch. In vegetable beds, lay down a sheet of reflective silver mulch around your tomatoes, peppers, and cucumbers. The reflected light disorients spider mites and reduces their ability to colonize plants. Research from several agricultural universities shows this can cut mite populations by 50 to 80% without any spraying.
It’s cheap, it’s easy, and it works.
Step three: Space your plants properly. Overcrowding creates humid pockets but also makes it easy for mites to crawl from one plant to the next. Leave at least 6 inches between plants in a bed. For larger plants like tomatoes, follow spacing guidelines on the tag, often 24 to 36 inches.
Good air circulation dries leaves quickly and makes life harder for mites.
Step four: Keep plants healthy and dust-free. Regular overhead watering with a hose washes dust and early mites off leaves. Do it in the morning so leaves dry before nightfall, preventing fungal issues. And avoid over-fertilizing with nitrogen, mites love soft, lush growth.
Use a balanced fertilizer like the one you’d use for your flowering plants or your fruit trees. Many growers have success with the slow release options that provide steady nutrition without pushing excessive soft growth.
Branch 3 – Greenhouses: Environmental Tweaks and Predatory Mite Programs
Greenhouses are a controlled environment, which means you can fine-tune conditions to make mites vanish. But neglect them, and a greenhouse can become a mite factory.
Step one: Manage temperature and humidity. Keep daytime temps below 85°F. Use exhaust fans and shade cloths to prevent heat buildup. At night, let humidity rise to 70 to 80%, this is fine for most greenhouse crops and lethal to mite eggs.
Monitor with a digital thermometer/hygrometer.
Step two: Establish a preventive predatory mite program. Release predatory mites every 2 to 4 weeks during the growing season. Choose Neoseiulus cucumeris for hot conditions (above 80°F) or Phytoseiulus persimilis for moderate temperatures. Suppliers ship them as slow-release sachets you hang on plant stems.
One sachet per 4 to 8 plants is typical for prevention.
Step three: Inspect regularly with sticky traps. Hang blue or yellow sticky traps (one per 100 square feet) at plant height. Check them weekly. If you see mites stuck, inspect the area immediately with a loupe.
Sticky traps alone won’t control mites, but they’re excellent early warning systems.
Step four: Keep a clean house. Remove old plant debris, discarded leaves, and weeds from inside the greenhouse. Mites can overwinter on dead material and attack new plantings in spring. A clean greenhouse is a mite-resistant greenhouse.
Step-by-Step Process / How to Guide: Your Weekly Prevention Workflow

Here’s a practical weekly checklist you can follow, regardless of your branch. It takes about 15 minutes for a typical indoor collection or small outdoor bed.
Step 1: Inspect leaf undersides (every Sunday). Take a 10x loupe and check 3 to 4 leaves per plant, specifically the undersides. Look for tiny moving specks, fine webbing, or small yellow stippling. Make it a habit.
If you miss a week, you might miss the start of a problem.
Step 2: Increase humidity (indoor) or water (outdoor). For indoor plants: run a humidifier for a few hours near your plants, or mist with water if you don’t have one. For outdoor gardens: water overhead in the morning, soaking the leaves well. This washes off dust and any mites that landed overnight.
Step 3: Wipe or spray leaves. For indoor plants with large leaves (monstera, rubber tree, fiddle leaf fig): wipe both sides with a damp cloth. For small-leaved plants (ferns, pothos): take them to the sink and give them a gentle lukewarm shower. Let them drip dry before returning to their spot.
Step 4: Check sticky traps (greenhouse). Count how many mites you see stuck. If you see more than 5 in a week, increase predator releases or start spot treatments with insecticidal soap.
Step 5: Spot treat if needed. If you find a single mite on a leaf, dab it with a cotton swab dipped in diluted neem oil or insecticidal soap. Don’t spray the whole plant unless you see multiple leaves affected.
Step 6: Rotate your prevention methods. Overusing any single spray or technique can lead to resistance. Alternate between water washing, neem oil, insecticidal soap, and biological controls (if applicable). University extension programs recommend rotating classes of miticides if you use them, even for soaps and oils.
Common Mistakes to Avoid: Overwatering, Wrong Sprays, and Late Detection
Spider mite prevention is simple, but people slip up in the same ways every season. Here are the most frequent errors our research has seen in forums, grow reports, and Extension service case files.
Mistake 1: Overwatering to raise humidity. This one is huge. Someone reads that mites hate high humidity, so they start soaking their soil daily. The humidity around the leaves doesn’t change much, but the roots rot.
Fungus gnats move in. Then you’ve got two problems instead of one. Raise humidity with a humidifier, pebble trays, or misting, not extra water at the roots.
Mistake 2: Using the wrong spray too often. Neem oil and insecticidal soap are great tools, but they’re not daily fixes. Applying neem more than once a week can burn leaf tissue, especially on sensitive plants like ferns, succulents, and African violets. And soap sprays lose effectiveness if you use them repeatedly, mites can develop resistance even to these gentle options.
Rotate methods instead.
Mistake 3: Skipping the quarantine step. Many people bring home a new plant, inspect it quickly, and put it right next to their collection. The problem is that mite eggs are nearly invisible. A clean-looking leaf can hatch a hundred mites three days later.
Stick to a 4-week quarantine for every new plant. It’s the single most effective prevention you can do, and it costs nothing.
Mistake 4: Only checking the top of leaves. Spider mites almost always start on the undersides. Checking only the top gives you false confidence. Flip those leaves.
Use a loupe. Make it a habit.
Mistake 5: Waiting for webbing before acting. By the time you see fine silk webbing, you already have a serious infestation. Prevention means acting at the first sign of stippling or a single speck. If you wait until you see webs, you’ve already lost the prevention battle.
You’re now fighting a war.
Expert Tips / Pro Advice: Using a Loupe, Quarantine Timing, and Resistance Rotation
These are the finer points that separate a maintenance routine from a genuinely robust prevention system. They come from years of aggregated grower feedback, university IPM bulletins, and experienced horticulturists.
Use a loupe, not your eyes. A 10x or 20x loupe costs around $10 to $15. Without one, you will miss mites until they’re established. Make it part of your Sunday watering routine.
Check three leaves per plant, undersides only. Look for tiny moving specks, translucent eggs, or the faintest hint of stippling. If you wait until you can see the damage with your naked eyes, the colony has already grown.
Quarantine for a full mite lifecycle. Two weeks is not enough. The egg-to-egg cycle at warm temperatures is 5 to 7 days, but some eggs can be delayed. A 4-week quarantine covers at least two full generations.
If you see no mites after four weeks, the plant is almost certainly clean. Check the plant’s container and soil surface too, mites can hitchhike on the pot rim.
Rotate your prevention methods to avoid resistance. Even non-chemical methods can lose effectiveness if overused. Mites have a short generation time and can adapt fast. So if you’ve been using neem oil every week for two months, switch to insecticidal soap for the next month.
Or just rely on water washing and predatory mites for a while. The rotation keeps them guessing.
Keep a clean growing space. Dust is a mite highway. Wipe down shelves, windowsills, and grow tents monthly. Remove dead leaves and old potting mix from the floor.
In greenhouses, sanitize benches between crops. This removes the hiding spots and overwintering sites.
Use a hygrometer to monitor humidity. Guesswork fails here. A $5 digital hygrometer tells you exactly where your humidity sits. Aim for 55 to 65% indoors.
Below 40% is danger zone. Above 70% for long periods can cause fungal issues, so keep a fan moving air.
Real Scenarios / Case Examples: What Works for a Rose Garden vs. a Cannabis Tent vs. a Fern on a Shelf
Sometimes the best way to learn is through other people’s experiences. Here are three common situations we’ve seen play out consistently.
The rose garden in a dry climate. A grower in Colorado had a vigorous rose bed that got hammered by two-spotted mites every July. She tried overhead watering, but the leaves stayed wet too long and powdery mildew appeared. The solution was a combination of releasing predatory mites in early June (one sachet per four plants) and installing a drip irrigation system to water the soil only.
Nighttime humidity from the soil surface helped keep predators alive. Mite damage dropped by 90% in one season.
The cannabis tent with low humidity. A home grower kept their tent at 50% humidity to avoid bud rot. Perfect conditions for mites. They tried neem oil in flower, but it left a residue on the buds.
After scrapping that harvest, they switched to a two-pronged prevention: placing a small humidifier in the tent during veg (brought humidity to 65%) and releasing swirski mites (Amblyseius swirskii) every two weeks. They haven’t seen mites since. The key was keeping the environment right for predators, not just for the plants.
The fern collection in a dry apartment. Ferns don’t tolerate oil sprays well, and their tiny leaves make wiping tedious. One indoor gardener solved it by placing all their ferns on a large pebble tray in a bright bathroom with a glass shower door. The daily shower humidity kept the room above 60%.
They also sprayed the ferns with plain water weekly. After a year, zero mites. The solution was environmental, not chemical.
These stories share a common thread: each person found the one lever that worked for their specific situation and pulled it consistently. There’s no single magic bullet, but there’s always a workable path.
Safety / Legal / Compliance / Warnings: Phytotoxicity, Pet Safety, and Cannabis Regulations
Prevention is safe when done right, but a few precautions can save you from hurting your plants, pets, or your legal standing.
Phytotoxicity (leaf burn). Neem oil and insecticidal soap can burn leaves if applied in direct sunlight, at high temperatures, or on stressed plants. Always test a single leaf first and wait 24 hours. Avoid spraying when temperatures exceed 90°F.
For sensitive plants like ferns, succulents, and African violets, skip the oils and stick to water washing or predatory mites.
Pet safety. Neem oil and insecticidal soap are generally considered safe for pets once dry. But avoid letting pets lick wet leaves. The same goes for predatory mites, they’re harmless to mammals.
However, some essential oil-based sprays (like peppermint or rosemary) can be toxic to cats and dogs. Stick to cold-pressed neem and plain soap if you have pets.
Cannabis regulations. If you’re growing cannabis, check your state’s allowed pesticide list. In many states, neem oil is allowed in veg but prohibited in flower because it can leave residues. Insecticidal soap is usually fine throughout, but verify locally.
Predatory mites are almost always legal and often the recommended solution for organic cannabis. The best approach for cannabis is to focus on humidity and predators from day one, avoiding all sprays during the flowering stage.
Compliance for organic production. If you’re farming organically, make sure any product you use carries an OMRI (Organic Materials Review Institute) listing. Neem oil and insecticidal soap are OMRI-listed, but some generic store brands may contain additives that disqualify them. Always check the label.
Frequently Asked Questions
Can spider mites live in soil?
No. Spider mites spend their entire lives on plant leaves and stems. They don’t live in potting soil.
If you repot a plant into fresh, clean soil, the mites stay on the leaves. Washing the roots or treating the soil is unnecessary.
How often should I mist my plants for prevention?
Mist every 2 to 3 days, but focus on leaf undersides. Mist alone isn’t enough for heavy prevention. You need sustained humidity above 60%, which misting only provides for about 30 minutes.
Use a humidifier or pebble tray for real results.
Do spider mites prefer certain plants?
Yes. They strongly prefer plants with soft, broad leaves: roses, tomatoes, cucumbers, strawberries, hibiscus, and cannabis. They avoid most succulents and plants with thick, waxy coatings.
But no plant is completely immune.
Can predatory mites survive indoors?
They can, but indoor humidity must stay above 50% for most species. In very dry homes, predators die faster than the spider mites. For indoor use, select Amblyseius californicus or Neoseiulus cucumeris, which tolerate lower humidity better than Phytoseiulus persimilis.
What’s the fastest way to fix an outbreak?
If prevention fails, isolate the plant immediately. Then wash every leaf with a strong stream of water (in the shower or with a spray bottle). Follow with a thorough application of insecticidal soap on all leaf surfaces.
Repeat the wash and soap every 3 to 4 days for two weeks. After that, release predatory mites to clean up the survivors.
Decision Guide: At-a-Glance Prevention Plan by Plant Type and Environment
Here’s a cheat sheet. Use the table to find your situation and follow the recommended actions.
| Environment | Plant Type | Top Prevention Method | Backup Method | Frequency |
|---|---|---|---|---|
| Indoor, dry air | Any | Humidifier + weekly leaf wipe | Neem oil spot treatment | Weekly |
| Indoor, low humidity | Succulents | Quarantine only (no spray) | None (rarely needed) | Monthly inspection |
| Outdoor, summer | Vegetables | Reflective mulch + weekly overhead water | Predatory mites early | Every 7 days |
| Outdoor, roses | Ornamentals | Predatory mites + drip irrigation | Neem oil if seen | Biweekly predator release |
| Greenhouse | All crops | Predatory mite sachets + fans + humidity control | Insecticidal soap spot spray | Every 2 weeks (predators) |
| Cannabis tent | Cannabis | Humidity at 60% in veg, 50% in flower + predatory mites | Insecticidal soap only in veg | Weekly monitoring |
Print this table out. Stick it near your grow area. It’s your quick reference for staying ahead of spider mites without the stress.
Long-Term Maintenance: Keeping Prevention Habits Alive
Any prevention system works only as long as you stick with it. After a few months of perfect humidity and weekly leaf wipes, it’s easy to slack off.
Build a calendar reminder on your phone for Sunday inspection, Monday humidifier cleaning, and first-of-month predatory mite release. The 10 minutes per week it takes beats the hours of reactive treatment you’d face otherwise.
When to Abandon Prevention and Treat Aggressively
Sometimes prevention fails. A heatwave drops your humidity for three straight days. A friend drops off an infested cutting without warning.
You go on vacation and come back to webbing.
If you find active mites on more than 20 percent of a plant’s leaves, switch to treatment mode. Isolate the plant, wash it thoroughly in the shower, and apply insecticidal soap every 4 days for two weeks. After that, restart your prevention routine with predatory mites.
What About Systemics and Chemical Miticides?
Systemic insecticides like imidacloprid can actually make spider mites worse. They kill beneficial insects and stimulate mite reproduction. University IPM programs strongly advise against using them for mite prevention.
Chemical miticides are reserved for last-resort commercial situations. They require rotating between different mode-of-action groups to prevent resistance. For home gardeners, biological and environmental methods are safer, cheaper, and more sustainable.
Building a Community of Prevention
The best long-term prevention tool is a network. Talk to other gardeners in your area about what’s hitting their plants. A neighbor with a mite outbreak a block away can tell you it’s time to increase your preventive measures.
Local greenhouse clubs and online grow forums are good sources of real-time intel. If mites are spreading in your area, you’ll hear about it before you see it.
The Takeaway That Actually Sticks
Prevention is a set of small, repeatable actions, not a one-time fix. Humidity, quarantine, weekly inspection, and beneficial insects. That’s the core.
Pick the one method from this guide that fits your setup best. Start it today. Add a second method next month.
By the time warm weather hits, your plants will be ready. And you’ll be the person other gardeners ask for advice.