What Is Loamy Soil 2026
You reach for a handful of soil in your garden, squeeze it, and have absolutely no idea if what you're holding is good or bad. That's the exact moment you need an answer to "What Is Loamy Soil", not a textbook definition, but a real, practical way to tell whether your dirt is the kind that grows amazing plants or the kind that fights you every step of the way.
According to the USDA Natural Resources Conservation Service, loamy soil is defined by a specific particle size distribution: roughly 40 percent sand, 40 percent silt, and 20 percent clay. That narrow window is what gives loam its legendary reputation among gardeners. But here's the thing, you don't need a lab to figure out if you've got it.
Let's start with what you're actually looking for.
Quick Answer
Loamy soil is a balanced mix of sand, silt, clay, and organic matter. It drains well but holds enough moisture for roots. It feels crumbly, not sticky or gritty.
It doesn't form a long ribbon when squeezed. Most garden plants thrive in it.
The Three-Part Identification System That Gardeners Actually Use
You can read every textbook definition of loamy soil and still walk outside unsure. That's because soil texture is a physical thing, you have to touch it, look at it, and run a few simple tests to know for sure. Professional soil scientists use the same three-method system that home gardeners can do in ten minutes with zero equipment.
These three tests cover every angle: how the soil feels, how it behaves when wet, and how its particles settle out in water. Together they give you a complete picture.
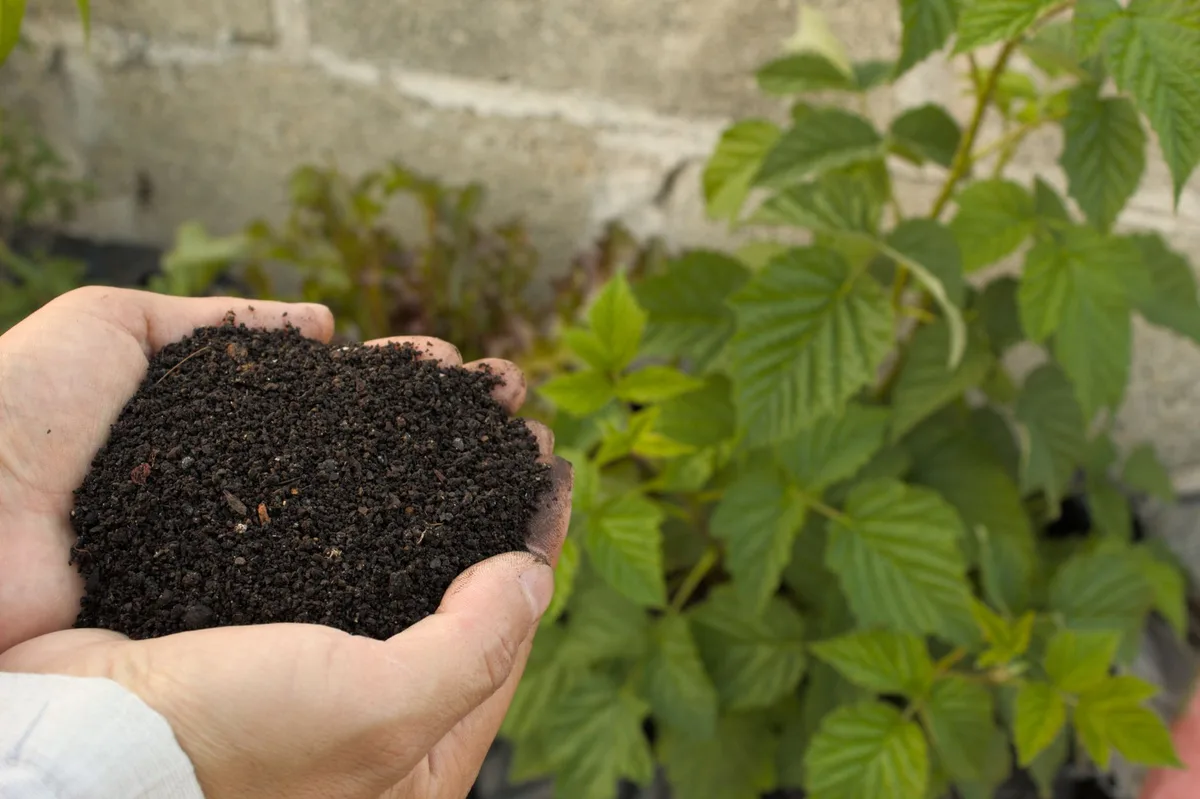
What the photo above shows is the visual texture you are aiming for. That dark, crumbly, slightly clumped look is the signature of healthy loam. The particles are neither standing apart like beach sand nor packed into a solid mass like modeling clay.
When you see this in your hands, you are looking at soil that gives plant roots the ideal balance of air, water, and nutrients.
Buying a bag of topsoil labeled "loam" won't help if you cannot tell the real thing from a pile of screened fill dirt. These three tests are your reality check.
Test 1: The Feel Method (Dry and Moist)
Take a small handful of dry soil. Rub it between your thumb and fingers. Loam should feel smooth overall with a slight grittiness, you'll detect the sand particles without them dominating.
It should not feel like pure flour (that's silt) or like a fine powder that clumps hard (clay).
Now wet the soil just enough to make it moldable. Roll it in your palm. Loam forms a ball that holds together but crumbles easily when you poke it.
It should not feel sticky or slick. It should not feel harsh and scratchy.
Test 2: The Squeeze Test
Squeeze a moist ball of soil firmly in your fist. Open your hand. If the ball stays in shape but falls apart with a light tap, you are looking at loam.
If it stays in a tight, hard clump that resists breaking, you have too much clay. If it falls apart before you even tap it, you have too much sand.
Test 3: The Water Behavior Check
Dig a hole about six inches deep and fill it with water. Let it drain completely. Fill it again and time how long it takes to empty.
Loam drains at roughly one to two inches per hour. If water is still sitting there after six hours, you have drainage problems. If it vanishes in under 15 minutes, your soil is too sandy.
The Ribbon Test (How to Tell If Your Soil Has Too Much Clay)
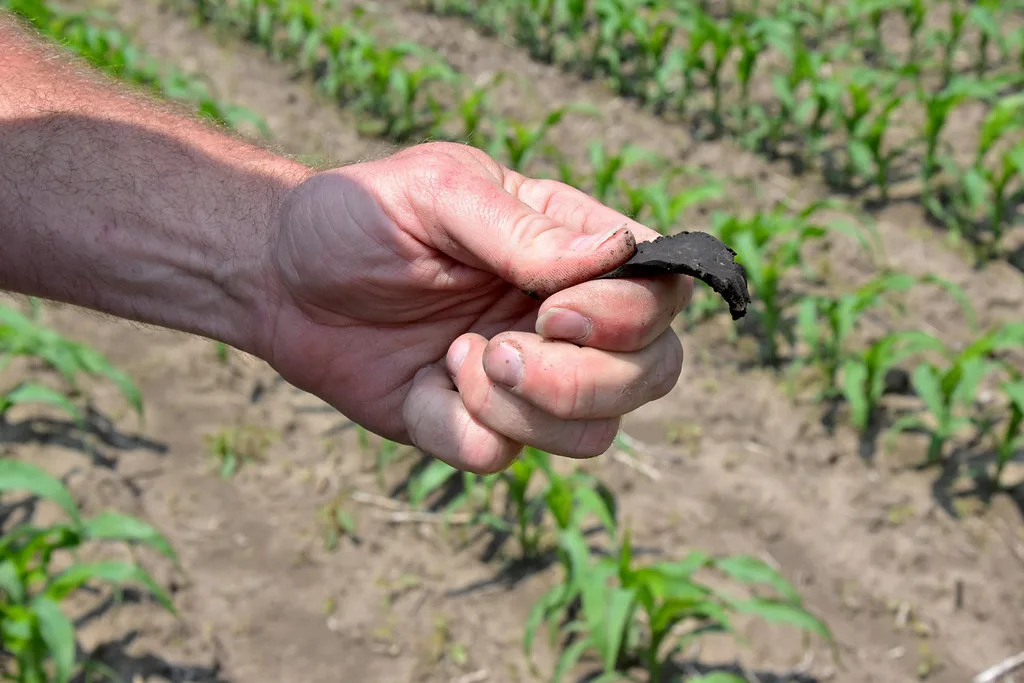
The ribbon test is the single most reliable field method for identifying clay content. It's used by USDA soil scientists during soil surveys, and it works just as well in your backyard. The image above shows a soil sample being squeezed into a ribbon between thumb and forefinger, the exact motion you need to practice.
Moisten a handful of soil until it is wet but not dripping. Work it into a ball, then squeeze it out between your thumb and forefinger, pushing it upward into a thin ribbon. Let that ribbon extend until it breaks under its own weight.
Here is what the ribbon length tells you:
- Longer than two inches, high clay content. You are looking at a clay loam or clay soil, not a true loam.
- About one inch, moderate clay, in the range of a loam or silt loam. This can be good soil.
- No ribbon forms, very low clay, likely sandy loam or sand.
The ribbon test is your fastest check. You will never confuse sticky clay with loam again once you have seen a two-inch ribbon form. If your soil ribbons longer than two inches, you have work to do before it behaves like a true loam.
The Jar Test (The 24-Hour Lab You Can Do on Your Counter)

The jar test gives you hard numbers. You get to see the actual percentages of sand, silt, and clay in your soil. The photo above shows what the settled layers look like after 24 hours, sand at the bottom, silt in the middle, clay on top.
It is your soil texture profile in a glass.
Here is how to do it:
- Fill a straight-sided glass jar about one-third full with soil. Remove any rocks or roots.
- Fill the jar with water, leaving about an inch of headspace.
- Add one teaspoon of liquid dish soap. This helps the particles separate.
- Put the lid on and shake hard for two to three minutes.
- Set the jar down and do not move it for 24 hours.
After 24 hours, measure the total height of the settled soil. Then measure each layer separately:
- The bottom layer is sand (gritty, coarse).
- The middle layer is silt (smooth, flour-like).
- The top layer is clay (fine, powdery).
Divide each layer height by the total height and multiply by 100. That gives you your percentages. If you get roughly 40 percent sand, 40 percent silt, and 20 percent clay, you have a true loam.
If those numbers are off by much, you know exactly what you are dealing with and what you need to add.
If your drainage is poor or your plants are struggling, the jar test often reveals the problem in a single glance. A thick clay layer at the top means water is sitting around roots. A thick sand layer at the bottom means water and nutrients are flushing through too fast.
The Feel Method (What Grit, Silt, and Stickiness Tell You)
The feel method is the fastest test but takes a little practice. You are basically training your fingers to recognize the three particle types.
Take a moist sample and rub it between your thumb and palm. Focus on three sensations:
- Grittiness. You can feel sand particles scraping against your skin. If the grittiness is strong and obvious, you have a lot of sand. Loam should have a mild, noticeable grit, not an overwhelming one.
- Smoothness. Silt feels like flour or talcum powder. It is smooth, soft, and almost greasy. If your soil feels very silky with little grit, you are in silt loam territory. True loam has a balanced smoothness.
- Stickiness. Clay feels sticky when wet and hard when dry. It sticks to your fingers and resists washing off. Loam should barely stick. You can rinse it off easily.
A good loam should feel like a mix of all three sensations, none of them dominating. You will know when you have the balance right because the soil will feel "friable", that is the technical term for the crumbly, workable texture that gardeners love.
If you are growing flowering plants or trying to establish a new garden bed, knowing your soil texture makes a huge difference in what you add and how often you water. Loamy soil typically needs less watering than sandy soil and less amending than clay soil because its natural structure already supports healthy root growth.
Key Visual and Tactile Identifiers of Genuine Loam
You can run all the jar tests you want, but experienced gardeners can spot loam from across the yard. It has a distinct look and feel that comes from decades of hands-on work. Here is what to look for.
Color: What Rich, Dark Brown Really Means vs. Fake Loam
True loam usually has a dark brown to nearly black color. That dark color comes from organic matter, called humus, which gives loam its fertility. A deep, rich color is a good sign.
But color alone can fool you. Some soils are dark because they hold too much water and never drain. Others are dark from added dyes in cheap bagged topsoil.
If the soil is dark but also smells musty or feels sticky, you are looking at a drainage problem, not good loam. A reliable loam is dark, crumbly, and slightly sweet-smelling from healthy microbial activity.
Structure: The Crumbly but Holds Together Test
Genuine loam has a structure that soil scientists call "granular" or "crumb." It forms small, irregular clumps that break apart easily under light pressure. When you dig into it, it falls apart naturally.
If your soil forms large, hard blocks, you have too much clay. If it looks like individual grains that never stick, you have too much sand. Loam sits perfectly in the middle.
It holds a shape when squeezed but crumbles the moment you poke it. This structure allows roots to spread freely while keeping enough contact with soil particles to absorb nutrients. Whether you are filling a raised bed or preparing a flower border, this texture makes digging a pleasure instead of a workout.
You might also find that plants suited to your conditions, like those for a shady spot or a sunny window, establish faster in soil with good tilth.
Drainage: How Fast Water Should Disappear from a Hole
The drainage test from earlier gives you a hard number. But you can also see drainage in action. After a heavy rain, walk your garden and look for puddles.
If water sits on top for more than a few hours, you have a compaction or clay problem.
Loam absorbs rain quickly and evenly. You rarely see standing water on loamy soil. The surface dries faster than clay but slower than sand.
When you dig a hole after rain, the soil should be uniformly moist, not soggy at the bottom or dry at the top.
The USDA Texture Triangle – How to Read It Without a Degree

The USDA Soil Texture Triangle looks intimidating at first. It is a triangle with three sides labeled sand, silt, and clay. Inside are dozens of soil type names.
But it is actually straightforward once you know the trick.
The triangle works like a map. Each side represents 0 to 100 percent of one particle type. To find your soil type, you take your jar test percentages and follow three lines until they meet.
Here is a simplified way to use it:
- Find your sand percentage on the bottom axis. Draw an imaginary line upward and left at a 60-degree angle.
- Find your clay percentage on the right axis. Draw a line horizontally to the left.
- Find your silt percentage on the left axis. Draw a line downward and right at a 60-degree angle.
The point where all three lines cross tells you your soil texture class. If you have 40 percent sand, 40 percent silt, and 20 percent clay, you land squarely in the "loam" zone. That is the sweet spot.
If you fall into "sandy loam" or "silt loam," you are close but may need adjustments. "Clay loam" means you have work to do. The triangle is free to use and printable from the USDA website.
Keep a copy in your garden shed for quick reference.
Common Visual Mistakes That Trick Even Experienced Gardeners
Even seasoned gardeners can misread their soil. Here are the three most common traps.
Confusing Silty Soil for Loam (The Smooth Trap)
Silt feels amazingly smooth and soft. It is easy to mistake for loam because it also forms a nice ball when squeezed. But silt behaves very differently in the garden.
Silt compacts easily. After rain, it can form a hard crust on the surface that blocks water and prevents seedlings from pushing through. It also erodes faster than loam because the particles are light and easily washed away.
If your soil feels like baby powder and forms a crust after drying, you have silt, not loam. The fix is adding coarse sand and plenty of organic matter to create more structure.
Thinking Dark Color Alone Means Good Soil
This is probably the most common mistake among new gardeners. Dark soil looks fertile, so people assume it must be loam. But dark color can come from several sources.
High clay content often produces dark soil because clay holds organic matter and stays wet. Peat soils are dark but acidic and waterlogged. Some commercial products use carbon black or dyes to make cheap soil look rich.
Always confirm texture with the ribbon test before you trust the color. A dark soil that forms a long ribbon is clay, not loam. Relying solely on appearance can lead to overwatering and poor root development, especially for plants that need good drainage.
Buying Loam in Bags That Is Actually Just Screened Dirt
Bagged soil products labeled "loam" or "garden soil" vary wildly in quality. Our research shows that many bags contain little more than screened sand or composted bark fines mixed with low-grade fill. They may look dark and feel loose, but they often lack the balanced particle distribution of true loam.
You can test a bag before you buy. Open it in the parking lot. Squeeze a handful.
If it feels like pure sand or pure sawdust, leave it on the shelf. If it forms a long sticky ribbon, it is clay based. Real bagged loam should pass the same feel tests as your garden soil.
If you want to improve your existing beds rather than replace soil, buying organic matter in bulk and mixing it in usually gives better results than hauling in unknown bagged dirt.
How to Fix the Two Most Common Non-Loam Soils (With Visual Cues)
If your soil is not loam, do not panic. Almost any soil can be improved over time. The key is adding the right materials in the right amounts.
Turning Clay into Loam (What to Add, and What Not to Add)
Clay soils are dense, sticky, and slow to drain. They feel slick and form ribbons over two inches long. Many gardeners make the mistake of adding sand to clay, which can turn your soil into something resembling concrete.
The right approach is adding organic matter. Compost, aged manure, leaf mold, and coarse horticultural grit all work. Spread a three to four inch layer over your beds each season and dig it in.
The organic matter separates the clay particles, creating pore spaces for air and water. Over two to three years, you will see the soil become darker, more crumbly, and easier to work. You can also plant deep-rooted cover crops like daikon radish to naturally break up compacted layers.
Turning Sand into Loam (Harder Than You Think – Here's the Visual Check)
Sandy soil feels gritty and falls apart instantly. It drains so fast that water and nutrients wash away before roots can use them. Fixing sandy soil is harder than fixing clay because sand has very low surface area to hold anything.
The solution is the same: organic matter. But you need more of it and you need to apply it more often. Sand does not hold organic matter well, so it breaks down faster.
Add a generous layer of compost twice a year. Mix in well-rotted manure or green waste. You can also add a small amount of clay or bentonite if available, but organic matter is safer and easier.
A good rule of thumb is to incorporate organic matter into sandy soil until it changes color from pale tan to dark brown and holds together briefly when squeezed. Regular top dressing with compost will sustain the improvement.
A Simple Reference Guide: The 12 Main Soil Textures
The USDA recognizes 12 primary soil texture classes. Here is a quick guide to what each one looks and feels like. Use this for reference when you run your jar test.
| Texture Class | Feel (Moist) | Ribbon Length | Drainage |
|---|---|---|---|
| Sand | Very gritty, falls apart | None | Very fast |
| Loamy Sand | Gritty, holds ball briefly | None to very short | Fast |
| Sandy Loam | Gritty with some smoothness | Short (under 1/2 inch) | Moderate to fast |
| Loam | Balanced grit, smooth, slightly sticky | About 1 inch | Moderate |
| Silt Loam | Very smooth, flour-like | Short to medium | Moderate to slow |
| Silt | Silky smooth, greasy feeling | Short to medium | Slow, crusts |
| Sandy Clay Loam | Gritty and sticky | Medium (1 inch) | Moderate |
| Clay Loam | Sticky, smooth, plastic | Medium to long (1-2 inches) | Slow |
| Silty Clay Loam | Very smooth and sticky | Long (1-2 inches) | Very slow |
| Sandy Clay | Very gritty and very sticky | Long (2+ inches) | Slow |
| Silty Clay | Very smooth and very sticky | Long (2+ inches) | Very slow |
| Clay | Very sticky, hard when dry | Long (2+ inches) | Very slow, waterlogs |
True loam sits right in the middle of this table. If you fall into sandy loam or silt loam, you are close and can improve with regular organic matter. If you land in the clay or clay loam zones, plan on a multi year amendment strategy.
The jar test tells you exactly where you stand.